• Steel Soldiers now has a few new forums, read more about it at: New Munitions Forums!

  • Microsoft MSN, Live, Hotmail, Outlook email users may not be receiving emails. We are working to resolve this issue. Please add support@steelsoldiers.com to your trusted contacts.

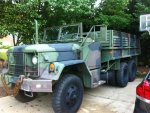
My M35A2 Project aka Big Betty

TMNT

New member
789
6
0
Location
Canton, Ga
With funerals and birthdays and work and my gimped up shoulder, I haven't been getting much done on the truck.

I did manage to get my tach cable swapped out today and that solved my "jumpy" tach. It wasn't too bad after I borrowed a crowfoot wrench from my neighbor. Getting the dang cable clips off was far more trouble than getting the cable disconnected.

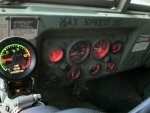
I worked a bit more on getting the pyro installed. I finished most of the electrical wiring, including getting the diode mounted to adapt the 24v to 12v for the gauge power. I'm taking the day off tomorrow and hope to get it finished then. I'd really like to have it done before going to Zout's cookout next Saturday.

My wife's uncle does a lot of serious hot rod work, builds a lot of 70's muscle cars and does paint work on Year One cars. I stopped by to see him today and he wants to team up with me and my father-in-law (heavy equipment business) and build some "unique" m35's. He's particularly interested in bobbed, crewcab deuces. He's excited about it and I'm looking forward to that possibility.
 

TMNT

New member
789
6
0
Location
Canton, Ga
So, my poor son came down with the flu on his 11th birthday. In between trips to the store for stuff for him, and cleaning up the barf, I finished my pyro install and it works!

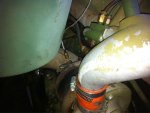
The problem now is that I'm not quite sure what it's telling me. I installed the probe after the turbo about 2 inches downstream from the turbo exhaust port.

When I fire up, it pretty quickly goes to 200 degrees and will rise to 300 within a few seconds of reving it up to 1500-1800 RPM.

It settled in to 300-350 degrees on the way out of the neighborhood in low range at 1500-1800 rpm.

A minute or so of accelerating up to 50MPH and it went up to 600-700 degrees and it stays in that range until I start climbing a hill. On a couple of different long climbs while maintaining full throttle but gradually losing speed down to 40 MPH, and once downshifting to 4th and maintaining 2000 RPM or so, the EGT hit 800 and once up to 850 degrees.

I don't know what the EGT should be 2 inches downstream from the turbo under any of these conditions. I read somewhere that downstream of the turbo will be about 300 degrees cooler than the input of the turbo, but I can't find that post again now.

Does that mean that when my pyro sees 850 degrees, that my actual turbo inlet temp is 1150 degrees?!! I'm trying to figure out if I have room to turn up the IP but these temps have me worried about that. I'm thinking that 1000-1100 degrees at the turbo inlet is the max that you would want to see.

****I have photos, but I haven't figured out how to upload them with my iPad and the new Tapatalk.****
 
Last edited:

clinto

Moderator, wonderful human being & practicing Deuc
Staff member
Administrator
Super Moderator
Steel Soldiers Supporter
Supporting Vendor
12,596
1,132
113
Location
Athens, Ga.
Step 1. Turn it up until it melts a piston/headgasket.
Step 2. Turn it down 1 flat.
Step 3. Tow it over here and we'll fix it.
Step 4. Profit!
 
I don't have a deuce yet. In all honesty, I don't know when I will get one. But I have to say, I'm SO GLAD i got bored and red through your thread. I have learned so much and I have thoroughly enjoyed reading about your progress. I look forward to more. I hope your son gets better.

Two Thumbs up from Southern California!! :beer:
 

TMNT

New member
789
6
0
Location
Canton, Ga
Step 1. Turn it up until it melts a piston/headgasket.
Step 2. Turn it down 1 flat.
Step 3. Tow it over here and we'll fix it.
Step 4. Profit!
Not that I would mind the visit Clinto, but I'd rather it be for a new winch and not a new motor! I'm not turning it up until I'm sure of the EGT operating range. That being said, it was a mistake to put the probe downstream of the turbo.

I did that for two reasons: a) I wanted to be able to see the aggregate EGT of all 6 cylinders without installing two gauges and; b) it looked easier and less risky than drilling the exhaust manifold. I didn't realize that it would leave me with more questions than answers. I'll probably move the probe to the manifold sometime after the cookout.
 
Last edited:

SMOKEWAGON66

New member
1,144
21
0
Location
California
I put an EGT probe in my manifold last weekend. I did not put two in because I dont have two, and I dont think its all THAT necessary. I tapped mine about 2 inches above where the turbo and mani meet, and its in the rear head pipe. I know this is not gonna give me a full accurate EGT reading for the whole motor, but it should be enough to give me an idea. I dont know if its true, but I have been told the back half burns a little hotter then the front anyway, so if that is true, then Im not worried about it.

Your truck looks great, great thread, and seeing your pictures and work done gives me ideas lol...thanks. :beer:
 

TMNT

New member
789
6
0
Location
Canton, Ga
After some additional research and reading, I've come to believe that the exhaust gas temperature difference after the turbo is a max of 100 degrees cooler than the pre-turbo temperature. In a long steady pull, the post-turbo temperature eventually matches the pre-turbo temp. Thanks to several other forum members for the very helpful info!

That means that with my 850-875 degree long-pull temperatures, I should be able to turn up Betty's IP a couple of flats. I think I'll try that today.

Yesterday, I changed all three fuel filters. The primary was a bit gunked up with some black clumps and there was about a cup of water. It took me a while to figure out how to get the primary filter canister off! Thanks again to the forum and the TMs I figured it out. I tightened up my alternator belts and fixed two other loose bolts while I was at it.

The second and third stage filters were not bad at all, but I replaced them anyway. I changed the oil and filters, and put in a fresh air filter as well. After a breif test run and re-tightening the oil filter canisters to stop the leaking from the top bolt, I hit all the grease fittings with my grease gun.

While I was at it, I replaced the exhaust flex pipe between the J-pipe and the turbo. When I installed my pyro I discovered a small hole in it. I ordered a new one from Erik and it had arrived a few days ago. I also got around to replacing the faulty air pressure gauge with a new one from Erik. It's not an S.W. so it looks a little bit different from the other gauges but it's close enough and it works great.

We took the soft top off of the cab to enjoy a little sunny weather top-down driving. ImageUploadedByTapatalk1335699265.084460.jpg

My brother helped me swap a couple of tires around to get a fresher one on the driver's side front. I have to get serious about some new tires soon.

Today I plan to prep and paint the metal frame for the soft-top while the top is off.

Now, I have to stop gabbin' and get to it!
 

TMNT

New member
789
6
0
Location
Canton, Ga
At Zout's cookout, Clinto asked me how many miles I've put on Big Betty and I honestly didn't know. I finally remembered to calculate it based on one of the early photos where I could get an odometer reading.

Wow 2,218 miles since December 2011. And as a testament to the TLC that Clinto gave the truck before I took possession, I've had no major problems.

Those miles are running around town, some highway and a little bit of off road. I'm very pleased and I hope I'm not jinxing myself by saying that.
 

TMNT

New member
789
6
0
Location
Canton, Ga
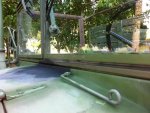
I finally finished stripping, cleaning, and repairing the inner windshield frames on Betty. They weren't in horrible shape, but each frame had rust in the lower corners so I thought I would get that taken care of before it got worse. In the process, I replaced the rubber seals and I'm please with the results.
ImageUploadedByTapatalk1337552817.522011.jpg

I also stripped the area where the windshield meets the cowl and got all of the rust out of there. I found a couple of small holes through the cowl. I fixed those with a 2-part epoxy. Welding is not one of my skills (yet).

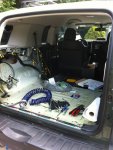
At the same time I disassembled the interior of my Toyota FJ Cruiser to track down and repair a broken air line in my on-board compressed air system. I ended up completely replacing and re-working the air lines from both compressors. The Cobalt PVC lines just weren't holding up to the nearly constant 150 psi. I put 250 psi rated stainless steel braided lines in. That should hold it!

I drove Betty out to get the new lines and she started spewing coolant out of the passenger side of the hood. It's either the lower hose or the water pump. I think it's the hose, but either way its a pain in the gonads to change. For the time being, she's a driveway queen until I get time to work on it. I've been planning to take the radiator out to have it serviced and tested anyway. I guess this is as good a reason as any.
 
Last edited:

TMNT

New member
789
6
0
Location
Canton, Ga
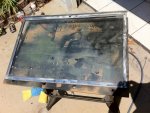
Here's a couple of photos of the drivers side windshield frame in progress:
ImageUploadedByTapatalk1337553678.913507.jpg

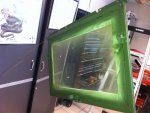
I used a paint stripper called Aircraft Remover. It worked extremely well on the old CARC. Twice through with that, a few minutes with a pneumatic sander loaded with a Scotchbrite pad and then Naval Jelly before rinsing it clean and drying it with compressed air and sunshine. I wiped it down with mineral spirits, primed it with etching primer and finished it with Rapco 383 green.
ImageUploadedByTapatalk1337553965.616495.jpg

This is the back of my FJ while fixing the bad air line. It gave me something to do when I was waiting for the paint stripper to work on the frame and for the paint to dry.
ImageUploadedByTapatalk1337554019.871300.jpg

That pile is the interior of my FJ. Seats, floor, wall panels, etc.

ImageUploadedByTapatalk1337554133.988417.jpg

It's all back to normal now. I'm worn out and sitting on the porch sipping my second glass of ice cold rum. Ahhhh!
 

TMNT

New member
789
6
0
Location
Canton, Ga
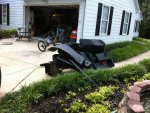
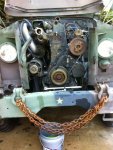
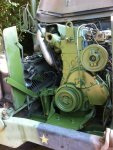
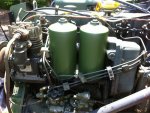
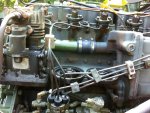
I'm working on the coolant leak that showed up last week. Of course, that task has expanded into a major project. New water pump, new belts and hoses, new thermostat and gasket, reconditioning the radiator, and a good cleaning and paint. Oh, and since I spilled coolant into the oil filter bases, an oil change!

ImageUploadedByTapatalk1338046174.647254.jpg
 

TMNT

New member
789
6
0
Location
Canton, Ga
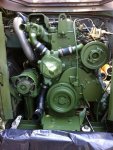
Making good progress. I got her cleaned up with Krud Cutter and a pressure washer. After using a small brush and a pick to get into the nooks and crannies, I washed it down with mineral spirits.

I used Naval Jelly on the rusty spots and then primed it with Rustoleum engine primer. The top coat is Rapco 383 green.

The new water pump, hoses and belts are ordered and hopefully I'll have them by next weekend. The radiator is going to Marietta Radiator on Tuesday. I've got the coolant, distilled water and fresh 15-40 ready to go in as soon as I get her reassembled.

I've got all the nuts and bolts soaking in phosphoric acid and they'll be good as new in a few hours.

It's not a complete rebuild, but I'll feel confident in the cooling system, belts and hoses when this is done.

ImageUploadedByTapatalk1338069690.489002.jpg
 
Last edited:

TMNT

New member
789
6
0
Location
Canton, Ga
Now all I need is for the new parts to arrive. I'm glad I did this. It's one of those things that I've wanted to do since I bought the truck. I kind of avoided it because of the magnitude of the task, but it really hasn't been that bad with a couple of uninterrupted days.

The bad news is that I saw a small rip in the passenger side front boot and the IP is leaking oil a bit worse than the last time I checked it.

ImageUploadedByTapatalk1338146496.609566.jpg

ImageUploadedByTapatalk1338146515.779895.jpg

ImageUploadedByTapatalk1338146532.828426.jpg
 
Last edited:

TMNT

New member
789
6
0
Location
Canton, Ga
The radiator shop called today to report that once they boiled out my radiator, they discovered several leaks including the seam in the bottom tank was actually coming apart. It's all repairable and I should still have it back before the weekend.

The bad news is that the new water pump won't be here until Monday the 4th. So much for getting her reassembled and running this weekend.
 

TMNT

New member
789
6
0
Location
Canton, Ga
The shop called yesterday to say my radiator was ready to go. After boiling it out, making the repairs and re-testing it, it checks out just fine. $275.

Unfortunately, I'm in Kentucky on business so I can't go pick it up until Monday.
 

TMNT

New member
789
6
0
Location
Canton, Ga
So I thought I would go ahead and break the compressor pulley loose with my new compressor wrenches from C&C. The wrenches work great and they withstand quite a lot of abuse. The pulley on the other hand, doesn't like abuse much at all.

ImageUploadedByTapatalk1338737674.753437.jpg

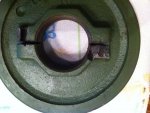
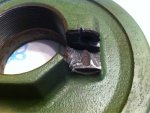
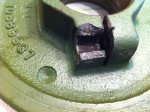
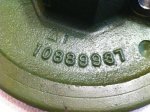
One of the bolt bosses cracked while trying to get the pulley freed up. After that, I used an air hammer on it to get it loose and broke it some more. I finally got it off but now I need a new one.

So much for getting her back on the road tomorrow!
 

TMNT

New member
789
6
0
Location
Canton, Ga
Here's a couple more photos of the damage. The chunk of the threaded portion thats missing was seized to the compressor arbor. There's some minor damage to the threads on the compressor, but it cleaned up pretty well. I applied a bit of anti-sieze and the outer pulley will now easily spin on and off. I have to find a new outer pulley though.

ImageUploadedByTapatalk1338737872.004867.jpg

ImageUploadedByTapatalk1338737899.355771.jpg

ImageUploadedByTapatalk1338737931.138695.jpg
 

TMNT

New member
789
6
0
Location
Canton, Ga
I saw an NOS pulley on Ebay for $55. I found and purchased one from Saturn for $22.50. It looks like next week will involve several late nights of reassembling as the parts arrive.

I should have the radiator, water pump, belts and thermostat tomorrow. Maybe the compressor pulley will arrive before the end of the week and I can still have her back on the road on next Saturday.

My new zipper boots are sitting here, maybe I can get those swapped out today without further mishap!
 

TMNT

New member
789
6
0
Location
Canton, Ga
As it turned out, I didn't get those new zipper boots installed. I took the weekend off and didn't get much done. I did get my sandblaster that I got for Christmas, assembled and tested. I cleaned and painted the radiator mounting bracket, but not much more than that.

I intended to pick up the radiator from the shop, but my daughter went in the hospital with appendicitis early Monday morning. That of course, put everything else on hold. She came through just fine and we'll have her back home this afternoon.

I did manage to pick up the radiator today. It was $275 to boil it out, fix the leaks, re-weld all of the broken straps and paint it. It looks good.

The new water pump, thermostat, gaskets, and belts arrived yesterday as well. Maybe I can get her reassembled tomorrow night! Now I just need that new compressor pulley to arrive and (please, please, please) be the right one.

For now, I'm headed back to Scottish Rite to see my wife and baby girl and hopefully get them home tonight.
 
Top
AdBlock Detected

We get it, advertisements are annoying!

Sure, ad-blocking software does a great job at blocking ads, but it also blocks useful features of our website like our supporting vendors. Their ads help keep Steel Soldiers going. Please consider disabling your ad blockers for the site. Thanks!

I've Disabled AdBlock
No Thanks