• Steel Soldiers now has a few new forums, read more about it at: New Munitions Forums!

  • Microsoft MSN, Live, Hotmail, Outlook email users may not be receiving emails. We are working to resolve this issue. Please add support@steelsoldiers.com to your trusted contacts.

My M35A2 Project aka Big Betty

TMNT

New member
789
6
0
Location
Canton, Ga
After getting some sleep and thinking on the leaking hub issue a bit, I think I have a plan. Early Saturday morning I will open up that right-middle hub again and check it out. I think I may have the adjuster nut just a bit too loose and that's causing the leak. The rear axle is doing just fine after I went through it the second time.

I think I can get it done in an hour or two and not impact the moving operation. I should be a dang expert on hubs after this! I can almost break them down and put them together in my sleep now. If I could just learn how to do it right.
 

TMNT

New member
789
6
0
Location
Canton, Ga
Yesterday morning, I went back over to the old house where Betty was still parked and worked on that leaking hub on the middle axle. The preload was correct and it wasn't overly loose like I thought. The seals look good and the keyway plug was intact. The only thing I can come up with is that I had the differential way overfilled. I made the same mistake on the rear axle.

Just another case of too much of a good thing is usually bad. The slight sideways slope of my driveway, combined with me filling the diff until the lube backed out of the fill/check hole, caused me to have about 1/2 gallon too much lube in there. I had to jack the low-side wheel up a good 3-4 inches to get the axle level, and then I filled it to about 1/2 inch below the check hole.

Incidentally, the hub that was leaking was on the "downhill" side of the truck when parked in the usual spot. I think the excess lube oil pooled up in that hub enough to cause the problem.

After getting that fixed, we loaded up more "stuff" for yet another load to the new house. It's about a 30 minute trip and everything worked like it's supposed to with no leaks and normal temps.

Now, if I can just get the rest of this moving stuff done so I can rest a little before the rally!
 

Merc1973

Active member
308
38
28
Location
Sykesville, MD
WOW.

Your thread is a wealth of information! I have learned so much just from what you have doe to your Deuce. I am still in the search for my Deuce, my SO wants her house first...
 

TMNT

New member
789
6
0
Location
Canton, Ga
There's plenty of others here with much more skill. I'm just hard headed enough to keep working at something until I've figured it out and then brave enough to post all of my mistakes here for the enjoyment of all.
 

frank8003

In Memorial
In Memorial
6,426
4,985
113
Location
Ft. Lauderdale, Florida
Brake tools. One must be a little hard headed to work on 30-40 year old trucks. But we do like getting an "A" in sticktoitniffness. I am curious about tools you use. For instance, have you altered tools for brake adjusting and bleeding? I find it difficult to get in there behind the wheels with a the 1-1/8" and a 1/2" wrench to do major and minor brake adjustments. What do you use? Any pictures?
 

TMNT

New member
789
6
0
Location
Canton, Ga
Frank, I haven't needed to do a major brake adjustment, yet. I've only done the minor adjustments using the 11/16" square adjusters. Those are pretty easy to get to, but access to the adjusters on the middle axle is a bit limited.

I've discovered a set of "stubby" combination wrenches are useful in many places on the truck. A 3/8" drive air ratchet has come in handy as well as 18" and 24" extension for my 3/8" drive ratchet. I also have a 3/8" drive stubby ratchet with an adjustable angle head that has saved the day once or twice. I also used a grinder to make a 1/2" thin wrench for adjusting the injection pump and I bought a set of air compressor wrenches that are "must haves."

Beyond that, I'm not sure what would qualify as "special" versus normal for a well equipped shop. Pneumatic grinders, chisels, impact drivers, pry bars of various sizes, good sockets from itty-bitty to bigger than a coffee cup including the 3" axle nut socket, a good tap and die set with left handed drill bits,

If I think of anything else special or modified for deuce work, I'll let you know.
 

SteelWarrior

Member
31
0
6
Location
portland, maine
Wow, I think what makes this such a good thread is that you approach it with a layman's attitude and experience - I don't mean to disregard your intelligence. Clearly, regardless of your experience or past or present profession - you have the skills and intellect to go at these tasks with a clever and sensible approach that makes sense to novice or experienced builders.

So what I'm trying to say is, Thank You! And on behalf of your son who may not know it yet but this experience with you will likely be looked back on as some of the best years of his life. I wish I had these memories with my dad.

So, It doesn't look like your girlfriend is going to fit in that garage - you have plans to raise the roof on it? Where do I sign up?
 

TMNT

New member
789
6
0
Location
Canton, Ga
SteelWarrior, thanks for the supportive words. The time that I spend with Michael working on and driving the deuce, is time well spent.

No plans on changing that garage. The truck gets a prime driveway spot or it stays in a high-bay garage at my work.

I've been so busy lately that I've neglected to follow up here on the leaky hub issue. I evidently solved the problem on that last attempt, as I've had no leaks since. That includes the rally, some stump pulling, and generally driving around. All hubs are leak free.

Most (read all) of my time has been taken with work or with getting things done at the new house, leaving no time for the truck right now. A buddy of mine has a large 5th wheel RV trailer and Ford 350 that seems to be stuck. I'm taking the deuce over there on Saturday to drag truck and RV out to solid ground. Of course, there's a 50-60% chance of rain, so getting out and on solid ground may be messy.
 
Last edited:

TMNT

New member
789
6
0
Location
Canton, Ga
Related to the new muffler installation, sorry
None that I've been able to detect. The Dynomax is a straight through type muffler, so there is very little (if any) restriction to exhaust flow. The exhaust gas temps didn't increase, she pulls strong, and I still get 11-12 MPG on the highway at 45 MPH. I don't regret installing the muffler. It was much nicer on the trip to and from SSGR13, and on the trail for that matter.
 

TMNT

New member
789
6
0
Location
Canton, Ga
If the weather cooperates, I'm changing out the steering boots (zipper type) this weekend and and hopefully finding a solution for the new hood hinge that fell apart on me at SSGR13.

I hate winter in Atlanta; it's either 50 degrees and raining, 15 degrees and windy, or dark.
 

TMNT

New member
789
6
0
Location
Canton, Ga
I managed a few hours to work on Betty. I was able to reconnect the driver side defroster duct that had come lose and get the passenger side front tire rotated to the back.

I started on changing out the right front zipper boot but I had to stop after an hour of wrestling the new boot on, only to have it slip out of the groove again. I did the boots last year and I managed to get them both done by myself. That inner clamp ring is frustrating.

I'll tackle it again later in the week. Just don't have the patience for it today.
 

TMNT

New member
789
6
0
Location
Canton, Ga
Got that pesky boot on this afternoon.....finally. Michael and I took her out for a drive to warm her up and to charge the batteries and all is well. After getting cleaned up, I took a nap and now I can't sleep!
 

clinto

Moderator, wonderful human being & practicing Deuc
Staff member
Administrator
Super Moderator
Steel Soldiers Supporter
Supporting Vendor
12,596
1,132
113
Location
Athens, Ga.
That inner clamp ring is frustrating.
It took me awhile to figure out the trick to the boot clamps. Most of the time, the boot won't stay on the groove on it's own. And it seems like you'd need 4 or 5 hands to hold it on all the way around so you can put the clamp on.

The trick is put the ring on the boot and tighten it just enough that it allow the boot to slide over the groove, but still hold the boot on. Once you've done this a few times, you'll be amazed at how fast you can get a boot on. Once it's on the groove, you can make the fine adjustments around the circumference to ensure the boot is perfectly located and then just tighten up the clamp.

I also replace the awful screws that come with these with cap screws so I can put a socket on them. Using a flat blade screwdriver is an exercise in annoyance, since the blade keeps sliding out the groove.
 

TMNT

New member
789
6
0
Location
Canton, Ga
I agree, Clinto. Technique and practice makes it much easier. I used 3 large clamps with padded grip points. Those helped a lot with the need for 5 hands. Another thing that helps is to replace the bolt that comes with the clamp, with one that is about 3/4" longer. That may not matter if I did it the way you suggest and have the clamp ring on the boot before putting the boot in the groove. I'll have to try that again because I was unable to make that method work. Everything kept going in different directions and causing me to break out in foul language.
 
Last edited:

TMNT

New member
789
6
0
Location
Canton, Ga
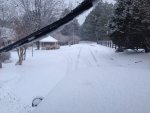
We survived Snowpocolypse 2014 with no damage and we never lost power. We are among the fortunate and we're grateful for it.

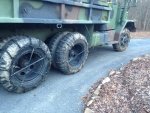
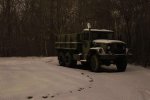
Last Sunday, I took the time to put the snow chains on Betty, just in case. It was weird out there sweating in 60 degree temps, putting snow chains on in preparation for a "catastrophic" winter storm.

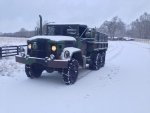
After all that work, I couldn't pass up the opportunity to take Betty for a drive around the 'hood this morning. The snow is about an inch of sleet and then a couple of inches of snow on top. It is really not bad. Certainly not as bad as the ice that we had a couple of weeks ago.

Betty started up great this morning on the third bump of the starter button. The chains work wonders and Betty went wherever I pointed without so much as a tire slip.

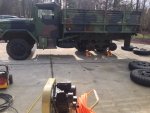
Chains put on Sunday. My first time with chains. I put the rubber bungies on as extra insurance. Some I had to do twice because they were twisted. I should have jacked up the wheels to put them on. I'll do that next time for sure.
ImageUploadedByTapatalk1392302368.259302.jpg

She looks good in the snow.
ImageUploadedByTapatalk1392302143.563016.jpg

ImageUploadedByTapatalk1392302508.165302.jpg
ImageUploadedByTapatalk1392302520.511346.jpg
ImageUploadedByTapatalk1392302542.130978.jpg
ImageUploadedByTapatalk1392302557.355113.jpg
ImageUploadedByTapatalk1392302630.966774.jpg
 
Top