• Steel Soldiers now has a few new forums, read more about it at: New Munitions Forums!

  • Microsoft MSN, Live, Hotmail, Outlook email users may not be receiving emails. We are working to resolve this issue. Please add support@steelsoldiers.com to your trusted contacts.

My m925a1 build "Brutus"

muthkw25

Well-known member
Steel Soldiers Supporter
490
582
93
Location
Sayre, PA
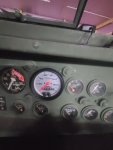
I have had issues with the speedometer and the cable is broken. Speedo hasn't been accurate since 1600s and now it's off by more than 30 mph when cruising at 40mph by GPS. Instead of buying a new cable, I decided it was time for an upgrade. I bought an autometer GPS speedometer. I wasn't a huge fan of the gauge color but if I need to replace down the road, this series of gauges has everything I need but the voltage gauge. It's high quality and it will be accurate regardless of tires I run on the truck.

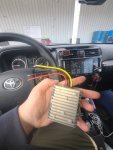
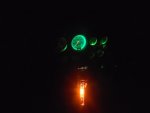
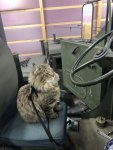
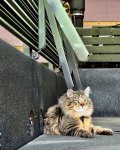
I had to step the power down on this gauge. Gauge runs on 12v or 16v. So I bought that 24v to 12v converter. I decided I wanted the gauge to get power when I turn accessory switch on. So Dad and I built a Y-jumper wire using the rubber boot connectors and jumped off the voltage gauge. I ran the output to the voltage gauge to input of the converter. And the output of the converter to the gauge. The gauge light I changed out to a 24v green led bulb. I then built a 3 way wire and spliced into where the dash bulb gets its power from. This way I can illuminate it when I use the push button light switch so it works like it's stock. I did a 3 way because I wired the Pyro into this setup. Overall I am very pleased with the results. The gauges in the photos appear much brighter than they are. There is a significant difference obviously between the new speedometer and the stock gauges but it gives you an idea. Also, Sgt Tibbs had to help Dad and I throughout the installation. I'll test it out in the next week or so and report back how accurate it is.
 

Attachments

Mullaney

Well-known member
Steel Soldiers Supporter
Supporting Vendor
7,769
19,877
113
Location
Charlotte NC
I have had issues with the speedometer and the cable is broken. Speedo hasn't been accurate since 1600s and now it's off by more than 30 mph when cruising at 40mph by GPS. Instead of buying a new cable, I decided it was time for an upgrade. I bought an autometer GPS speedometer. I wasn't a huge fan of the gauge color but if I need to replace down the road, this series of gauges has everything I need but the voltage gauge. It's high quality and it will be accurate regardless of tires I run on the truck.

I had to step the power down on this gauge. Gauge runs on 12v or 16v. So I bought that 24v to 12v converter. I decided I wanted the gauge to get power when I turn accessory switch on. So Dad and I built a Y-jumper wire using the rubber boot connectors and jumped off the voltage gauge. I ran the output to the voltage gauge to input of the converter. And the output of the converter to the gauge. The gauge light I changed out to a 24v green led bulb. I then built a 3 way wire and spliced into where the dash bulb gets its power from. This way I can illuminate it when I use the push button light switch so it works like it's stock. I did a 3 way because I wired the Pyro into this setup. Overall I am very pleased with the results. The gauges in the photos appear much brighter than they are. There is a significant difference obviously between the new speedometer and the stock gauges but it gives you an idea. Also, Sgt Tibbs had to help Dad and I throughout the installation. I'll test it out in the next week or so and report back how accurate it is.
.
Sgt Tibbs looks like he is interested in what you are doing...
Go man go!
 

muthkw25

Well-known member
Steel Soldiers Supporter
490
582
93
Location
Sayre, PA
Got the last 16r20 together on the hemtt wheel and holding air for the spare. I also got a Fiberglass hard top for the truck in. Got inside primed and painted. Outside is now primed with self etching primer. Sgt Tibbs was inspecting the bed and checking out the paint from Rapco. He gave it the stamp of approval. Next step is to finish sanding the mirror brackets and painting the new mirrors up. Installation of hardtop on Friday. Once completed I can get the body painted and ready for the season.
 

Attachments

muthkw25

Well-known member
Steel Soldiers Supporter
490
582
93
Location
Sayre, PA
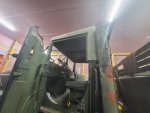
I bought a Fiberglass hardtop. I do not recommend it. I had one for my deuce that fit like a glove. This one fits horrid. Dad helped me grind down the inside to help fit better but still not perfect but working on it. Almost ready to drill holes for the back of the cab. I also used a high temp primer and high temp black for the exhaust. Going to apply a coat to inside of heat shield and then exhaust and all gets painted green like the truck. Getting closer to paint.
 

Attachments

ohsmily

Member
44
32
18
Location
Davis, CA
Had a hiccup when doing overhead. When my buddy came up to help with the radiator, dual fuel line mod, and coolant filter, we did the overhead on the engine. As we got to the last cylinder, the feeler gauge broke and a piece went Into the engine.

We tried looking for it and couldn't find it. Called cummins and asked for any ideas, they said it could be in the block or it could be elsewhere. Drained the oil and tried using a camera and couldn't see anything. Tried using a magnet and going down between the rods without luck. Panic set in.


We then decided to remove the rocker box and the rods and remove the cam follower. After removing the rear cam follower and pulling the rods we could see the metal in the pan. That was a sigh of relief. My buddy and I then put a magnet down inside the block and fished out the piece of metal.

The next part is what became very stressful. After looking at the cam follower, we saw a gasket and called cummins and they told me there was 2 shims for the cam follower. Went down and picked them up and when we got back home, we could feel a significant difference in the shim thickness between what we bought and what was on the truck. Spent hours on the phone with cummins. Cummins was almost no help. The cummins shop Gave me only 2 shims, when there is a number of different shims for the nhc 250. There was no markings on the old shims seeing they prolly were not replaced since the engine was put in the truck.

I bought a micrometer and we measured the shims and came to 0.66. Well the shims I had measure 0.47 which If the shims are the wrong thickness it can throw the timing off and cause a huge issue.

The shims on the truck that measures 0.66 were not ones you could get for the small cam. And cummins wouldn't give me the shims for a big cam because it didn't match what their manual said. After arguing with them and telling them the block is the same, it's not an internal shim, it's external it shouldn't matter, they still wouldn't ship them.

So luckily I was able to secure 3-0.22 shims to get to the 0.66 I needed. We then were able to reassemble the engine and do the overhead. Sad part is the overhead was out of adjustment but not by alot. So we did alot of work that probably wasn't necessary. However, I did learn alot on this big roadblock.


1) make sure to have angled feeler gauges because spacing on rear cylinders is not alot even with cab jacked up.

2) Don't waste your time dealing with cummins. If you don't know what you need you have to figure it out yourself. I barely got any help from them and the manuals for the nhc 250 are not online. Luckily using the tms got me the torque spec and extra help I needed as well as asking a few in the hobby that run these trucks. So thank you to those that helped.

I can say truck runs better now then it did when I drove it home.

Photo taken after reassembly and got some nice sunset photos.
That is terrifying. You and your buddies are intrepid folks.
 

muthkw25

Well-known member
Steel Soldiers Supporter
490
582
93
Location
Sayre, PA
That is terrifying. You and your buddies are intrepid folks.
Thanks ohsmily. It was a nightmare. I initially wanted to pull the pan, would have been less stressful but overall I learned alot. Sometimes we are put in stressful situations and it helps us grow. This was one of those times.
 

muthkw25

Well-known member
Steel Soldiers Supporter
490
582
93
Location
Sayre, PA
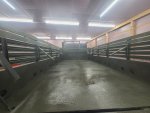
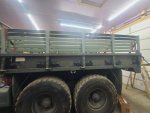
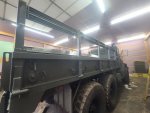
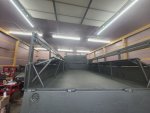
I decided to paint most of the truck with a roller. Now that the body has bedliner, I thought using s roller works. It won't show roller or brush marks and I can layer it more thick than using a paint gun. I also didn't lose any paint to aersolizing and having to thin the paint. I used 1 gallon for the bed and whatever was left over for the bed sides. Turned out really nice so far.


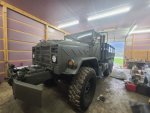
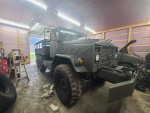
Tonight I got the cab, windshield, bumper, doors, hardtop done. More photos to come. Used another 3/4 gallon.

Overall happy with rolling. I don't normally do brush or roller but this made sense when having a expired bedliner on the surface. I have 4 1/4 gallons of paint left. Plan is to do more rolling Thursday, then get the truck outside either Friday or Sat to power wash the frame and then finish the frame and other spots with the paint gun.
 

Attachments

Mullaney

Well-known member
Steel Soldiers Supporter
Supporting Vendor
7,769
19,877
113
Location
Charlotte NC
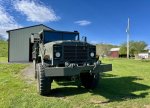
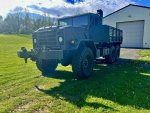
Truck is now painted. 3 gallons of paint and a case of rattle cans. Going to reassemble tomorrow and should be ready for a test drive. So far happy with the results.
.
@muthkw25 , that is a GOOD looking paint job.
And the bed is amazing... Smooth!
 

muthkw25

Well-known member
Steel Soldiers Supporter
490
582
93
Location
Sayre, PA
.
@muthkw25 , that is a GOOD looking paint job.
And the bed is amazing... Smooth!

Thank you Mullaney! It's been a work in progress. Using bedliner and then rolling the paint with a roller definitely gave a real nice coating. I have enough I might do another coat. Not sure yet. The truck stays in the shop so it's protected but I like the idea of having extra coats in the heavy traffic areas.
 

Eastern Front

New member
16
9
3
Location
Mobile AL
Thank you Mullaney! It's been a work in progress. Using bedliner and then rolling the paint with a roller definitely gave a real nice coating. I have enough I might do another coat. Not sure yet. The truck stays in the shop so it's protected but I like the idea of having extra coats in the heavy traffic areas.
What color green did you use? Is that the Marine corps dark green?
 

muthkw25

Well-known member
Steel Soldiers Supporter
490
582
93
Location
Sayre, PA
Today got the reflectors installed with new hardware. Mirrors installed, snorkel back on. I also bought 4 brand new napa group 31 batteries. 950 cca/piece. Hooked them up, boy the truck loves the double the amperage now. Plan is to install heat shield tomorrow and test drive and top off with fuel and see how he does. First time having the whole thing put together.
 

muthkw25

Well-known member
Steel Soldiers Supporter
490
582
93
Location
Sayre, PA
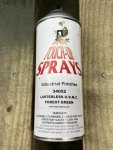
I had picked up the 24052 green for mine, wasn't sure of the shade of green.. Its the same shade you used only its a semi gloss. I really like that color..
I do feel bad for you though, your gonna feel it when you fill it up! ;)
Great Job!
Yes same shade just yours is semi gloss. And yeah luckily I need about 25 gallons to top it off so not terrible. But bad enough
 

muthkw25

Well-known member
Steel Soldiers Supporter
490
582
93
Location
Sayre, PA
Took truck on approx 25 to 30 miles round trip. Topped off fuel. The powersteering fluid heated up and came out breather a bit, but otherwise that was it from test drive. Got rims painted after drive. Wipers installed. GPS speedometer was dead on. Very pleased with results.

After driving I went to church and came back and the Heater core went. Leaking from box. I drained system with the valves and got the Hester core drained and blocked off. Plan is to order new one and I should have some good heat after this upgrade.

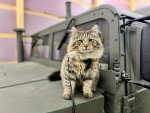
Sgt Tibbs standing at attention with the approval.
 

Attachments

muthkw25

Well-known member
Steel Soldiers Supporter
490
582
93
Location
Sayre, PA
Mounted the 16r20 spare behind cab. That was a chore. Got a 1 ton hoist from harbor freight and had some spacers to move the metal plates on the tire holder out to fit the larger tires. What I found was unless the tire was at a low tire pressure there's no way it would fit behind the cab. Got it to fit but If I need to put it on the truck I'll need to pack a lunch for a bit haha. Test drove again with the heater core blocked off and everything looked good. More photos to come.
 

US6x4

Well-known member
Steel Soldiers Supporter
1,238
2,272
113
Location
Wenatchee, WA
Mounted the 16r20 spare behind cab...

...Got it to fit but If I need to put it on the truck I'll need to pack a lunch for a bit haha.
Yeah, Wes makes it look easy by himself but in the case of a roadside tire change I've been thinking of carrying a pop out sign similar to the 'wet floor' signs you see but offering cash for some extra muscle to entice someone to stop and help
 
Top
AdBlock Detected

We get it, advertisements are annoying!

Sure, ad-blocking software does a great job at blocking ads, but it also blocks useful features of our website like our supporting vendors. Their ads help keep Steel Soldiers going. Please consider disabling your ad blockers for the site. Thanks!

I've Disabled AdBlock
No Thanks