• Steel Soldiers now has a few new forums, read more about it at: New Munitions Forums!

  • Microsoft MSN, Live, Hotmail, Outlook email users may not be receiving emails. We are working to resolve this issue. Please add support@steelsoldiers.com to your trusted contacts.


My new 1992 M998 Avenger

springer1981

Well-known member
844
1,147
93
Location
Maine
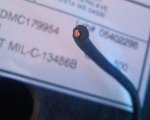
I ordered a spool of 16ga Military wire as used in the HMMWV's. I ordered it from a reputable national wire company. I received it yesterday and opened the box. As soon as I looked at it I could tell there was a problem. I contacted a sale rep and explained the issue and set a picture. Today they called me back and said they confirmed the problem and pulled stock that was bad. They are sending me a replacement and a call tag.

Very happy with the service however that isn't what this post is about. Make sure you inspect everything as soon as you receive it. Problems are much easier to correct the day you get something rather than 3 months later. If you have any unused wire of this type, it is worth a look to make sure you didn't end up with any from the same batch. Granted most people aren't buying spools and doing there own wiring but if you are....

wire.jpg
 

springer1981

Well-known member
844
1,147
93
Location
Maine
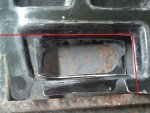
I ordered a hood reinforcement kit on the auctions site. $70 with shipping I thought was a great deal. The guy has them listed with a misspelling. If you are interested in one, do a search on "HMMWV reenforcement" and you will have no problem finding it.

The first thing I noticed when I open the box was the double sided tape was peeling off. I really didn't like the idea of using double sided tape anyway. I peeled it all off, it came off easy.
hood1.jpg

3M 5200 marine adhesive is incredible stuff. I bought 2 tubes for $25 but I only used about half a tube. Retail is about $17 each.
hood.jpg

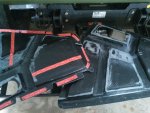
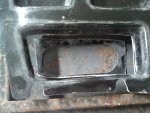
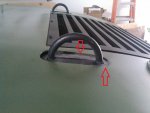
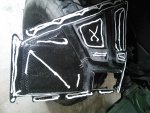
After test fitting the first one I did not like the way it fit around the lifting hooks in the hood. It was too thick and put extra pressure on the hood in that area. It also deformed the seals around the hooks. I decided to cut out the area around the hooks on the reinforcements. It made a huge difference.
hood2.jpg hood8.jpg

In hind sight, I probably should have cut the corner out like this.
hood9.jpg

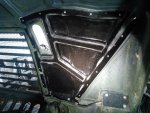
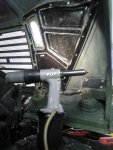
Then I applied liberal amounts of 3M 5200 where the tape was and more. I still didn't apply as much as I should have. On the other side I put much more on. I'm sure it was still enough but I would have preferred it to squeeze out the edges more. I predrilled 3 holes and used a 2x4 to wedge it in place. Put in the first 3 rivets and then drilled an riveted the rest. I added a few extra rivets for good measure. An air POP rivet gun is really handy. I picked this up on the auction site for a project years ago.
hood3.jpg hood4.jpghood6.jpg

After the 5200 sets up, I'm going to fill in around the holes that I cut out with 5200.
hood5.jpg

Less than $100 total and I am really happy with the end results. My hood didn't have any cracks or damage and I probably didn't need these but it is added insurance. They will get painted OD Green and blend in like they were always there.
hood7.jpg
 
Last edited:

DREDnot

Well-known member
717
430
63
Location
Phoenix, AZ
Thanks for the great writeup on those. There is a guy selling them locally for $65 and I have been considering getting a set to install.
 

springer1981

Well-known member
844
1,147
93
Location
Maine
Thanks for the great writeup on those. There is a guy selling them locally for $65 and I have been considering getting a set to install.
If you go the route I did, here is what I would do different.

I would DA the mating surface on the hood for better adhesion of the 5200. With that said, I cut off the pieces today that I said I would do "in hind sight". It bothered me thinking about last night so I did it today. The pieces I had to remove were not easy to get off with 5200 that was on it and it wasn't even fully set up yet.
hood11.jpg hood10.jpg

I would use a half of a tube on the backs of each side and I would have a friend help me set it in place so I didn't get the 5200 everywhere. It would be oozing out the sides.

I did use the rest of the tube today to get as much into the cracks on the side as possible. I used my finger to make a fillet around the edges. I had 2 goals when doing this. One to seal around the edges to keep dust and dirt out, not water so much. Two was for additional adhesion though I'm sure it was overkill at this point.
hood12.jpg hood13.jpg
 

springer1981

Well-known member
844
1,147
93
Location
Maine
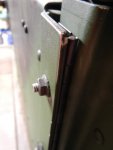
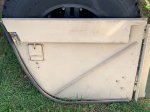
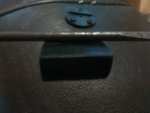
Next up is a set of rear half doors. I pulled off the side panel to test fit. They require a front spacer panel that I don't have. I worked up the measurements today and I will make them this week if I have time. Ultimately I am going to build a solid door jam and use Riv-nuts on the bed side so it could be removable. More on this to come....

RDoor1.jpg
 

DREDnot

Well-known member
717
430
63
Location
Phoenix, AZ
I'm slowly working on half doors for mine, too. It looks like you popped for the real deal to start with.

Im going to fab my own. Im waiting on my local metal supply to save me some 24x38 remnants of 1/4 or 3/16 aluminum sheet.

I started by just adding a piano hinge to the door filler panel.

DSCN7822.jpg

DSCN7832.jpg

I was planning on using original door hinges in the factory location. Ive seen a few of the GI door sets and they all have that filler panel and I wonder why. It seems easier to just make the door the same size as the blank door. ???
 

springer1981

Well-known member
844
1,147
93
Location
Maine
I'm slowly working on half doors for mine, too. It looks like you popped for the real deal to start with.

Im going to fab my own. Im waiting on my local metal supply to save me some 24x38 remnants of 1/4 or 3/16 aluminum sheet.

I started by just adding a piano hinge to the door filler panel.


I was planning on using original door hinges in the factory location. Ive seen a few of the GI door sets and they all have that filler panel and I wonder why. It seems easier to just make the door the same size as the blank door. ???
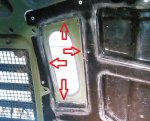
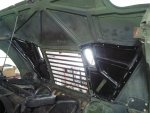
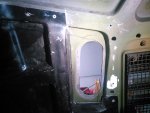
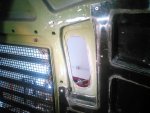
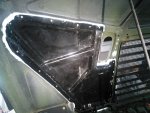
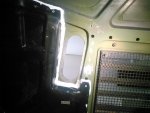
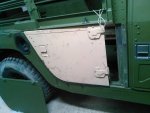
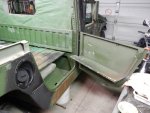
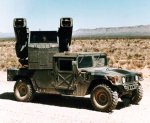
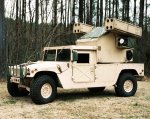
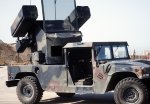
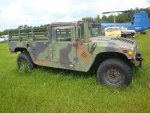
The Avenger version seemed to have a hinged rear panel, not a door so much. It allowed access to the systems and storage from what I can tell. Here are some example.
Avenger4.jpg Avenger3.jpg Avenger2.jpg Avenger1.jpg


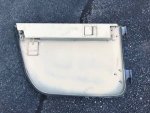
I looked at full length rear half doors and they were big money. I found this set of original doors for $500 plus shipping and I thought that was a good deal. Originally I was going to use them as a template and make full length doors but that's more work and money than I wanted to spend. I would have had to make several sets and sell some to recoup my costs.

I want them for easy access to that area so I can use it for storage. It will have a similar look as the original but more useful than the original design for my purposes.

I think the original doors are .125 thick IIRC.
 

TOBASH

Father, Surgeon, Cantankerous Grouch
Steel Soldiers Supporter
3,173
2,800
113
Location
Brooklyn, NY
IIRC, the "what have you done lately" thread has pics of custom made rear half doors. Maybe 2 or so months ago, (give or take)?

[EDIT - not in the what ya' done section, but I found the link...

https://www.steelsoldiers.com/showt...ut-making-some-half-doors&highlight=half+door ]

If it were my vehicle, I would make plywood doors, skin with metal, install, and wait for real doors to come along at a reasonable price.

Best,

T
 
Last edited:

DREDnot

Well-known member
717
430
63
Location
Phoenix, AZ
I like the Avenger style but with the paddle latch. I thought about plywood, but I would prefer to just do it once out of aluminum.

Thanks for the info on the thickness. I may still go with thicker sheet in hopes of gaining rigidity without the riveted bracing and having a fold down filler "shelf" to fill in the load floor.
 

springer1981

Well-known member
844
1,147
93
Location
Maine
I think the difference in the full length doors and the ones that use the filler panel are the intent of use. The full length door have door handles that open the door from the inside, as you would need in a 4 man. The ones with the filler panels only have latches on the outside. The last door is the full door, note the latch to open it from the inside. The smaller door is used just for rear access as shown on the HMMWV picture.

rear2.jpg rear1.jpg rear3.jpg
 

springer1981

Well-known member
844
1,147
93
Location
Maine
One of my goals is to replace a lot of the plastic pieces, covers, bumpers etc. The truck is 27 years old and everything is pretty much original. That means cracked, worn, rusted and warped.

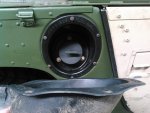
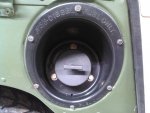
I've already replaced tail lights and directional lights but found the tail light housings have a few cracks. Same with the rear marker light housings. I have them on order and will be replacing them. Today I replaced the fuel filler housing. Mine was pretty warped and deformed (first picture). Probably from a combination of Diesel fuel, sun light and Over Tightened Screw.
Fuelfill1.jpg Fuelfill2.jpg


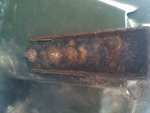
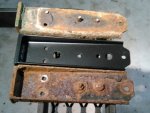
The hood bumpers or rests on the sides were rusted pretty good. I bought a pair of NOS replacements on the auction site for $45 shipped. There are (5) 1/4-20 x 1" grade 8 bolts on each side. 7 of the 10 bolts were so rusted in place they just broke off without even needing to hold the nut. 2 of the bolts removed without breaking. 1 bolt just spun and the nut was so rusted it couldn't be held. I drilled that one from the head using a good Cobalt drill bit.

hoodbumper1.jpg hoodbumper2.jpg
 
Last edited:

springer1981

Well-known member
844
1,147
93
Location
Maine
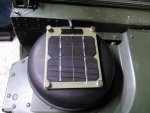
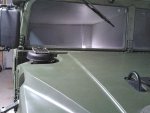
Today I added a Solargizer. I mounted it on top of the air intake. I like that it didn't require putting holes in the hood and routing the wire was shorter and cleaner.
solar1.jpg solar2.jpg

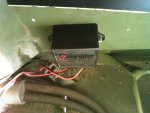
I mounted the control in the battery compartment. I used rivets, once painted they will blend in with the 300,000 other rivets. I may replace them and add backing washers.
solar3.jpg solar4.jpg
 
Last edited:

springer1981

Well-known member
844
1,147
93
Location
Maine
One of the upcoming projects is renewing the fuel system. My gauge doesn't read correctly (common problem). The tank is stained and discolored badly, not a function issue. Some of the lines are marginal, etc. I don't like the idea of cutting into the bed to change the sending unit, not going to do it.

So I found a surplus dealer that has NOS tanks for $45 + shipping. Bought new fittings and tank cover, sending unit etc.

In another thread about sending units pjwest03 supplied a link to newer style magnetic sending unit. https://www.steelsoldiers.com/showt...ubleshooting&p=2209173&viewfull=1#post2209173

I like the idea versus the older rheostat style. I have already purchased a new HMMWV replacement though. I decided to check it out to see how it was made. Turns out it uses magnetic sensors as well so it looks it's going in.

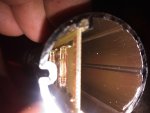
The first picture shows the circuitry in the sender. Second is the float with the magnets showing. Third is stuck to the screw driver.

sender1.jpg sender2.jpg sender3.jpg
 

McSpeed

Well-known member
333
293
63
Location
Palmer, AK
Next up is a set of rear half doors. I pulled off the side panel to test fit. They require a front spacer panel that I don't have. I worked up the measurements today and I will make them this week if I have time. Ultimately I am going to build a solid door jam and use Riv-nuts on the bed side so it could be removable. More on this to come....

View attachment 761094
You'll love being able to access the bed and set up the rear seats. I'm very happy with having used the factory block off plates, as set of soft door hinges, a saw blade...and some time and converted into doors. They are flimsy but they get the job done and cost just peanuts to make work.
 

springer1981

Well-known member
844
1,147
93
Location
Maine
You'll love being able to access the bed and set up the rear seats. I'm very happy with having used the factory block off plates, as set of soft door hinges, a saw blade...and some time and converted into doors. They are flimsy but they get the job done and cost just peanuts to make work.
Well actually mine is a permanent hard top with a permanent rear wall. There aren't ever going to be back seats. The access will be for storage under the bed floor and access to the front of the bed area.
 

springer1981

Well-known member
844
1,147
93
Location
Maine
I have been casually researching wheels and tires for a while. A recent health issue has me laid up in front of my computer. I'm not an expert on wheels and fitment but I did accumulate a fair amount of information on the topic.

My criteria was pretty simple.
1. Maintain stock profile as much as possible (height, width, offset)
2. I want an All Terrain tire, not a mud tire.
3. I want a more plain wheel style, not flashy.
4. Rim cost $200 ea or less however 1 wheel listed is more.

In general the wheels are listed in order (attached file) of maintaining stock like overall width. The extended width measurement represents how much the wheel sticks out farther on 1 side. So overall extra width would be 2x the extended width of the wheel.

All wheels listed meet minimum specifications.
Bolt pattern 8x6.5 or 8x165.1 (metric equivalent)
Rim width meets tire requirements
Minimum 117mm hub bore
DOUBLE CHECK ALL SPECS IF YOU USE ANY OF THIS INFO TO PURCHASE ANYTHING. I MAKE NO GUARANTEES.

I couldn't find any aftermarket steel wheels but did find some stock Dodge Ram steel wheels that look like they will fit pretty good. Dodge also had some Aluminum rims as well. However the rim width is 8". There was only 1 manufacture that I could find that made a tire in 37" that fit the rims. The tire width is 11.5" vs 12.5" stock. All the 12.5" wide tires require a minimum of 8.5" rim width. That said, you could mount a 12.5" on a 8" rim and probably be fine allowing a wider variety of tires.

The easiest way I found to view wheel options was on the auction site. I found searching on rim size and bolt pattern returned the best results. Also change the max $ amount to 200 however this eliminates sets of 4. If you find a wheel you like, search the part number to find sets of 4.
Examples,
18x8 8x165.1 returns the Dodge wheels
17x9 8x6.5 Then select the Offset on the left side to narrow down

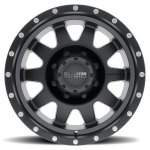
Of the new aftermarket wheels my first choices is the Raceline Avenger and the Method MR301. I would pair this with the BFG KO2's. The MR301 having a better offset. Either set is about $400 each Rim and Tire.
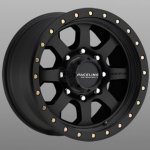
929b_Avenger.jpg method_mr301.jpg

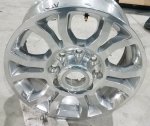
The Dodge wheels are compelling. The Aluminum ones could be painted black and a custom center cap made. The Center could also be turned down flat and polished then painted black for a flat look. The Steel ones also come in Black, a Matte Black would blend in well, no center cap. I'm liking the thought of the Steel 18x8 matched up with the 37x11.50R18. The steel wheels are $64 each used and refurbished. Not sure on the tire costs yet.

These are 2014-2018 Dodge Ram 18x8
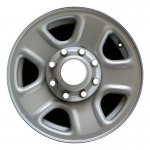
dodgesteel18x8.jpg dodgealum18x8.jpg

Here's some other Dodge Ram 20x8 wheels.
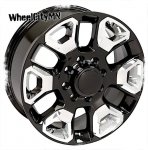
dodge20x8blk.jpg dodge20blk.jpg dodge20x8.jpg

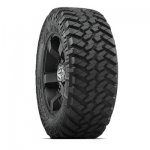
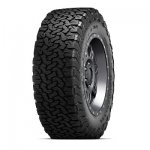
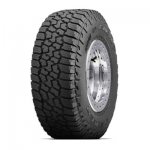
Nitto Ridge Grappler AT, Nitto Trail Grappler MT (Mud), BFG 37x12.5R17 AT, Falken WildPeak A/T3W
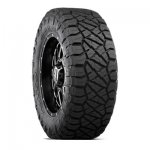
RidgeGrappler.jpg TrailGrappler.jpg All-TerrainTAKO2.jpg WildpeakAT3W.jpg

Attached PDF of data. Scroll down in the PDF there are 2 pages.
View attachment wheels.pdf
 

springer1981

Well-known member
844
1,147
93
Location
Maine
So it's been a while since I've posted to my thread. Since my last post my focus changed to a plow truck. Originally I bought a low mileage Duramax with a rusted out frame to use as a donor to do a Duramax conversion to this truck. I actually bought it the same day with those intentions. After getting this one home and doing a little more in depth checking it had the 6.5 GEP and it runs great. No need to do the conversion. This left me with a low mileage rusted out Duramax. I found a high mileage truck of the same year with a perfect frame. So for the last year an half I did a ground up rebuild as well as some modifications of a 2002 Chevy 3500.
My next transportation goal the HMMWV. I do take it out from time to time but realistically the TH400 transmission and a top speed of 45'ish just keeps it from being practical to use much. I want to fix that this year. 4L80 upgrade is going to be in its near future. In the mean time I have a lot of little things I can do.

The Avenger being the only 2 man hard top is extremely cramped for space and since I'm not my 19 year old self anymore, it's a very tight fit. My plan is to move the steering wheel as far forward as possible and move the seat back as far as possible. in this post https://www.steelsoldiers.com/threads/my-new-1992-m998-avenger.184818/post-2202550 on page 4 I explained the seat being back as far as I could go. I have since figured out a way to get the seat back another 1.5". I will post about that later.

This post is about moving the steering wheel forward. About 2 years or so ago I bought steering column to modify. Post about it here https://www.steelsoldiers.com/threads/my-new-1992-m998-avenger.184818/post-2200986 Today I started that process. I did some measuring and figure I can remove 2" for the length of the steering column. This will move the steering wheel closer to the dash but will also move the directional switch until it hits the dash. So I need to move the directional switch out towards the steering wheel.

In order to get the steering column apart I had to make a tool, indicated by the RED #1 on the picture. The 2 pieces circled in RED are the pieces I cut out after disassembling the steering column. Next I have to weld it all back together and reassemble. More to come....

Steering1.jpg
 
Last edited:

TOBASH

Father, Surgeon, Cantankerous Grouch
Steel Soldiers Supporter
3,173
2,800
113
Location
Brooklyn, NY
So it's been a while since I've posted to my thread. Since my last post my focus changed to a plow truck. Originally I bought a low mileage Duramax with a rusted out frame to use as a donor to do a Duramax conversion to this truck. I actually bought it the same day with those intentions. After getting this one home and doing a little more in depth checking it had the 6.5 GEP and it runs great. No need to do the conversion. This left me with a low mileage rusted out Duramax. I found a high mileage truck of the same year with a perfect frame. So for the last year an half I did a ground up rebuild as well as some modifications of a 2002 Chevy 3500.

My next transportation goal the HMMWV. I do take it out from time to time but realistically the TH400 transmission and a top speed of 45'ish just keeps it from being practical to use much. I want to fix that this year. 4L80 upgrade is going to be in its near future. In the mean time I have a lot of little things I can do.

The Avenger being the only 2 man hard top is extremely cramped for space and since I'm not my 19 year old self anymore, it's a very tight fit. My plan is to move the steering wheel as far forward as possible and move the seat back as far as possible. in this post https://www.steelsoldiers.com/threads/my-new-1992-m998-avenger.184818/post-2202550 on page 4 I explained the seat being back as far as I could go. I have since figured out a way to get the seat back another 1.5". I will post about that later.

This post is about moving the steering wheel forward. About 2 years or so ago I bought steering column to modify. Post about it here https://www.steelsoldiers.com/threads/my-new-1992-m998-avenger.184818/post-2200986 Today I started that process. I did some measuring and figure I can remove 2" for the length of the steering column. This will move the steering wheel closer to the dash but will also move the directional switch until it hits the dash. So I need to move the directional switch out towards the steering wheel.

In order to get the steering column apart I had to make a tool, indicated by the RED #1 on the picture. The 2 pieces circled in RED are the pieces I cut out after disassembling the steering column. Next I have to weld it all back together and reassemble. More to come....

View attachment 824696
Why not see if a Ford Escort steering column fits your needs. I believe the Escort column is what H1 models use.
 

springer1981

Well-known member
844
1,147
93
Location
Maine
Why not see if a Ford Escort steering column fits your needs. I believe the Escort column is what H1 models use.
I want to keep the military look and the stock directional signal controls. I did check out a H1 steering column and did not like the looks of it.
 
Top
AdBlock Detected

We get it, advertisements are annoying!

Sure, ad-blocking software does a great job at blocking ads, but it also blocks useful features of our website like our supporting vendors. Their ads help keep Steel Soldiers going. Please consider disabling your ad blockers for the site. Thanks!

I've Disabled AdBlock
No Thanks