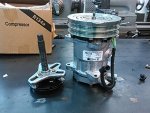
• Steel Soldiers now has a few new forums, read more about it at: New Munitions Forums!

  • Microsoft MSN, Live, Hotmail, Outlook email users may not be receiving emails. We are working to resolve this issue. Please add support@steelsoldiers.com to your trusted contacts.

My new 1992 M998 Avenger

springer1981

Well-known member
844
1,150
93
Location
Maine
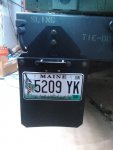
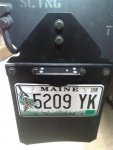
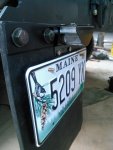
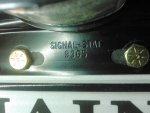
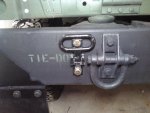
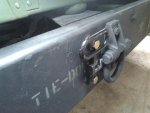
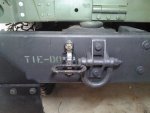
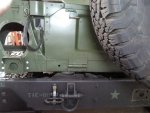
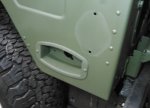
I put a set of mud flaps on today. I've also been trying to figure where and how to mount a license plate and light. I bought a Signal-stat 9365 combination light and bracket from a humvee parts place and paid way too much for it. I thought it was for a Hummer but it's just a generic mount. They changed the bulb to a 24v and then doubled the price.

mud1.jpg

plate1.jpg


plate3.jpg


plate4.jpg
 

springer1981

Well-known member
844
1,150
93
Location
Maine
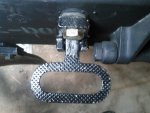
I bought a pair of these fold up steps. Wasn't sure what I was going to do with them. I didn't like the idea of drilling the bumper to mount them. While doing the other stuff today I took one out and started holding it up to see if I could use them. The bolt holes looked like they might line up with existing bumper mount bolts but the holes were obviously too small. I decided to drill one out to 1/2" holes. They lined up nearly perfectly and close enough to work. I'll have to paint them flat black to match. It doesn't interfere with the shackle either.

With the Rhino tire carrier there is no need for one on the other side. It's a tall first step but it allows more to climb into the back without having to move the tire and open the gate.

step1.jpg

step2.jpg

step3.jpg

step4.jpg

step5.jpg
 

TOBASH

Father, Surgeon, Cantankerous Grouch
Steel Soldiers Supporter
Supporting Vendor
3,569
3,475
113
Location
Brooklyn, NY
Previous owner put a class 3 hitch on it and since I will probably never tow anything with it I wanted to put the pintle hitch back on. I removed the class 3 and when I went to mount the pintle I found the safety chain plate was bent up. It looks like it did its job. I'll have to find a replacement before I put it back together.

View attachment 826966

View attachment 826967
Seems like a 10 pound persuader would fix that bent piece right quick.
 

springer1981

Well-known member
844
1,150
93
Location
Maine
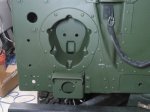
I cleaned up the rear corners and replaced the light buckets. Although I ordered the correct rivets they don't seem to be correct. It took a while to figure out how to get them right. New reflectors on the way as well.


taillight.jpg


taillight1.jpg
 

springer1981

Well-known member
844
1,150
93
Location
Maine
I started removing the radiator stack so I can change the water pump pulley to a 5 groove to prepare for an AC install. Also the radiator has a couple of corner brackets that have come desoldered from the core. Once I get it out, drained and dried I'll get the corners fixed.

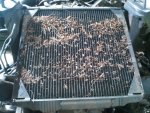
In the mean time if you haven't had your radiator out or at least the transmission cooler off, take a look at what I found under mine.

rad.jpg
 

springer1981

Well-known member
844
1,150
93
Location
Maine
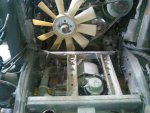
Continuing the radiator removal, I found the metal lower radiator hose/connector in somewhat rusty condition. While I have it apart i'll replace that. Overall everything looked good. The belts are a little stiff but not cracking, i'll probably replace them while I'm right here.


rad2.jpg


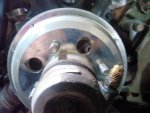
After getting it apart and the belts off, I see the clutch doesn't line up with the bolts and it doesn't move. Anyone have any tricks to rotating the clutch to line up the bolts? I have an idea but why reinvent the wheel if there is already a way.

rad3.jpg
 

springer1981

Well-known member
844
1,150
93
Location
Maine
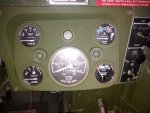
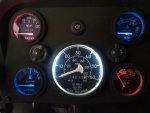
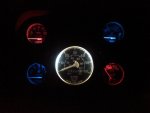
My dash cluster worked but had some issue from age. Some of the brackets that hold the gauges in were cracked or broken. Everything was just old, 29 years old to be exact. So I built a new gauge cluster and updated the water temp gauge. I kept the original speedometer but it had its share of wear on the outside ring. I cleaned it up and sanded out some of the scratches and scrapes and it was in good condition except for paint. taped it up and touched it up, the outside looks like new again.

I tried to get a picture of it all done but they all came out blurry. EDIT, I did get one clear picture but with glare, posted it below.

After completing the install I tried to get it to light up as well and it didn't. I have all the other lights disconnected at the moment as well as the hood off, would that cause the dash lights to not work? Is there something that relies on the say the hood harness being attached? Any help would be appreciated before I tear into look for the issue.
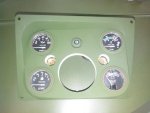
dash.jpg


speed1.jpg


dash2.jpg
 
Last edited:

springer1981

Well-known member
844
1,150
93
Location
Maine
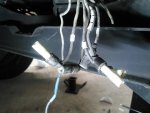
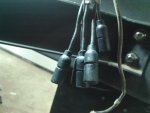
When I replaced the taillights a couple of years ago I noticed all the connectors were dried out and cracked. At the time I just gooped them up with dielectric grease. I have since purchased replacement connectors and with redoing the light buckets and all, now is a good time to fix it. The fist picture is what they looked like when I took them apart this time. I replaced them all on both sides.
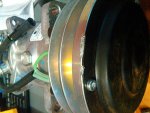
wires1.jpg


What they look like now.

wires2.jpg
 

Action

Well-known member
3,576
1,557
113
Location
East Tennessee
Continuing the radiator removal, I found the metal lower radiator hose/connector in somewhat rusty condition. While I have it apart i'll replace that. Overall everything looked good. The belts are a little stiff but not cracking, i'll probably replace them while I'm right here.


After getting it apart and the belts off, I see the clutch doesn't line up with the bolts and it doesn't move. Anyone have any tricks to rotating the clutch to line up the bolts? I have an idea but why reinvent the wheel if there is already a way.
About 90 psi of air will free up the clutch.
i have used 1/4" quick disconnect fittings for the air,
 

springer1981

Well-known member
844
1,150
93
Location
Maine
About 90 psi of air will free up the clutch.
i have used 1/4" quick disconnect fittings for the air,
Well that didn't work. 90-120 psi did not release the clutch. Any other suggestions?

What are the 6 little screws on the back side that remove towards the pulley?
 

Milcommoguy

Well-known member
Supporting Vendor
1,708
2,261
113
Location
Rosamond, CA
Well that didn't work. 90-120 psi did not release the clutch. Any other suggestions?

What are the 6 little screws on the back side that remove towards the pulley?
Clutch materiel retainer ring screws.

And if 90 PSI didn't free it... Something is ??? Frees the fan from the pulley. Hub free floats.

Maybe wasn't working, CAMO
 

springer1981

Well-known member
844
1,150
93
Location
Maine
Had a delivery today. Still have to figure out how to get the fan clutch off before I start messing with the rest of the AC. That's a project for tomorrow.

AC.jpg
 

springer1981

Well-known member
844
1,150
93
Location
Maine
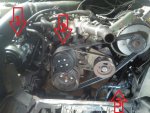
2 steps forward and 2 steps back. Got the clutch off, destroyed it doing it. Replaced the water pump pulley with a 5 groove (arrow 2). All new belts, it needed them. Got the AC Compressor mounted (arrow 1) and found a flat spot on the pulley. Turns out it was dropped at some point prior to shipping to me. The shaft is bent and the pulley wobbles. Contacted the seller we'll see how that goes.

After inspecting the coolant lines, looks like now is a good time to replace them. Good preventive maintenance.

When I mounted the winch I didn't hook up the hydraulic lines since I couldn't easily get to them. Today I managed to get that done (arrow 3). I still have to wire it but that will be pretty easy now.

Belts.jpg
 

springer1981

Well-known member
844
1,150
93
Location
Maine
Buttoned up the tail lights and rear side markers today.

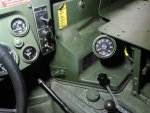
Painted and mounted a tach. I looked at numerous locations for mounting. I decided I like a lower mount rather than off the top of the windshield.

tach.jpg
 

springer1981

Well-known member
844
1,150
93
Location
Maine
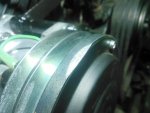
Update on AC compressor. I bought a Red Dot (Sanden) AC compressor on epay. "New" in the box surplus. It had a clear dent on the pulley from an obvious drop. I didn't notice it until after I mounted the compressor and spun the pulley. I contacted the seller and explained the issue and he asked if I could remove the pulley and check it, so I did. I found more damage on the compressor where a cir-clip lip had also been broken. It was damaged beyond repair. I sent pictures and the seller agreed to ship another pulley. I suspect he was thinking I was trying to scam him since the next day he asked for a picture of it all apart. I had already put it back together so I had to take it apart again.

AC2.jpg


AC3.jpg

AC4.jpg
 

springer1981

Well-known member
844
1,150
93
Location
Maine
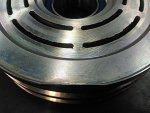
The seller sent me a "New" compressor. This time as soon as I received it I opened the box and checked. Much to my disappointment it too was damaged and had a bent pulley!!! I took a picture and sent it immediately and in my haste I texted him asking if he had bought a bunch of junk surplus parts. I also took a video and sent it and then called the guy. Turns out I was right, he bought the compressors on GovPlanet. I told him this compressor had the same issue as the other one. He said he checked it and saw the nick but it felt OK. I now realize he doesn't know what to the check for or how it is a problem. He agreed to send me a 3rd compressor and I stopped him and told him I would take it apart and access the damage and see if I can fix the pulley.

I took it apart and the pulley was not nearly as bad as the first one. The cir-clip lip wasn't broken either. Using the parts from the first compressor I made fixture to hold the pulley and then straightened it. Testing with the pulley from the first compressor to make sure it would work and it did. However that pulley is just too far gone. Took the second pulley and straightened it and it come out great. It is out by .010" but you can't tell without a dial indicator.

Picture of damaged second compressor

AC5.jpg
 
Top
AdBlock Detected

We get it, advertisements are annoying!

Sure, ad-blocking software does a great job at blocking ads, but it also blocks useful features of our website like our supporting vendors. Their ads help keep Steel Soldiers going. Please consider disabling your ad blockers for the site. Thanks!

I've Disabled AdBlock
No Thanks