• Steel Soldiers now has a few new forums, read more about it at: New Munitions Forums!

  • Microsoft MSN, Live, Hotmail, Outlook email users may not be receiving emails. We are working to resolve this issue. Please add support@steelsoldiers.com to your trusted contacts.

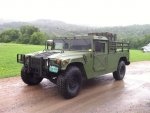
My new 1992 M998 Avenger

Retiredwarhorses

Well-known member
Steel Soldiers Supporter
4,414
4,207
113
Location
Brentwood, Calif
Since there doesn't seem to be much interest in this thread it will probably be my last update.

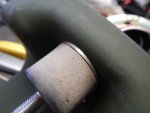
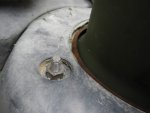
I mentioned in a previous post that I purchased some visors and they wouldn't fit because of the extra hard top brackets. Today I started looking at how to mount them. It actually was pretty easy, I used one of the existing bolts for the hardtop mount. I will still have to make some small spacers but that is easy. I used washers for now. That ties up this loose end.

View attachment 756630 View attachment 756631

not sure what interest you want in your thread...people post to share there experience and show off the work and transformation of a build. So far this thread is 4 pages...
 

nattieleather

Well-known member
1,883
145
63
Location
Cleveland, OH
I'm enjoying your posts and following along on what you are doing with your truck. I may not be saying hey good job after every post, but hey good job keep it up and keep the pictures coming.
 

D6T

Well-known member
228
532
93
Location
Vermont
Since there doesn't seem to be much interest in this thread it will probably be my last update.

I mentioned in a previous post that I purchased some visors and they wouldn't fit because of the extra hard top brackets. Today I started looking at how to mount them. It actually was pretty easy, I used one of the existing bolts for the hardtop mount. I will still have to make some small spacers but that is easy. I used washers for now. That ties up this loose end.
Be assured that there's interest in your journey! At least myself and Evil Dr. Porkchop I bet :)
 

springer1981

Well-known member
844
1,150
93
Location
Maine
not sure what interest you want in your thread...people post to share there experience and show off the work and transformation of a build. So far this thread is 4 pages...
Well I'm not looking for vindication of what I have done but I have been the only who has posted to the thread in 3 weeks, with zero responses. I though some of it might be helpful or useful information, maybe inspire some feedback. It seemed like there wasn't any interest and I'm not posting so I can read it, I've already done it LOL.
 

TOBASH

Father, Surgeon, Cantankerous Grouch
Steel Soldiers Supporter
Supporting Vendor
3,596
3,518
113
Location
Brooklyn, NY
Well I'm not looking for vindication of what I have done but I have been the only who has posted to the thread in 3 weeks, with zero responses. I though some of it might be helpful or useful information, maybe inspire some feedback. It seemed like there wasn't any interest and I'm not posting so I can read it, I've already done it LOL.
I have a PCB thread I'm about to update. It is an FYI. People are free to post but they don't need to.

Juan Prado has a thread following his journeys and trials and tribulations with his M998 soft top in LA. Same thing.

I think your vehicle is pretty awesome, but if I have nothing to add I will read without posting. Sometimes it is as simple as a "thanks" thumbs up click on the lower left of the post.

Just because people don't post doesn't mean we have not been reading and keeping up. It just might mean that we enjoyed what we read and then had nothing of value to add.

Of course I would like you to post more, but don't just post 'cause you want an "ataboy" Post because you enjoy contributing and because you have a seriously interesting HMMWV.

Best,

T
 
Last edited:

NDT

Well-known member
Steel Soldiers Supporter
10,498
6,630
113
Location
Camp Wood/LC, TX
Dude 1442 people have viewed your thread, I would call that interest. Just because people have not chimed in don't mean a whole lot. I was GOING to post that those headlights kinda burn out alot, but did not want to rain on your parade.
 

springer1981

Well-known member
844
1,150
93
Location
Maine
Well that would be helpful feedback. How much is a lot? I don't expect to be putting a lot of miles/time on the truck and probably less at night in general. I'm hoping it will be a good plow truck and that will likely use plow lights when I plow at night. Are they a quick high failure rate? Any known reason for failure, vibration, overheat, LED issues?

At the very least my old original buckets were pretty much shot and would need replacing anyway. I might have to do bulbs then sometime.
 

Evil Dr. Porkchop

Well-known member
Supporting Vendor
1,964
295
83
Location
Colchester, VT
It should make a pretty good plow truck. The Army tested HMMWVs with 9 foot Fisher plows here in VT with good results. A friend drove one and said it did really well.

Here's a pic of your truck at the VT show a few years back.
IMG_2697.jpg
 

DREDnot

Well-known member
725
445
63
Location
Phoenix, AZ
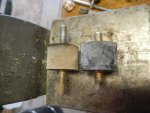
In a prior post I mentioned that I replaced my headlights with OEM Military LED Trucklights. When I mounted them the studs were too short. There are 2 reasons for this. The first is simply the stud length is shorter than the original standard headlights. Also the housing design has a slightly different radius and I found that was hitting the headlight bucket on the hood. These two things compounded the problem. I took some picture to help explain the issue.
View attachment 756392
I wouldn't mount these headlights without changing the rubber isolation mounts.
Reading this made me revisit my Short stud issue with my Trucklite LEDs. I dug out my old headlight buckets and harvested the isolators. I will move the beast outside in the morning to see if I can effect an isolator transplant.
 

springer1981

Well-known member
844
1,150
93
Location
Maine
It should make a pretty good plow truck. The Army tested HMMWVs with 9 foot Fisher plows here in VT with good results. A friend drove one and said it did really well.

Here's a pic of your truck at the VT show a few years back.
View attachment 756679
Cool, Mounted my plate in the same location. I'd like to find some original plow push plate but they are probably impossible to find. I'll end up making my own.
 

springer1981

Well-known member
844
1,150
93
Location
Maine
Reading this made me revisit my Short stud issue with my Trucklite LEDs. I dug out my old headlight buckets and harvested the isolators. I will move the beast outside in the morning to see if I can effect an isolator transplant.
Before you pull them out (or even after they are changed) grab them firmly from the front and see if you have any movement in them. With the rubber mounts it should have some flex. If it seems rock solid then the bucket is tight to the hood and you should really have longer isolation mounts. I'm interest in the results.
 

D6T

Well-known member
228
532
93
Location
Vermont
There were plow frames for the HMMWV at Camp Ethan Allen Training Site (CEATS) in Jericho, VT, a few years ago. I believe they were made by Iroquois Manufacturing in Hinesburg, VT. Iroquois is a dealer for Fisher and I wouldn’t be surprised if they or Fisher could assist.

I’m actually meeting with a supply officer from that post sometime this week for business purposes, and can see what I can learn from him.
 

springer1981

Well-known member
844
1,150
93
Location
Maine
There were plow frames for the HMMWV at Camp Ethan Allen Training Site (CEATS) in Jericho, VT, a few years ago. I believe they were made by Iroquois Manufacturing in Hinesburg, VT. Iroquois is a dealer for Fisher and I wouldn’t be surprised if they or Fisher could assist.

I’m actually meeting with a supply officer from that post sometime this week for business purposes, and can see what I can learn from him.
Wow that would be great. I wonder what they did for the light control? Also wonder if they change the motor on the hydraulics for 24v?
 

DREDnot

Well-known member
725
445
63
Location
Phoenix, AZ
Before you pull them out (or even after they are changed) grab them firmly from the front and see if you have any movement in them. With the rubber mounts it should have some flex. If it seems rock solid then the bucket is tight to the hood and you should really have longer isolation mounts. I'm interest in the results.
They had minimal movement. They weren't touching, but real close.
I swapped out the new short for the original long stud isolators.

DSCN8456.jpg

I installed the old washers behind the isolators to give them a smidge more clearance

DSCN8465.jpg

Way better thread engagement and housing clearance now. Thanks for the inspiration.

DSCN8466.jpg
 

D6T

Well-known member
228
532
93
Location
Vermont
Wow that would be great. I wonder what they did for the light control? Also wonder if they change the motor on the hydraulics for 24v?
I have just spoken with the aforementioned gentleman. He said there are two operational existing HMMWV Fisher plows that he knows of, one at CEATS and one at the Williston Army National Guard armory. He said that one can probably go down to the armory and view it from the fenceline, or possibly ask the unit armorer or a recruiter if you want a closer look. He does not know if there were any more and if there were how they were disposed of. He remarked that almost anything that is at all vehicle-related, from tires to Conex boxes, goes through the typical vehicle surplus auction websites.
 

springer1981

Well-known member
844
1,150
93
Location
Maine
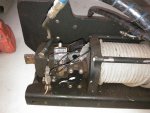
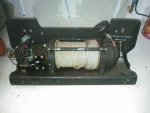
About a month ago I picked up a Mile Marker 10,500 winch. At some point the solenoid valve got damaged and the solenoids coils were broken off. The guy said he had a new valve to fix it and it came with the winch. The winch itself looks like it has never had the cable spooled out but was obviously installed before. He wanted too much considering the unknown extent of the damage. We came to terms and I bought it. My mistake was not looking closely at the replacement valve. Turns out it too had taken a hit and was bent. I suspect due to the location of the valve this is a common issue.

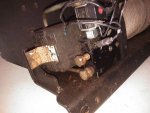
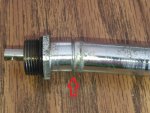
I took the replacement valve apart today to see if I could fix it. Here is a picture of where it is bent. There arrow point to where there is a groove and a weak point. There is a plunger inside that is operated by the solenoid coils.
valve1.jpg

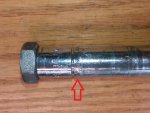
Here is a picture of the other end. In this picture is shows the original weld next to the groove. I believe this part is assembled in 3 pieces and the center tube holds the plunger captive.
valve2.jpg

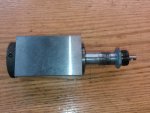
I put the part in an arbor press to try to carefully straighten it. I didn't expect it to work and it didn't. It broke the tube at the groove next to the weld. The tube had fluid from the power steering still in it. I cleaned it out with alcohol and blew dry with an air hose. Then I chucked it up in a 5C collet holder to weld it.
valve3.jpg

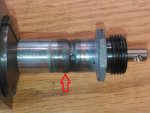
Here is a picture of the welded part. I didn't add any rod to it since I didn't know what exactly the metal is. The arrow points to the original weld. I was able to flow it to the other side of the groove and seal up the crack from straightening it.
valve4.jpg

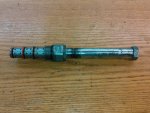
Here is the completed and reassembled part. The plunger moves freely inside the tube. The valve moved freely now that it is reassembled. I need to reinstall the solenoid coils and replace it on the winch. I'll do that tomorrow and get a picture of the finished assembly.
valve5.jpg
 

TOBASH

Father, Surgeon, Cantankerous Grouch
Steel Soldiers Supporter
Supporting Vendor
3,596
3,518
113
Location
Brooklyn, NY
Nice work. I might have used a torch to warm the unit PRIOR to straightening in the arbor press.

Still, terrific result.
 
Last edited:

springer1981

Well-known member
844
1,150
93
Location
Maine
Today I replaced the damaged valve on the winch. Here is the damaged valve.
valve6.jpg

After install
winch1.jpg

Whoever the hacks were that removed the winch bent the lines during the removal. The winch came with the missing line but I determined today the replacement line that came with it is the same as the one on it. And is bent in the same way. So I am missing a line still. It also show they used no care in parting out the vehicles. I suspect they are the ones that destroyed the original valve also.

winchline.jpg
 

springer1981

Well-known member
844
1,150
93
Location
Maine
I've been paying attention to the threads about glow plugs and controllers as well as engine threads. I have been thinking about what I would like to do with my Humvee. I have a truck with a low mileage Duramax that I have considered for a donor in a conversion but I really don't like the thought of a body lift. I like the height of the truck as it is now.

I thought about a GEP engine but the Duramax is readily available to me so there's that. Today I decided to inventory my truck so I know exactly what I am working with to start.

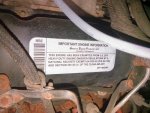
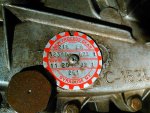
My truck being 1992 with a GM 6.5 3sp that I thought was stock. I guess I never really looked at it closely enough. Here is what I found.
gep.jpg

I've seen the tag a hundred times but never really read it. Looks like I have a 6.5 GEP. That changes things considerably. I also have the TH400 and NP 218 AM
tctag.jpg

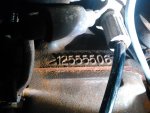
Here are the block casting numbers if anyone can further identify the engine year etc.
block.jpg block1.jpg

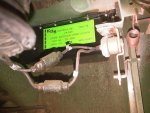
I also checked the glow plug controller. It looks relatively new and functions perfectly however it isn't the best model.
kds.jpg
 
Last edited:

springer1981

Well-known member
844
1,150
93
Location
Maine
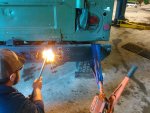
This weekend it was time to address some of the abuses done over the last 27 years to the truck. My front brush guard had a little tweak on the passengers side and although hardly noticeable it bothered me. We put a torch to it and pry bar and now it looks good as new. It took maybe 5 minutes. The rear bumper also had a tweak to it as well. However the rear bumper is a little more stout than the brush guard.

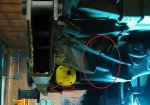
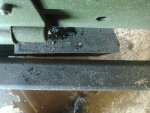
I tried to capture the bend in the rear bumper. Someone obviously backed into something pretty solid. The bumper was bent at the frame so the passenger side end was about 1.5" in too far. It also buckled the bumper support bracket. Note the original support brackets are made of Aluminum and the replacement brackets are steel. I choose to replace both sides with the steel brackets since I was in there fixing one anyway.
bend.jpg

We unbolted the support and shackle and blocked the wheels. Put a strap on the end of the bumper and used a come-a-long to apply pressure. Then heated it with a torch. In an effort to save time we heated the face of the bumper. It would have been better to heat the back side but the frame and brackets were in the way.
bend1.jpg

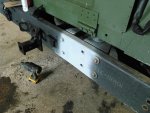
After straightening the bumper you can see how much it moved the brackets in on the frame. I was concerned the brackets may not come out enough however they straightened themselves out once we bolted them back up. Looked as good as new.
bend2.jpg

Touched up the paint and started bolting it back together.
bend3.jpg

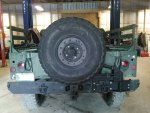
After fixing the bumper we attached a Rhino spare tire mount. I looked at all the different options available and for the money the original mount was the best one in my opinion and didn't cost any more than aftermarket mount that don't do as much. This one has the ratcheting lift to easy lifting and lowering the 150lb tire. note, I did touch up the bolts with black paint.

spare.jpg
 
Last edited:
Top
AdBlock Detected

We get it, advertisements are annoying!

Sure, ad-blocking software does a great job at blocking ads, but it also blocks useful features of our website like our supporting vendors. Their ads help keep Steel Soldiers going. Please consider disabling your ad blockers for the site. Thanks!

I've Disabled AdBlock
No Thanks