• Steel Soldiers now has a few new forums, read more about it at: New Munitions Forums!

  • Microsoft MSN, Live, Hotmail, Outlook email users may not be receiving emails. We are working to resolve this issue. Please add support@steelsoldiers.com to your trusted contacts.

Operation: Ethel. Kendelrios M37 (re)build thread

kendelrio

Well-known member
Steel Soldiers Supporter
2,677
8,647
113
Location
Alexandria, La
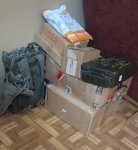
Loaded and ready for the blasting on Monday. Kept the running gear in as they said they can blast that too. While putting it together gonna regrease/clean everything again and gonna bag up the intake and winch and remove the alternator this weekend.

Then hopefully Tuesday gonna start priming.

20220916_173133.jpg
 

kendelrio

Well-known member
Steel Soldiers Supporter
2,677
8,647
113
Location
Alexandria, La
This past Thursday was "try to fire" day. Good hot batteries, a little ether and we tried.

One cylinder fired. Pulled the plugs to check compression and cylinder 3 was the only one showing us love.

Generous amount of Marvel into the cylinders and let it set over night.

Friday, after several calls to members to make sure I was doing the right thing, I found put about the plates on the side I can pull to look at the valves.
20221027_153919.jpg
After trying several methods to free the valves, no love.

Monday I'll be pulling the head to go ahead and clean them up.

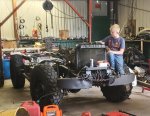
I had a great helper too!

20221028_111907.jpg

20221028_124520.jpg
 

kendelrio

Well-known member
Steel Soldiers Supporter
2,677
8,647
113
Location
Alexandria, La
Whew... where have I been?

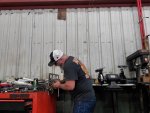
I've been busy as all get out working on the old girl. I would drop my kid at school, go to the shop and work until he got out of school, go home, shower, eat and crash then do it again.

Here's the big update, it may take several posts...

Honestly the timeline is goofed in my head so, I'll upload pics etc and let you know what I did.

Came back Monday and still no compression, so off came the head.
20221031_091506.jpg

After checking it for straighteness, a new head gasket was ordered and we got to work on checking the pistons:

"Testing the pistons and valves"

and saw that several valves were stuck, so after an hour of gapping and tapping

"Gapping and tapping results"

we had good movement on the valves.

After that, it was a matter of cleaning up the head:

20221102_093753.jpg

20221102_120917.jpg

20221102_122241.jpg

20221102_122904.jpg

20221102_124922.jpg

A coat of 2,000° primer later:

20221102_140330.jpg

Then installation:

20221102_141451.jpg

20221102_150937.jpg

More to come
 

kendelrio

Well-known member
Steel Soldiers Supporter
2,677
8,647
113
Location
Alexandria, La
While waiting for the head gasket, I went ahead and prepped the fuel tank/removed the old sending unit and pickup (they were showing every day of their age).

20221101_132326.jpg

20221101_141718.jpg

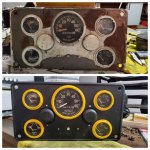
and used the gauge cluster @harptheblues was kind enough to pay forward and went ahead and prepped and prepared the instrument panel.

20221101_101227.jpg

20221104_194159.jpg

I also sand blasted, wire wheeled and primed more stuff than I can describe.

As my days home were winding up and I was waiting for more parts to arrive, I decided to start stripping the donor cab and getting it ready for prep:


received_804492790627866.jpeg

So, next time home is pulling the engine, cleaning and painting it, checking timing etc then we start reassembly!
 

Guyfang

Moderator
Staff member
Moderator
16,690
23,888
113
Location
Burgkunstadt, Germany
Whew... where have I been?

I've been busy as all get out working on the old girl. I would drop my kid at school, go to the shop and work until he got out of school, go home, shower, eat and crash then do it again.

Here's the big update, it may take several posts...

Honestly the timeline is goofed in my head so, I'll upload pics etc and let you know what I did.

Came back Monday and still no compression, so off came the head.
View attachment 884026

After checking it for straighteness, a new head gasket was ordered and we got to work on checking the pistons:

"Testing the pistons and valves"

and saw that several valves were stuck, so after an hour of gapping and tapping

"Gapping and tapping results"

we had good movement on the valves.

After that, it was a matter of cleaning up the head:

View attachment 884027

View attachment 884028

View attachment 884029

View attachment 884030

View attachment 884031

A coat of 2,000° primer later:

View attachment 884032

Then installation:

View attachment 884033

View attachment 884035

More to come
And here I thought you had been tossed in the slammer.

Fine looking work Ken!! Fine.
 

GopherHill

Well-known member
474
1,250
93
Location
Thomaston, TX
Whew... where have I been?

I've been busy as all get out working on the old girl. I would drop my kid at school, go to the shop and work until he got out of school, go home, shower, eat and crash then do it again.

Here's the big update, it may take several posts...

Honestly the timeline is goofed in my head so, I'll upload pics etc and let you know what I did.

Came back Monday and still no compression, so off came the head.
View attachment 884026

After checking it for straighteness, a new head gasket was ordered and we got to work on checking the pistons:

"Testing the pistons and valves"

and saw that several valves were stuck, so after an hour of gapping and tapping

"Gapping and tapping results"

we had good movement on the valves.

After that, it was a matter of cleaning up the head:

View attachment 884027

View attachment 884028

View attachment 884029

View attachment 884030

View attachment 884031

A coat of 2,000° primer later:

View attachment 884032

Then installation:

View attachment 884033

View attachment 884035

More to come
Don't forget to check water distribution tube behind the water pump.
 
Top