- 568
- 1,376
- 93
- Location
- AL
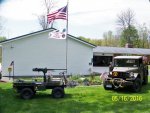
I like the 1954 Chevy Bel Air in the background! Another project of yours? If not, it should be.
Steel Soldiers now has a few new forums, read more about it at: New Munitions Forums!

That's my buddies project. He's gonna LS swap it.I like the 1954 Chevy Bel Air in the background! Another project of yours? If not, it should be.


And here I thought you had been tossed in the slammer.Whew... where have I been?
I've been busy as all get out working on the old girl. I would drop my kid at school, go to the shop and work until he got out of school, go home, shower, eat and crash then do it again.
Here's the big update, it may take several posts...
Honestly the timeline is goofed in my head so, I'll upload pics etc and let you know what I did.
Came back Monday and still no compression, so off came the head.
View attachment 884026
After checking it for straighteness, a new head gasket was ordered and we got to work on checking the pistons:
"Testing the pistons and valves"
and saw that several valves were stuck, so after an hour of gapping and tapping
"Gapping and tapping results"
we had good movement on the valves.
After that, it was a matter of cleaning up the head:
View attachment 884027
View attachment 884028
View attachment 884029
View attachment 884030
View attachment 884031
A coat of 2,000° primer later:
View attachment 884032
Then installation:
View attachment 884033
View attachment 884035
More to come
Don't forget to check water distribution tube behind the water pump.Whew... where have I been?
I've been busy as all get out working on the old girl. I would drop my kid at school, go to the shop and work until he got out of school, go home, shower, eat and crash then do it again.
Here's the big update, it may take several posts...
Honestly the timeline is goofed in my head so, I'll upload pics etc and let you know what I did.
Came back Monday and still no compression, so off came the head.
View attachment 884026
After checking it for straighteness, a new head gasket was ordered and we got to work on checking the pistons:
"Testing the pistons and valves"
and saw that several valves were stuck, so after an hour of gapping and tapping
"Gapping and tapping results"
we had good movement on the valves.
After that, it was a matter of cleaning up the head:
View attachment 884027
View attachment 884028
View attachment 884029
View attachment 884030
View attachment 884031
A coat of 2,000° primer later:
View attachment 884032
Then installation:
View attachment 884033
View attachment 884035
More to come
Thank you. All of that is getting pulled when I get home and cleaned.Don't forget to check water distribution tube behind the water pump.


