• Steel Soldiers now has a few new forums, read more about it at: New Munitions Forums!

  • Microsoft MSN, Live, Hotmail, Outlook email users may not be receiving emails. We are working to resolve this issue. Please add support@steelsoldiers.com to your trusted contacts.

Operation Mighty Mite Miracle

ODFever

Madness Takes Its Toll...
Steel Soldiers Supporter
2,011
73
48
Location
Orlando, FL
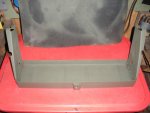
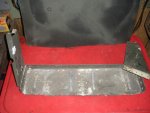
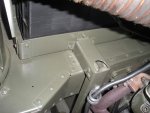
Doc worked on her all day yesterday. Someone hacked the battery box up badly. They torched off the front bracket so they could squeeze in oversized batteries. Doc removed the box and cleaned off the edge that was wrecked by the torch. He fabricated the angle aluminum bracket purchased from Skycraft into the front edge of the box. He cut out a section on the front edge for the battery hold down, riveted on a small piece, and drilled out the teardrop bolt holder. He custom built a new piece that holds the battery box to the body.

The picture titled batt_box_compare.jpg is a shot of Doc's M422. He used his Mite's battery box as a template to build the parts for mine.
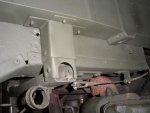
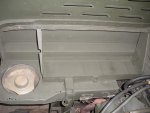
new_bracket.jpgfinished_box_installed.jpgfinished_batt_box.jpgBatt_box_removed.jpgbatt_box_compare.jpg

Doc's fabrication skills are truly amazing. I think the finished box looks like he ordered and installed a NOS part. He told me last night that there is no way to order a replacement because they don't exist. Nearly every Mite box was hacked to allow for larger batteries.
 

Another Ahab

Well-known member
18,007
4,582
113
Location
Alexandria, VA
Doc worked on her all day yesterday.

View attachment 636823View attachment 636824

Doc's fabrication skills are truly amazing. I think the finished box looks like he ordered and installed a NOS part. He told me last night that there is no way to order a replacement because they don't exist. Nearly every Mite box was hacked to allow for larger batteries.
Take a bow, Mr. Doc, because those before-and-after shots make it clear how you are a genius of your art. That's pretty right there.
And OD, you're a genius for knowing how to choose your talent. This is a real nice project. :jumpin:
 

ODFever

Madness Takes Its Toll...
Steel Soldiers Supporter
2,011
73
48
Location
Orlando, FL
All I did was drop the Mite off at Doc's house. He deserves ALL of the credit. I'm well versed with computers. I felt it necessary to share the progress with the world because of how rare Mighty Mites are.


One other thing - the spark plugs I ordered from Amazon are correct for a Mite. :) Hopefully this information will help a fellow Mite owner.
 

Another Ahab

Well-known member
18,007
4,582
113
Location
Alexandria, VA
All I did was drop the Mite off at Doc's house. He deserves ALL of the credit. I'm well versed with computers. I felt it necessary to share the progress with the world because of how rare Mighty Mites are.
But that's the key to your genius right there; you knew WHICH house to drop it off at.


house.jpg
 

ODFever

Madness Takes Its Toll...
Steel Soldiers Supporter
2,011
73
48
Location
Orlando, FL
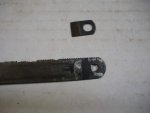
From Doc:


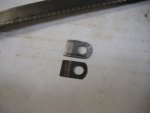
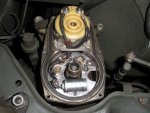
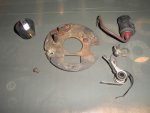
What to do about a broken distributor plate clip. I needed spring steel. Looks close to a hacksaw blade. Works perfect.

DSCN1777.jpgDSCN1778.jpg
 

ODFever

Madness Takes Its Toll...
Steel Soldiers Supporter
2,011
73
48
Location
Orlando, FL
He used a Dremel. He doesn't own a plasma cutter.


Sent from my iPhone using Tapatalk
 

Tracer

Well-known member
Steel Soldiers Supporter
6,649
14,179
113
Location
Hawthorne, NV.
Take a bow, Mr. Doc, because those before-and-after shots make it clear how you are a genius of your art. That's pretty right there.
And OD, you're a genius for knowing how to choose your talent. This is a real nice project. :jumpin:

:ditto: Looking Good!
 

ODFever

Madness Takes Its Toll...
Steel Soldiers Supporter
2,011
73
48
Location
Orlando, FL
Thanks, guys. I let Doc know that his master craftsmanship is appreciated by me and a few Steel Soldiers members. He's thankful that I'm documenting the progress. I REALLY wish I could be there to help out. I may just have to run away from home for a weekend sometime soon to help him out. I want to learn more about my wife's Mite.

Anyways, here's the latest from Doc:

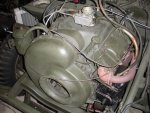
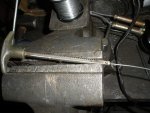
I installed the upper gas line. I bent new lines and kept the rubber hose to a minimum length. I was in town and bought the rotor button and some more hose. The second photo is of the fan put back together and all pull cables installed and working. The loose cable in the front is for the shutter and will go on with the front clip.
 

Attachments

ODFever

Madness Takes Its Toll...
Steel Soldiers Supporter
2,011
73
48
Location
Orlando, FL
More from Doc:

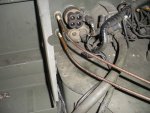
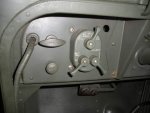
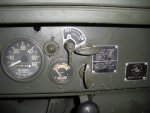
I got all 4 cables in good shape. Didn't think that I could do it. no, I lied. I knew i could do it. Pictured is the shutter handle. It had no cable wire in the housing. I robbed a cable wire from a generic choke cable, peened and soldered. The Fording cable was just frozen. A good soaking loosened it up. I had to beat the dents out of the dashboard so the cables would sit flat. Had to do some work on the ignition switch. At one point someone had drilled out the dash hole too big. What a Dash Hole!!

DSCN1789.jpgDSCN1790.jpg
 
Last edited:

ODFever

Madness Takes Its Toll...
Steel Soldiers Supporter
2,011
73
48
Location
Orlando, FL
More from Doc:

Knobs and cables as they are supposed to be. New choke cable in correct spot. Tight ignition switch.
DSCN1792.jpgDSCN1791.jpg
 

ODFever

Madness Takes Its Toll...
Steel Soldiers Supporter
2,011
73
48
Location
Orlando, FL
More from Doc:

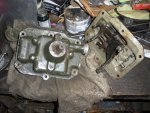
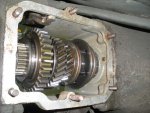
I had to hot wrench that center stud on the bottom of the photo to get it out. Just too worn out. It only had 5 nuts holding it on. It would have been okay but since I was this close I figured I'd change it out. Time to get a new one. The gears look good.


That extra transmission top that you had came in handy. It was rusty and stuck, but I soaked and oiled it. I'm taking the best parts and making it work. I had to torch a pin out to get the tip off. It's tough working in a tunnel.

DSCN1802 (1).jpgDSCN1801 (1).jpg
 
Last edited:

ODFever

Madness Takes Its Toll...
Steel Soldiers Supporter
2,011
73
48
Location
Orlando, FL
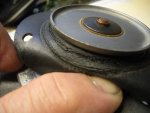
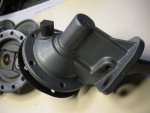
Doc disassembled the fuel pump and although it was clean, the diaphragm was all cracked and the springs in the valves were weak. Gonna need a new rebuild kit for this. :-(

DSCN1804.jpgDSCN1806.jpg


Last edited:

ODFever

Madness Takes Its Toll...
Steel Soldiers Supporter
2,011
73
48
Location
Orlando, FL
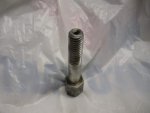
Hollow bolts on the valve cover for vacuum for wipers and distributor cooling. One for the distributor was clogged up. Doc had to drill it back out. Probably overlooked by some Mite owners.

DSCN1807.jpgDSCN1808.jpg
 

ODFever

Madness Takes Its Toll...
Steel Soldiers Supporter
2,011
73
48
Location
Orlando, FL
I just got off the phone with Then and Now Automotive. http://then-now-auto.com/
Ted was great. He told me that they build the fuel pump rebuild kits in house, and they are ethanol fuel tolerant to 20%!!! :shock: :) The cost of the kit is $47.50 + $8.50 shipping. I'm so thankful that they still make fuel pump rebuild kits for the Mite.
:jumpin:
 
Top
AdBlock Detected

We get it, advertisements are annoying!

Sure, ad-blocking software does a great job at blocking ads, but it also blocks useful features of our website like our supporting vendors. Their ads help keep Steel Soldiers going. Please consider disabling your ad blockers for the site. Thanks!

I've Disabled AdBlock
No Thanks