• Steel Soldiers now has a few new forums, read more about it at: New Munitions Forums!

  • Microsoft MSN, Live, Hotmail, Outlook email users may not be receiving emails. We are working to resolve this issue. Please add support@steelsoldiers.com to your trusted contacts.

optimizer long block - hummer 24V or cucv 24v

Barrman

Well-known member
5,277
1,805
113
Location
Giddings, Texas
I went the serpentine belt route Rich. There were two basic systems from the factory. 1996 or so is when they switched. The water pump plate you got from me is for the V belts. You need the serpentine back plate if you go that way.

Basically, the single thermostat set up had the alternator on the drivers side with the power steering pump and everything else on the passenger side. I have read they had a second alternator bracket for this set up, but I have never seen the parts. I would like to find them for my Cowdog project.

The dual thermostat cross over had the power steering and a/c compressor on the drivers side. The ambulance 2nd alternator option bolted onto the a/c mount. The dual thermostat set up does not allow for the throttle cable bracket/fast idle solenoid bracket you have now. You can make the throttle cable work, but not the fast idle solenoid.

The compressor that goes with the dual thermostat set up is the one GM had on most 2000 and newer vehicles. The one that flexes and leaks in the middle of the housing. Sanden makes a drop in replacement that is supposed to be great.

Going dual air means hose issues. Unless you plan to run two compressors with two condensors? I managed to make a stock dual a/c GM hose set up bolt to a Sanden 506 compressor. That was using GM evaporators.
 

richingalveston

Well-known member
1,715
120
63
Location
galveston/Texas
6.5 gep J-code progress - elbow for turbo on banks manifold

I have decided to go back with all the cucv belt system. need to get moving on the truck and I have all the parts for the cucv system.

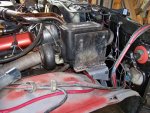
I have made some progress, I was able to get the motor back in the truck. I am almost ready for the exhaust shop. I am using Cucv drivers manifold and banks passenger manifold. I had to manufacture an elbow for the turbo. The turbo I have is to large to fit where the banks was.The banks 6.2 turbo is really small and compact.
I like the way it turned out. plenty of room to run the exhaust. The cross over will come across the front. There is enough room to get it above the ord cross member and below the ord motor mount, next to the oil pan. I am not sure it would work with stock parts. It will cross over under the harmonic balancer. You will still be able to get to all of the oil pan bolts.

I was able to make the elbow from scrap. I need to figure out a way to test it for holes, I may just have to run it a little bit and then pull it off and check it out for touch ups. it is easy to get to. The banks t-3 was not the exact same t-3 on the turbo and both the manifold and turbo required studs with nuts so there was no good way to bolt them together. I did a lot of searching on the internet and found nothing that I could purchase. Building my own allowed me to set things where I needed them.

now I can have an exhaust shop build the cross over.

will update as work happens.
Rich
 

Attachments

richingalveston

Well-known member
1,715
120
63
Location
galveston/Texas
The placement of all the items worked out really well. I did a little custom work to the stock egr bracket and was able to attach it to the back of the air filter. I am using the stock egr hose and with it much higher, the drain back to the motor should work better than stock. I also angled the airbox down so that any oil that enters will not puddle and cause large amounts to get to the turbo at one time. If it gets to the air box, it will quickly go through the turbo.

I like the air filter in this location, once I get the snorkel done, the connection to it will be short. I plan to mount the front core support and radiator next. I have coolers to plumb: tranny, oil, and hydro.

It is also time to start shopping the exhaust shops in my area. I need the cross over done so I can get the motor running and checked out before getting the fenders and hood back on it.
 

Barrman

Well-known member
5,277
1,805
113
Location
Giddings, Texas
There used to be an exhaust shop at the point where College and Texas almost meet, on College. I haven't even driven by there in years so they could be gone. They had a pit in the floor and were great at fabbing up anything for a good price.


Your airbox should have a little bitty drain hole in the bottom of the casting too. Mine does.
 

richingalveston

Well-known member
1,715
120
63
Location
galveston/Texas
mine does not have a drain hole that I have found, will look closer, it has a slit (looks like hack saw blade) right at the bottom of where the 4 inch hose connects. It is after the hose connection so I am not sure why it is there, may have been done by previous owner. my parts are used. When I get it connected to the snorkel, I am going to JB weld the cut and hole if it is there.

Does your air box have a gasket on the lid? my does not, trying to determine if there is one to get or if I should just rtv the lid. A Gasket would be nice, rtv will be a pain to use every time I want to check air filter.

is the hole in the bottom after or before the air filter. if after, it seams like a dirty filter would cause the hole to start sucking air and not drain anything. I will look closer at mine this weekend when I get home.

I will look around college station for exhaust shop but my truck is in Texas city so I am looking there first. I have to trailer it to the shop so It really does not mater where it is, I just one someone who does good work. I need it to be done right.
 

jake-cutter

Member
297
13
18
Location
League City, Texas
I have had good luck in the past with the Muffler shop on Hwy 3 just south on 518 in League City. Been several years, but they took care of me with my Jeep and a few hangers on other cars.

Been watching your thread as I need a 6.5 na and mechanic for my hmmwv.
 

richingalveston

Well-known member
1,715
120
63
Location
galveston/Texas
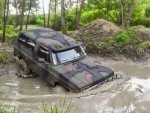
I am going to add a gasket just for extra effort. I never plan to run in water that will ever be as deep as my doors. The snorkel is to protect myself from that splash of water that gets to the intake and also for cleaner air when in trail rides. I wish they could make the pre-cleaners smaller I would rather have that than snorkel head.

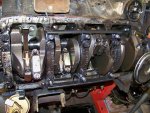
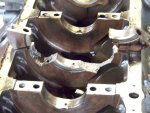
Camok5- what you are showing there is a stud girdle kit, yes it helps to keep the bottom end from breaking. The stronger engine blocks are from GEP they improved the webbing and also added some alloys to make the metal stronger. They were casted by Navistar which has a symbol that looks like two triangles back to back (<>). however GEP switched to Dalton recently, I have a brand new Dalton block and heads. If you have a GM 6.5 block, it is known to have problems and the stud girdle kit you have is a good thing to add. With the block I have I should not have to worry about it. My build is supposed to be around 250hp and 350 to 400 on torque. The motor can be built to put out more but it is not needed with this truck and the hotter you build the motor the less reliable it becomes so I am going for durability and only trying to get a little more power.

I have found the place on hwy 3. in Dickinson. Pro-exhaust. I talked with him on the phone and will be sending pictures to him on the cross over and probably put the truck on the trailer and stop by there next week. Has very good reviews on line hopefully it is the same shop.

thanks
Rich
 

richingalveston

Well-known member
1,715
120
63
Location
galveston/Texas
yes, I don't like the standard position of the banks air box. I was going to be in standard position until my larger turbo would not fit without inner fender work so I built the 90 and turned the turbo backwards.

I like the way it turned out with backwards turbo. It was not intentional but I really like the way my system is plumbed. I plan to run a snorkel out of the edge of the hood just on the inside of the hinge. I will build a doghouse on the hood where it exits that should resemble the old tach.s that stuck out of the hood. going through the fender the exit is to close to the front and to much of the pipe has to run down the side of the fender.

I like the visor you have on your 1009. I have a roof rack designed that I plan to build where I would like to incorporate a visor into the front of the roof rack or put a visor on before the roof rack. Curious to where you got your visor? Was that a US made visor or something you got over there?

Rich
 

camok5

New member
19
0
0
Location
France
The visor was on Ebay Germany so I can not tell if it's imported from the US.
It is fixed with 3 legs in aluminum and screwing from inside, the 2 extremities are screwed from the outside, I would make pictures ...

Standard position yes . It is my next project to change it or create another one with snorkel .....
100_2100.jpg
 

richingalveston

Well-known member
1,715
120
63
Location
galveston/Texas
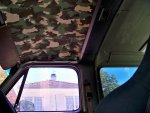
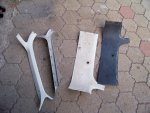
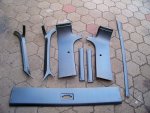
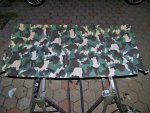
that is nice work on the interior. I am going to add the trim and headliner at some point. I like to make it quiet as I can. my floor and fire wall has 3 layers. I am looking for a good product (mostly for sound) to put on the exterior fire wall. I have been looking at aircraft insulation for that. some nice products out there, I have not settled on anything yet.

What I was planning on doing to my airbox in standard position was to put a gate valve on the existing 4 inch intake hole (like an rv sewer valve) and fabricate another 4 inch connection in the back going to a snorkel. That way if I was off road I could shut the valve and only use snorkel but on road I could get better airflow. Now that I have changed mine, I am going to do a 4 inch snorkel which will be about 4 to 5 ft of pipe at most. Until the snorkel gets done i plan to stay out of the water.
 

richingalveston

Well-known member
1,715
120
63
Location
galveston/Texas
I got some more work done. no exhaust work yet but hopefully coming soon. I am pretty much down to the exhaust work and a few things to re-do. I don't like my power steering coolers, going to get a different one that mounts better. the oil cooler is going to get flex lines to the T fittings that will be mounted on a plate attached to the bottom of the core support. The pipes don't really work well.
Installed the electric fuel pump, still have to tie the power wire in.
Installed deep tranny pan, tranny cooler. Every thing is plumbed except the radiator oil cooler. still looking for fittings.
Batteries are temp wired up in the back seat.

I plan to get the gauges finished tomorrow, just got to wire them in. I also plan to turn it over and prime everything up with the glow plugs out. It will be ready to start after that.

No coolant in it yet. got pressure test going on it right now. I found three hoses not tight enough and the thermostat housing was leaking real bad. I found that I got real stingy on the gasket sealer. It is pressured up to 10 PSI. I lost about 1/2 psi in first three hours. Pumped it back up, going to see where it is tomorrow.

Getting closer
Rich
 

Attachments

richingalveston

Well-known member
1,715
120
63
Location
galveston/Texas
Well I had 10 lbs last night and only 5 this morning. I have sprayed everything possible with soap water and no visible leaks anywhere. I have no fluid in the engine and was wondering how much will leak past the water pump bearing and seal. The coolant is thicker than air.

Did some more test today and I loose 1/3 Lb. of air every hour. not much of a leak It is new motor so it has never been heated up and cooled down.
Unless someone has any really great suggestions, I am going to run it the way it is and see what happens.

Rich
 
Top
AdBlock Detected

We get it, advertisements are annoying!

Sure, ad-blocking software does a great job at blocking ads, but it also blocks useful features of our website like our supporting vendors. Their ads help keep Steel Soldiers going. Please consider disabling your ad blockers for the site. Thanks!

I've Disabled AdBlock
No Thanks