• Steel Soldiers now has a few new forums, read more about it at: New Munitions Forums!

  • Microsoft MSN, Live, Hotmail, Outlook email users may not be receiving emails. We are working to resolve this issue. Please add support@steelsoldiers.com to your trusted contacts.

optimizer long block - hummer 24V or cucv 24v

richingalveston

Well-known member
1,715
120
63
Location
galveston/Texas
I think it is the gauge or sending unit. i don't think it is actually that hot. I will get another IR gun if i can't find mine this week. I have Flow Kooler pump, brand new spectra copper radiator. I am using stock fan and clutch at this time, may change to a better fan. At this time I have no hood so the fan clutch has yet to kick in.
I have a leroy diesel A-team turbo. no waste gate. I think i am getting a little more boost out of it than the banks. At half throttle acceleration I get 1 to 2 psi. I have yet to get the truck over 50 mph. IF I floor it I can get the boost gauge over 5 psi and the exhaust temp goes to 600. I get a small amount of black smoke when I get on the throttle but not a lot. I have a 90 degree elbow pointing up from the turbo so no muffler or tail pipe at this time.
I am planning on getting the exhaust done in the next couple weeks so I can get it inspected and on the road for some better testing. I just need the exhaust, parking brake installed and I have to fix my windshield wipers in order to get the inspection done. I did add some air to the tires and the road handling improved a lot I only had 30 psi when I first started driving it.
Thanks for the input
Rich
 

richingalveston

Well-known member
1,715
120
63
Location
galveston/Texas
currently waiting on my spintech exhaust parts. They shipped today and I should have them next Tuesday.
going to order new lines for the power steering high pressure. I am going to use the same rubber lines that go from the pump to the hydro ram on the axle. I have to get longer lines for those two lines anyway because the way they are currently routed my steering arm hits them when I turn left and I think they are to short for the spring flex. These lines have reusable ends also and they have not leaked so I am going to try these so that way all of my high pressure lines are the same size and material and I will only need to carry one type of extra hose if I go somewhere that I want to bring all my spare parts.

my next purchase will be a snorkel head to get a 4 inch donaldson I will have to order from Australia. The head is $115 and the shipping is $90 Brettstruck.com
 

richingalveston

Well-known member
1,715
120
63
Location
galveston/Texas
snorkel and exhaust

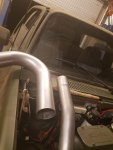
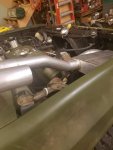
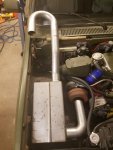
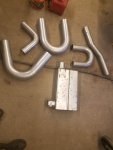
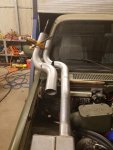
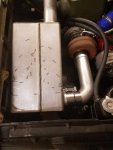
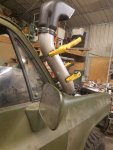
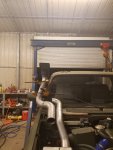
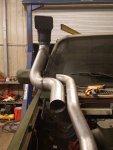
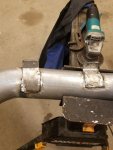
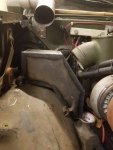
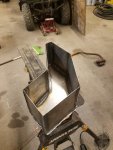
20190430_211544.jpg20190430_211349.jpg20190430_211329.jpg20190430_193632.jpg

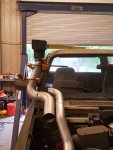
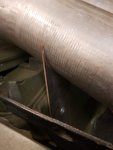
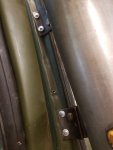
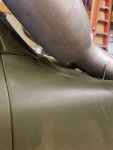
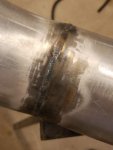
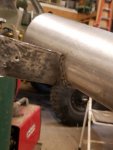
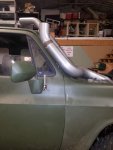
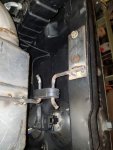
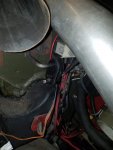
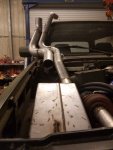
got the spintech parts. best to look at the pics to see what I am doing. The 4 inch will be the snorkel. The exhaust is 3 inch. The U-bends will be cut and made into s bends with a tilt to follow the windshield. A dog house will be built into the hood and the exhaust will eventually go through a roof rack once it is built. The plan is to have all of the exhaust parts ceramic coated and an additional heat and sound wrap will be done on the muffler and pipes under the hood.

With the exhaust going into the roof rack to the back of the truck, it will be street legal since the exhaust will exit pointing up with a rain cap after the windows. The snorkel will end up outside the windshield frame and the exhaust right on the line of the windshield. I may have to put a shield on the bottom if it gets hot enough to melt the windshield rubber.
The batteries will go where the mufflers were so the weight is right over the back axle. If I go with an electric AC in the future (mounted in the roof rack) I will try to make trays for two strings of batteries (4 batteries total)

I did order the snorkel head from Australia, could not find one here in 4 inch. The inlet opening on my banks air filter is 4 inch so I wanted to keep it that dimension all the way to the snorkel head.
 

richingalveston

Well-known member
1,715
120
63
Location
galveston/Texas
snorkel and exhaust progress

made some progress today. the snorkel tube will have to connect to the air cleaner with a flex hose. I purchased a 130 degree bend to try and make it hard pipe but the bend is to large to fit in the space available.

I need to get some metal plate to make the bracket that attaches to the windsheild post. I have two straps at this time but the metal is a little thin and the straps need to be wider so the exhaust can use the same straps with a bracket between the two pipes. it will be next week before the snorkel head gets here.

I did get the turbo flange cut and a collar made to connect it to the 90 going to the muffler. I am going to try and clamp the 90 to the muffler but the bend of the pipe may be to close for the clamp to work so I may have to weld it.
 

Attachments

richingalveston

Well-known member
1,715
120
63
Location
galveston/Texas
snorkel head

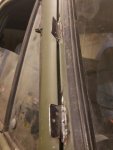
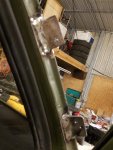
i received the snorkel head. I just need to do some final grinding and then all the parts are ready to weld for the snorkel. i have to finish it first because the exhaust will have brackets that attach to the snorkel brackets. it is very sturdy now with the thicker metal on the attachement brackets. I have them screwed to the A-pilar for now but the will get welded.
.
 

Attachments

Barrman

Well-known member
5,266
1,782
113
Location
Giddings, Texas
I wonder how good bugs lubricate a turbo?

It looks great, but being where you live, that was the first thing I thought of when I saw the scoop on top.
 

richingalveston

Well-known member
1,715
120
63
Location
galveston/Texas
I looked at the pre-cleaners but they are very large. There is an air filter prior to the turbo. Where the pipe transitions to the flex hose, it will drop lower than the air cleaner and give a place for anything to collect. Any small amounts of water should stay in the bottom of the sag.

The pipe goes up inside the head 4 to 5 inches with space around it and drains at the bottom so water that runs the sides of the scoop and hits the back will flow out through vents at the bottom. I can get socks that will go over the head also which works as a pre-filter if I feel the bugs are a problem. And when expecting heavy rain or bugs, I can turn the snorkel backwards.

There are a lot of people running snorkels and from the forums I have not read of any bug problems.
I believe it is better than having the intake tube and scoop in the grill (traditional banks setup). water is a direct shot to the air cleaner and just as many bug parts will work through the grill as will hit the snorkel head.
With out the intake tube to the grill or a snorkel, there is a very good chance a splash into high water can get to the air cleaner and the air cleaner design makes water drain directly to the turbo and thus the motor. I think the snorkel is the best setup of all the choices except the pre cleaner.

I will add that with my air filter mounted high on the motor instead of the traditional banks location, there is a less likely chance of getting water in it but it is also under the hood getting nothing but hot air. So far I have not gotten a drop of oil into the air cleaner from the crank case so I think the high mounting of the CDR is responsible for this. I am using the one from the 6.2

I will lower the snorkel just a little, I want it to be shorter than the roof rack that I build.
 

Barrman

Well-known member
5,266
1,782
113
Location
Giddings, Texas
I have a wind scoop that clips onto the header of my Miata. Driving around sunset gets bug parts all over my legs.

I wasn't complaining about your design. I know you thought it out very well and have executed the thoughts greatly. I have the same concerns about the water ingestion possibilities of my Banks valence mounted air intake. The Banks box does have a small drain on the bottom too.
 

richingalveston

Well-known member
1,715
120
63
Location
galveston/Texas
Snorkel almost done

I did not take your comments in any negative way, I enjoy the feed back,
my banks air filter box did not have a drain on the bottom, it for some reason had a small slit at the bottom of where the intake hose connects, like it was made with a band saw blade. I filled it because I wanted it water tight. I am planning on adding a junk box, which is basically a larger volume box lower than the air filter. The flex hose will go to this box and then out a separate opening to the air filter. This creates a pressure drop and a cut of in the air stream so particles can drop out of the air flow and collect inside the box. It will also catch water that gets down the snorkel. It is a sealed box so it will need to be checked on occasion. It reduces the ram air affect but I think it is needed.
The turbo somewhat negates the ram air effect and there is a lot of room for this box.

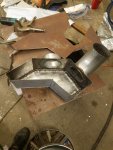
I am going to drop off my snorkel pipe to the welding school tomorrow so they can do a professional job on welding the seams of the pipe sections I have it tacked together at this time and I want all of the parts outside of the hood to look their best. One of the instructors is going to TIG weld it for me. When I get it back I will then weld all of the brackets to the pipes to complete the snorkel. Then I can work on the exhaust. I will have a bracket from the snorkel to attach the exhaust so I need the snorkel complete before I continue.

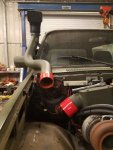
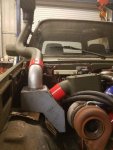
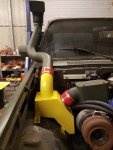
Attached are some pics of the final height and fit of the snorkel. The top of the snorkel head is approx. four inches above the roof of the vehicle. the roof rack will be 6 to 8 inches from the roof so the snorkel will not be the tallest point.

20190507_163839.jpg20190507_163847.jpg20190507_163859.jpg20190507_163922.jpgThanks for the comments
Rich
 

richingalveston

Well-known member
1,715
120
63
Location
galveston/Texas
I also got my PSC hose and fittings in today and replaced all of the high presure hydraulic lines with:
[FONT=Verdana,Arial,Tahoma,Calibri,Geneva,sans-serif]https://www.pscmotorsports.com/motorsport-specific-products/offroad/hose-fittings-seal-kits/field-serviceable-6-universal-pressure-hose-kit.html

I was using stainless braided PFTE lines from the pump to the brake booster and then from the booster to the steering box and kept having leaks at the connections. I was already using the attached type of hose and connectors to run from the steering box to the hydro ram and my only problem was I made the lines to short but had not leaks.

Now I have the same line and connectors throughout the system so hopefully I cured my leak problem. I shut things down for the night before getting the system filled and checked out so once that is done I will post some pics of that work. The connectors are much easier to work with than the stainless braided pfte.
[/FONT]
 

richingalveston

Well-known member
1,715
120
63
Location
galveston/Texas
snorkel welding done now ready for paint

finished the snorkel with the exception of some clean up before paint. The shop did an excellent job on welding the pipe sections. my welding of the mounting tabs are not near as good but definitely structurally sound. The snorkel is firmly attached to the vehicle. At least I know how to use bondo to clean up my not so perfect welds. since the snorkel will be painted to match the truck I can clean it up before paint.
now I have to order a couple more pipe sections before I can finish the exhaust but it is ready to attach to the snorkel.
 

Attachments

richingalveston

Well-known member
1,715
120
63
Location
galveston/Texas
still waiting on the remaining exhaust parts. I need a few more pieces including some flex pipe. the section between the turbo and muffler is going to get about 8 inches of flex pipe.

while I have been waiting I have been working on my trash box/intake transition. it will have four inch pipe from the snorkel into the top and then four inch pipe out the side to the air cleaner. This is mainly for any excess water that gets down the snorkel but it should let any heavy particles fall out of the air flow into the bottom of the box.

I am working on getting it water tight. I was able to get my welder working better, still not the best work but it is better. The wire feed was sticking and not flowing smoothly so I changed to a smaller wire and made some adjustments and now I can run a continuous bead which I could not do before. The plan is to get it sealed to hold water before I put the last side on it and cut the holes for the four inch pipe. It will have pipe all the way to the snorkel and to the air cleaner so I will only need hose clamps and a few inches of rubber hose to connect all of the pieces.
 

Attachments

richingalveston

Well-known member
1,715
120
63
Location
galveston/Texas
I have made more progress, work keeps getting in the way and I keep running out of wire in my welder. I went to a smaller wire and it fixed the feed problems I was having. My welding has greatly improved. My grinder is getting a lot less work.

I ditched the flex exhaust pipe for now, you cannot weld it (or I cannot weld it). either the weld is to hot for the flex pipe or you turn it down and it does not stick to the regular pipe. I don't want to use clamps in this short of a distance so no flex pipe for now. The muffler is on rubber hangers so it will move a little and the motor doesn't really move with the ORD motor mounts

I hope to have the hood on this weekend so I can begin working on the hood modifications. will post some pics when that happens.
 

richingalveston

Well-known member
1,715
120
63
Location
galveston/Texas
have not started on the hood but got all of the exhaust to the roof done. I removed the connections to the snorkel. it is not needed. All it did was transfer noise. The pipe is sturdy enough to have support at the fire wall and then again once the roof rack is done. the exhaust is all rubber mounted and sounds pretty good.

All this work, wore out my best helper.
 

Attachments

richingalveston

Well-known member
1,715
120
63
Location
galveston/Texas
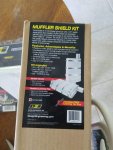
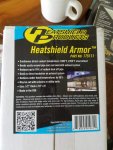
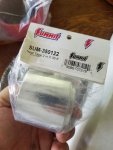
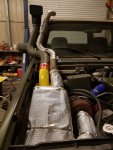
I ordered 3 different insulating materials from summit. I checked into the ceramic coatings and they are way to expensive for what the accomplish. The specs on most only show a 100 degree drop from the inside heat to the outside temp of the pipe. The pipe wraps have much better performance. I purchased the lava rock based wrap along with some additional 1/2 thick wrap and then an aluminum wrap for the las layer on the muffler. I have some 1 inch thick insulating material that is used in Kitchen exhaust systems. I wraps the duct to give it a 2 hour fire rating. This material is supposed to be good for up to 1800 degrees for which my exhaust should never reach.
The plan is to use the ceramic 1/2 inch thick material for the first layer on the muffler, then use the kitchen hood wrap and then use the aluminum wrap for an outer protective layer to hold it all together.

The pipes will get the lava rock wrap and then the 1/2 thick ceramic. I think I have enough to wrap everything under the hood except the manifolds. The manifolds look like they are going to be difficult to wrap. I may purchase some more of the 1/2 thick material to wrap the manifolds once I get everything else done.

I should be able to get it all done this weekend. I will post pics as it happens.

Rich
 

richingalveston

Well-known member
1,715
120
63
Location
galveston/Texas
muffler wrap

i got some of the work done. painted the snorkel and got it reinstalled. I still have to finish the transition box that goes between snorkel and air intake. I did get the silicone connectors.

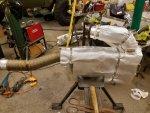
i insulated the muffler section with the 1/2 thick heat sheild insulation and then the aluminum muffler sheild. the materials are basicly the same except the 1/2 inch thick material has thick insulation and real thin aluminum, it is about the same as heavy duty reynolds wrap foil. The muffler rap has a small amount of insulation but a decent grade of aluminum. It is thick enough to fold and hammer the corners. The straps however are not good. i am going to replace with screw type hose clamps. I tried to put my thicker exhaust hood insulation on but it is to thick. It would not mold aroung the muffler well and was to bulky for the muffler wrap to cover. '
The lava rock exhaust wrap is on the tube sections and it went on very easy. did not have to wet it and it stretched around the corners well. I used the heat tape to put on the lava rock wrap ends to keep it from fraying and also to tape the starter section when beginning the wrap. it worked well for that but did not adhear to the muffler wrap very well. when fist put on it seamed to stick good but within 5 minutes it was letting go. i do not have enough of the 1/2 thick material to do the rest of the pipe section so i think i am going to double wrap it with the lava rock. For the pipe outside the hood i am going to get one more muffler wrap and one more roll of the lava rock and put the lava rock on and then try to do a real neat job on the muffler wrap. I can then paint the muffler wrap with engine paint. Only items that did not work that well are the clamps that come with the muffler shield and the tape.
 

Attachments

richingalveston

Well-known member
1,715
120
63
Location
galveston/Texas
had to stop working on the exhaust and get some work done on the snorkel transition box. I got the 4 inch connections done. Next step is to make and weld some tabs on the outside of the box where it will mount to the inner fender. I will then paint the inside and weld the back side of the box on. I am using engine paint so the welding does not mess it up but just a little around where the weld is done. once I get the cover on I will then paint the inside again as best I can through the 4 inch hole. last steps will be to paint the outside of the box and then I plan to plastic dip the box. The welds are pretty good but I want to be sure it is water tight.

I wish I could have built the box out of aluminum so I would not have to worry about painting the inside of the box but my welding is only good enough to work with steel at this time. I have done aluminum with my wire feed before but my skills and probably my equipment are not good enough for aluminum.
 

Attachments

richingalveston

Well-known member
1,715
120
63
Location
galveston/Texas
I got the air box done, I painted it well with all the extra paint I had. I filled the inside with paint and rolled it around. With light and mirror I was able to check and made sure all surfaces were covered. I painted the outside with two coats primer and three coats top paint. I did not use any rubber coating. I may try to get some self adhesive insulation to put on the outside in the future. It may try to condensate on the inside with temp changes.
I also got the muffler and exhaust pipe that is under the hood wrapped I have to get the roof pipe bent and all of the exterior pipe wrapped. I also have to get some long hose clamps from an HVAC supply company to replace the existing straps on the muffler wrap.
Good news is I can start on the hood now.
 

Attachments

Top
AdBlock Detected

We get it, advertisements are annoying!

Sure, ad-blocking software does a great job at blocking ads, but it also blocks useful features of our website like our supporting vendors. Their ads help keep Steel Soldiers going. Please consider disabling your ad blockers for the site. Thanks!

I've Disabled AdBlock
No Thanks