• Steel Soldiers now has a few new forums, read more about it at: New Munitions Forums!

  • Microsoft MSN, Live, Hotmail, Outlook email users may not be receiving emails. We are working to resolve this issue. Please add support@steelsoldiers.com to your trusted contacts.

Picked up 6 MEP-802A gensets and will be documenting making them all runners here

Ray70

Well-known member
2,595
5,909
113
Location
West greenwich/RI
When you first mentioned using Evaporust and a cyl. hone for the 2007 I thought you were crazy. I would have anticipated it needing to be bored and sleeved with all that rust! I've never used Evaporust but looking at the pictures I can't believe the transformation. Apparently it really is "miracle juice"! Can't wait to see your project(s) through to the end! Good luck with all 3!
 

pclausen

Well-known member
Steel Soldiers Supporter
452
281
63
Location
Afton, VA
Thanks. Yes, it really does appear to be "miracle juice"!

I was able to secure a "decarb set" of gaskets for $42. Here's the pic of what's included. From what I can tell, the only gasket not in this set is the crank case access panel one.
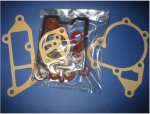
657-34231.JPG

Lister Petter part # 657-34231

I was also able to score 2 "Joint Set" of gaskets from the same source for $55 a pop. They look as follows.
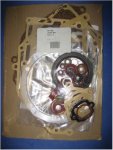
657-34241.JPG

Lister Petter part # 657-34241

I'll check them out when I receive them to assess what else I need. Hopefully just that one crank case access panel gasket.

On the head gasket, looking at Lister Petter's web site, it looks like the current part number is 752-47171. I understand that there were issues with the early / older part number version, and that they have been corrected with the new ones?

I ask because Kraft Power only has 1 of these new ones left and there is a significant lead time (many months) on getting new ones.

There is a guy on Ebay selling aftermarket LPW2 head gaskets, but they cross to 752-40751, which appear to be the older part number before Lister fixed whatever the issue was with the original version(s)?

Here's a link:

http://www.ebay.com/itm/LPW2-Lister-Petter-Head-Gasket-/320471989418

I'm not sure if I should gamble on these aftermarket gaskets or pre-pay for 3 sets from Kraft and wait 16 weeks before getting them?
 

Munchies

Member
417
3
18
Location
Keesler Air force base/ MS
shoot me the NSN's of the kits you need and I will see what I can dig up.

I would plan on atleast a set of rings on the 2007. Good immersion of the pistons in evaporust, rings, and a light hone. Wont be as good as new or anything but you can probably get some good hours out of it.
 
Last edited:

Keith_J

Well-known member
3,657
1,323
113
Location
Schertz TX
Aren't top rings chromium or other corrosion resistant alloy? Yes, I would be more concerned with rust in the ring inserts on the pistons causing stuck rings. You should be able to clean them out on complete tear down.
 

pclausen

Well-known member
Steel Soldiers Supporter
452
281
63
Location
Afton, VA
Yes, I plan to pull the pistons on all 3 units and thoroughly clean the ring grooves on them and inspect the rings.

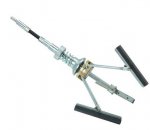
I don't have a hone tool. Any recommendations on the type to get? I see a couple of different types as follows:

honetool2.JPGhonetool1.JPG

On the head gasket, I believe there used to be 3 different ones as listed here:

FSCM -- PART NUMBER - DESCRIPTION
44940 --186-6108 ----- HEAD GASKET 1.35 MM THICK
44940 --186-6109 ----- HEAD GASKET 1.47 MM THICK
44940 --186-6110 ----- HEAD GASKET 1.60 MM THICK

But then they switched to a "one height fits all gasket". I believe the Lister Petter part number for this one is 752-47171 not sure what the NSN is for this item.
 

steelypip

Active member
769
68
28
Location
Charlottesville, VA
Be sure to follow factory recommendations on the grit of abrasive to use and the angle of crosshatch. You don't want to be too out of tolerance on this, as the factory ring package was probably specd in assuming a particular range of values. The way your bores look (after evaporust), I am guessing that less is more on the honing.

As for which hone to use, I've used both. If the bores are straight and have no ridge, the ball kind works well and is simple to get right. Professional engine builders use them all the time to clean up a boring job and put the right finish on for the rings they're using. If you're trying to work a ridge down at the top of the bore the springloaded rectangular stones are better, as you can walk them up so the pressure point is near the ridge and cuts it down very quickly. They don't respond well to being pulled all the way out of the bore, though, so attention is required.
 

Ratch

Member
586
5
18
Location
Chester County, PA
Wow, I'm amazed at the evapo-rust results. I've thought about that stuff before, but figured it was a lot of sales pitch. Those are pretty good results, though.
 

Keith_J

Well-known member
3,657
1,323
113
Location
Schertz TX
I've only used the 3-stone type. Yes, they work well to remove top cylinder ridges too. I use coarse stones, wrapping a single layer of tape around the bottom of the stones so only the top of the stone contacts the ridge. You can see when the ridge is removed. Far easier than a dedicated ridge reamer.

Definitely use a slow speed drill, some cordless work well in this respect. I use a Makita 1/2" drill as it has very even speed so cross-hatching angle is easy to maintain.
 

Munchies

Member
417
3
18
Location
Keesler Air force base/ MS
Yea, less is more on this. Fine grit IMO, just enough to clean it up and break the edges of where the rust was.

the '3 stone type' is probably best for the $$. It adapts to different size bores and you can replace the stones, and change grits.

Flex hones work good but only for the bore size its made for
 

pclausen

Well-known member
Steel Soldiers Supporter
452
281
63
Location
Afton, VA
Appreciate all the advice on honing! I'll get the 3 stone type then and find out what angle and grit of abrasive to use. So constant slow speed and smooth up and down motion to get the proper angle, right? And maybe only do it for 20-30 seconds total per cylinder?

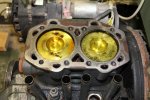
Still pulling out rust with the evapo-rust. Here's the 2006 after soaking 24 hours in that stuff

802A-2006-6-24-01.jpg
http://www.cstone.net/~dk/802A-2006-6-24-01.JPG

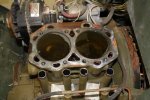
After sucking it out, I did my usual PB and ATF mix and was able to get the 2006 engine to make revolutions. There a clicking sound coming from the generator head, like worn out brushes or something. The other 2 units didn't have any sounds like this. Next I wiped down the piston and walls with brake cleaner and loaded the cylinders back up with fresh evapo-rust.

802A-2006-6-24-02.jpg
http://www.cstone.net/~dk/802A-2006-6-24-02.JPG

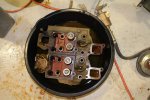
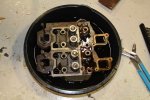
Also got the head soaking in a fresh batch of that stuff

802A-2006-6-24-03.jpg
http://www.cstone.net/~dk/802A-2006-6-24-03.JPG

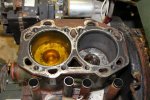
Moving on to the 2007 rust winner, I wiped it down with brake cleaner cleaner and filled with fresh evapo-rust. The #2 cylinder was leaking it past the rings at a good clip, so I sucked it back out. Will pick up some clay tomorrow to keep that from happening.

802A-2007-6-24-01.jpg
http://www.cstone.net/~dk/802A-2007-6-24-01.JPG

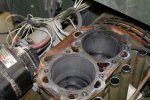
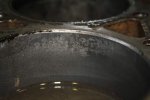
After about 1 hour I sucked cylinder 1 dry and took a closer look. I'm not seeing a ridge, but I do see pitting from where that heavy layer of rust once was. So the idea with the honing would be to just eliminate those irregularities in the surface and nothing more, right?

802A-2007-6-24-02.jpg
http://www.cstone.net/~dk/802A-2007-6-24-02.JPG

And that terribly rusted 2007 head soaking in the old evapo-rust solution. Let's see how it handles the challenge.

802A-2007-6-24-03.jpg
http://www.cstone.net/~dk/802A-2007-6-24-03.JPG

And finally the 2009. I'm giving it a final round of evapo-rust at the very top edge to get rid of the last little bit of rust here

802A-2009-6-24-01.jpg
http://www.cstone.net/~dk/802A-2009-6-24-01.JPG

And here's the head off the 2009. Turned out pretty nice after an overnight bath!

802A-2009-6-24-02.jpg
http://www.cstone.net/~dk/802A-2009-6-24-02.JPG

Here are all the top engine parts removed from each unit so far. I noticed that the 2007 and 2009 engines are painted an almost grey green color, where the 2006 is more of just a dark green. I plan to repaint the engines once I get them all done. Wonder what color and brand I should choose? I'd like to be as close to the proper official color as possible.

802A-ALL-6-24-01.jpg
http://www.cstone.net/~dk/802A-ALL-6-24-01.JPG

Finally, here are a shot of all the "accessories" I pulled out of each cabinet:

802A-ALL-6-24-02.jpg
http://www.cstone.net/~dk/802A-ALL-6-24-02.JPG
 

Munchies

Member
417
3
18
Location
Keesler Air force base/ MS
Pitting isnt too hot on that 2007. At this point i would in my opinion... hone it, make sure the rings are in spec and sealing well, then throw a head gasket at it and do a compression test. dry and wet. If it passes.. run it. then buy some sleeves and rings for later. Or oversize pistons if they are available.
The honing is not going to fix the pitting unless it doesnt look so bad in person :) It will help the rings seal as best as they can though
 

rustystud

Well-known member
9,280
2,987
113
Location
Woodinville, Washington
It looks like those intake and exhaust valves are stainless steel ! I'm impressed !
Remember to use a good honing oil when you go after those bores . You can pick-up some at NAPA or any good automotive store.
 

pclausen

Well-known member
Steel Soldiers Supporter
452
281
63
Location
Afton, VA
Unfortunately, the pitting does look that bad (or worse) in person on the 2007. Fortunately pistons are available in 0.25 and 0.50mm oversize.

Here's a closeup of the walls on the 2009 for comparison.

802A-2009-6-24-03.jpg
http://www.cstone.net/~dk/802A-2009-6-24-03.JPG

A light hone is all this one needs from what I can tell.

I'll swing by NAPA and see if they have a 3 stone hone and the proper oil.

Looking through Engine Service Manual TM-9-2815-252-24, I don't see any specs on honing angle or grit, but I believe I can make out the angle of the hone on the 2009 closeup above.

I did find specs on the maximum advisable piston to cylinder clearance:

Across the faces at the bottom of the piston skirts: Initial dimension 85.891 - 85.901mm

Cylinder bore in the region of travel by the piston skirt: Initial dimension 86.000 - 86.025mm

Maximum clearance: 0.40mm
 

pclausen

Well-known member
Steel Soldiers Supporter
452
281
63
Location
Afton, VA
Curious to find out of these engines had been bored .25 or .50 over already, I decided to take a closer look at the stamps on the pistons. The Lister Petter parts manual states that .25mm oversize pistons have a /025 added to the part number and a .50mm oversize has a /050 added.

Well, the 2006 has this stamp, so I assume it's already bored 0.25mm over.

802A-2006-6-25-01.jpg
http://www.cstone.net/~dk/802A-2006-6-25-01.JPG

Incidentally, since it is done soaking, here's a closeup of the cylinder wall

802A-2006-6-25-02.jpg
http://www.cstone.net/~dk/802A-2006-6-25-02.JPG

2007 stamp. Looks like 0.50mm over already

802A-2007-6-25-01.jpg
http://www.cstone.net/~dk/802A-2007-6-25-01.JPG

2009 stamp. Also appears to be 0.50 over already

802A-2009-6-25-01.jpg
http://www.cstone.net/~dk/802A-2009-6-25-01.JPG

Assuming 5000 hours between rebuilds, could these units really have 10,000 - 15,000 actual hours on them?

There are 8,750 hours in a year, so I suppose it is possible they have been running 24/7 for years on end...
 
Last edited:

pclausen

Well-known member
Steel Soldiers Supporter
452
281
63
Location
Afton, VA
Thanks for the link! Very informative. I'm looking around for a decent digital bore gauge. Always love adding useful tools to my garage.
 

pclausen

Well-known member
Steel Soldiers Supporter
452
281
63
Location
Afton, VA
The head from the 2007 did not clean up 100% from just the evapo-rust. I guess there are limits to what it can do after all, haha.

Dropped the head off at the machine shop this morning. He looked it over and said $60 buck to clean it up and do a valve job on it. Sounded reasonable, so I left it with him.

Preparing for the worst, I asked him how much to bore out the 2 cylinder block, and he said $70. So I guess that's an option on the 2006 if it needs it. I also asked him about the cost to re-sleeve, and that would run a $144 per bore! I hope it won't come to that on the 2007.

So with that, I figured it would be worth while to go ahead and invest in a decent bore gauge, so I ordered a Fowler Extender-E 74-646-401.

http://www.fvfowler.com/onlinecatal...ge=flypage.tpl&product_id=1352&category_id=19

Keeping fingers crossed that I don't need to do any re-sleeving!
 
Last edited:

Munchies

Member
417
3
18
Location
Keesler Air force base/ MS
As long as he doesnt take 10 months to do it like my machine shop you will be golden.
Been waiting on my guy for 11 ish months to finish the shortblock and head for my wifes Saab. what a disaster.

Hope your stuff comes out good!
 

Ray70

Well-known member
2,595
5,909
113
Location
West greenwich/RI
I wouldn't think your units would already have been bored out. I have zero experience with how the military maintains their equipment, but I would think boring the block would be beyond the limit that they would go before setting it aside for auction, especially a generator that new. Only way to tell for sure is to measure.
Hopefully you're still at a stock bore, the pitting on the 07' looks pretty bad to me, well beyond what a hone will clean up. Since it's already torn down, for $70 plus parts I think I would just bore it now, if it turns out to still have a std. bore.
 
Top
AdBlock Detected

We get it, advertisements are annoying!

Sure, ad-blocking software does a great job at blocking ads, but it also blocks useful features of our website like our supporting vendors. Their ads help keep Steel Soldiers going. Please consider disabling your ad blockers for the site. Thanks!

I've Disabled AdBlock
No Thanks