• Steel Soldiers now has a few new forums, read more about it at: New Munitions Forums!

  • Microsoft MSN, Live, Hotmail, Outlook email users may not be receiving emails. We are working to resolve this issue. Please add support@steelsoldiers.com to your trusted contacts.

Pics of pulling and rebuilding transfer case of M923a2

Gu3

New member
56
0
0
Location
Tres Piedras, NM
This is my first time to work on/repair a military vehicle, so thought I would post some pics of pulling and repairing the transfer case. If anyone knows where I can find diagrams or an assembly/disassembly guide, please let me know.
SAM_0003.jpg
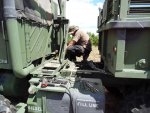
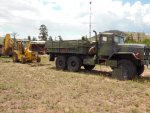
Unbolted the bed and slid it back far enough to access the transfer case.
SAM_0001.jpgSAM_0005.jpg
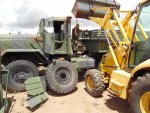
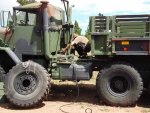
hoisted down the spare, unbolted and removed the hoist.
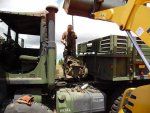
SAM_0007.jpgSAM_0008.jpg
disconnected all air lines, wires, drive shafts and mounting bolts, then lifted out the transfer case.
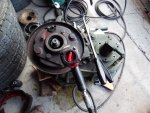
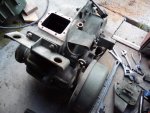
SAM_0009.jpgSAM_0010.jpg
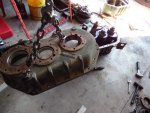
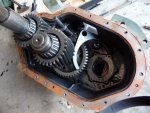
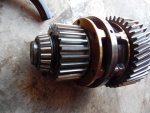
Began disassembly of donor transfer
case.

The donor case had a bad front output shaft brg, and the 2008 rebuilt case only had 1975 miles, but attempted theft of the truck caused a broken input shaft. I figured I would swap in the needed parts into the newer case since it had less miles on it, even though the gears of the donor appear to be in great condition.

I don't have a diagram or instructions, but have been turning wrenches for near 38 years on and off the job, so hopefully I can make a go of it. Already had to purchase a 3/4 drive impact socket set for some of the work. One of the important issues will be getting the shims correct for the proper clearance, but I can use a dial indicator to measure the back space on the existing shafts prior to disassembly and put it back to those clearances.
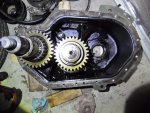
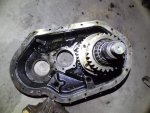
SAM_0001 (1).jpgSAM_0002 (1).jpg
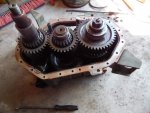
Donor case split, and ready to clean up and use input shaft.

More to come.
 

Gu3

New member
56
0
0
Location
Tres Piedras, NM
looks like a giant pain.
I think that in military terms it would be classified as a "General Pain", or a "Major Pain". Lol. But really its not to bad, having the right tools for the job makes a big difference, especially with a little help from my son who you see in the pics. It's a good feeling to be able to make repairs without having the expense of paying someone else to do it. So far I have $200 in parts (used transfer case) and another $150 for a new air valve, and a few dollars in fuel. While to have it done was quoted at 15k by a shop in Las Vegas. I can't complain. :-D
 

dmetalmiki

Well-known member
5,523
2,026
113
Location
London England
Not the way I would have done it, (years ago I did one)..But, any way is a GOOD way if the the task progresses easily and without a hitch. Well done! excellent pictures, and a 'guide' for others contemplating that job, as another way to go.
Thank you for posting, and keep us up to date with the task, to completion and testing.
 

Gu3

New member
56
0
0
Location
Tres Piedras, NM
All is well, project completed. It took approximately 12 hours for two men to remove, disassemble, assemble, install. Drives well in high and low range. Very Happy! :wink: another blessing! God is great!!!!
 

Gu3

New member
56
0
0
Location
Tres Piedras, NM
You didnt have to move the bed. I didn't when I did mine, just the two support brackets had to come off.

It was easier for me to remove 8 bolts and slide the bed back, than to drop the transfer case downward and lift it back up while crawling around underneath. I prefer standing when possible. Also, the mounting brackets on the 90 model are made like a saddle, so that you pull three bolts and lift the transfer case straight up. Much easier in my opinion.
 

Gu3

New member
56
0
0
Location
Tres Piedras, NM
Can you elaborate on the attempted theft that caused all this work?
The original private owner of the truck, purchased it shortly after the Kansas rebuild so it had only 1975 miles on it and was in like new condition, not even a scratch in the paint. He used it only to attract attention to his Army Surplus store in Las Vegas, NV. It was chained solidly from the front to a large steel structure, and parking brakes were engaged. Thief attempted to drive in reverse and low range, but instead twisted the input shaft in the transfer case in two right behind the yoke.

Apparently frustrated with the high cost quoted to repair the damage, he decided to sell it as is.

Now that it is repaired, I took my wife for a ride in it and it made a believer out of her. I think she likes it as much as I do. Its very impressive and functions perfectly.;-)
 
Last edited:

dmetalmiki

Well-known member
5,523
2,026
113
Location
London England
You didnt have to move the bed. I didn't when I did mine, just the two support brackets had to come off.
I certainly can't move my 'bed', and now I too am facing this task.Thank you for the pictures, they have given me GOOD in site. Obliged.
Tomorrow I start.....Solo. (No help till the weekend).
 

marchplumber

Well-known member
Steel Soldiers Supporter
3,675
2,503
113
Location
Peoria, Illinois
All is well, project completed. It took approximately 12 hours for two men to remove, disassemble, assemble, install. Drives well in high and low range. Very Happy! :wink: another blessing! God is great!!!!
That He is! That He is!! Thanks for the pics and descriptions!! Amazing what a little "common sense" can do. Had others instill in me, mainly my Pops, that what is called a "Can Do" attitude! Only sure way to fail? Never attempt. Good job Sir.

Demetalmiki, Good luck and God's speed on your repair! Sometimes, patience is the better part of valor. We all know that the "iron" is heavy, especially when we are alone.
 

Swamp Donkey

The Engineer
Steel Soldiers Supporter
1,450
119
63
Location
Gray, GA
I certainly can't move my 'bed', and now I too am facing this task.Thank you for the pictures, they have given me GOOD in site. Obliged.
Tomorrow I start.....Solo. (No help till the weekend).
Wow. I searched for this thread for about 3 hours a couple weeks ago, using the Google and forum search, with no luck. Now it's sitting right in front of me. Perfect!

Are you going to be splitting a T-case or are you just doing a direct swap? If tearing one down, I have a couple special picture requests. I have a spare one sitting on the floor that has a broken front output shift fork. I'll be changing it through the inspection hole without splitting the case, since there aren't any other broken parts, but my view is limited. Some pictures of this area with a case split would be great.
 

Swamp Donkey

The Engineer
Steel Soldiers Supporter
1,450
119
63
Location
Gray, GA
Is that like changing a cam bearing through the tail pipe?
Well, no not really. The inspection hole is large enough to use both hands at the same time. The fork is easily changed because the shaft slides out of the housing once the front axle engagement cylinder is removed. The fork then comes out the inspection hole. This would be more like you describe above if still mounted in the truck but it's easy when on the ground. The problem is that the gear sets are in the way to see what the fork was supposed to engage and where. The diagrams in the manuals have great exploded views but don't show how parts interact. I tried an inspection camera but without knowing how things were originally oriented, it's not much help.
 
Top