• Steel Soldiers now has a few new forums, read more about it at: New Munitions Forums!

  • Microsoft MSN, Live, Hotmail, Outlook email users may not be receiving emails. We are working to resolve this issue. Please add support@steelsoldiers.com to your trusted contacts.

Pintle hook question

Lothar

Well-known member
324
661
93
Location
North Arkansas
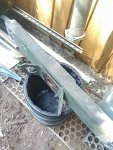
I made a bumper from 2" x 8" rectangle tube similar to an airlift bumper. I was intending to use the original pintle hook from the truck but I am wonderimg if there is a different hook utilized on the airlift bumper with a longer stem to compensate for the 2" thick bumper. I think it would only compromise strength if I had to make a pocket so that this hook can be used.20210612_113813.jpg
 

Coug

Well-known member
Steel Soldiers Supporter
2,976
4,360
113
Location
Olympia/WA
I made a bumper from 2" x 8" rectangle tube similar to an airlift bumper. I was intending to use the original pintle hook from the truck but I am wonderimg if there is a different hook utilized on the airlift bumper with a longer stem to compensate for the 2" thick bumper. I think it would only compromise strength if I had to make a pocket so that this hook can be used.View attachment 836770
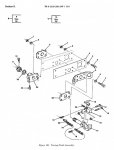
Looking in the parts manual at the airlift bumper it appears that they do just cut a pocket into the bumper, then add a reinforcement plate to the outside surface to give it additional strength.

to pintle image.jpg

EDIT: the ECV/REV parts manual has the same design for the airlift pintle where it's a cutout into the back of it, with a reinforcement place on the outside.
 

Lothar

Well-known member
324
661
93
Location
North Arkansas
Thanks Coug, I recall seeing the plate but didn't realize it was because the back was cut completely out. I will just do the same. Appreciate the help. Any idea how thick that plate is?
 

Coug

Well-known member
Steel Soldiers Supporter
2,976
4,360
113
Location
Olympia/WA
However...
Depending on your skill level with machining tools and a welder, the A2 non-airlift rear bumper doesn't use the bracket with the pintle, and just uses some type of tube welded into it.
 

Lothar

Well-known member
324
661
93
Location
North Arkansas
Imteresting, so I hope I am interpreting correctly when I assume the bracket you are referring to is the cone shaped piece and it was likely replaced with a shorter tubing piece to compensate for the added thickness of the reinforcing plate. I can fabricate all that stuff simple enough.
 

Lothar

Well-known member
324
661
93
Location
North Arkansas
Wouldn't ya know some continued searching brought me full circle back the this forum and this particular thread.
Looking at all that, it looks to me that other than a larger surface area on the nut side of the part in question, there wouldn't be any difference in just milling the extra material off. Unless the zirc fitting is too close.
 

Coug

Well-known member
Steel Soldiers Supporter
2,976
4,360
113
Location
Olympia/WA
Wouldn't ya know some continued searching brought me full circle back the this forum and this particular thread.
Looking at all that, it looks to me that other than a larger surface area on the nut side of the part in question, there wouldn't be any difference in just milling the extra material off. Unless the zirc fitting is too close.
db2684c8a390b33c46aae4d06690f114d6a7bf3f-1 (1).jpg
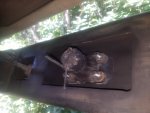
So this is the picture of the rear "bumper" non airlift type from my M1123. As you can see it's basically a 2"x4" piece of tubing.
I haven't taken a closer look, but I would assume that they just cut a hole in the back, insert a piece of tubing that is the right size for the pintle, then weld it in. Then there is an extra 1/4" piece of flat plate welded onto the back, probably to reinforce everything and spread out the force when towing. This is rated for the 4200 lbs that all the reinforced bumpers are.

Just to give ideas for those mechanically inclined.
 

Coug

Well-known member
Steel Soldiers Supporter
2,976
4,360
113
Location
Olympia/WA
So a couple observations after looking at this style.
a0681d0d0b930f53ea0c582df2dcca19a150ec3f-1.jpg


a0681d0d0b930f53ea0c582df2dcca19a150ec3f-2.jpg
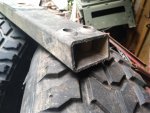
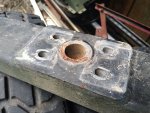
What it looks like they did (at least to me) was drill the proper size holes in the front side to fit the pintle and the bolts, then the back side they drilled oversized holes to fit spacers.
Then they added a plate over the spacer, and welded the spacers to the plate, rather than welding them into the bumper itself. The spacers are there primarily to keep the tubing from being crushed, while the plate is what handles the majority of the force being applied.
After some tack welding on the backside, they would have pulled it out and done full welds around the spacers to this added plate on the inside of it, as well as the full weld around the spacer on the outside (I only mention this because it doesn't appear to be welded to the 4 smaller spacers, only the large one in the center)

Then they welded that plate with the spacers attached to it to the back of the tubing. It wouldn't surprise me if I ground off the welds on all 4 sides of the plate in the above picture and the plate came off with all the spacers, and no welding done anywhere else.

Downside of the above style is no grease fitting, so mine didn't want to spin and took a couple whacks from a hammer to get it out.

Note: the 2" thick tubing plus the 1/4" plate welded to the back brings us to 2 1/4". The bracket on the front side where you attach the safety chains to would bring total thickness to 2 1/2". You might fit just a little more (maybe 1/8") but anything more than that and you won't be able to tighten the castle nut on the puntle down far enough to put the cotter pin through without also clamping the puntle down to immobility (it really needs to spin freely if you're driving off road with a trailer)


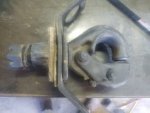
Edit: looking at the second picture here it also appears they machined it down or something so the plate itself where it welds is not the full 1/4" in order to be able to have a good weld that didn't need ground down afterwards, as well as allowing the castly nut to have a nice flat machined surface to spin against.
 
Last edited:

juanprado

Well-known member
Steel Soldiers Supporter
5,614
2,923
113
Location
Metairie/La (N'awlins)
air lift bumper uses a different bracket collar /bearing plate that is different in depth than the regular bumper pintle collar. I have the holland part number in my build thread here. Check Tm's and you will see 2 different part numbers for the 4 hole bracket/collar.

Search Juan's m998
 

Action

Well-known member
3,576
1,558
113
Location
East Tennessee
Early and late full width rear bumpers have a large opening on the back side. The pintle does not go thru 2” of bumper, just the outside. It also uses the 2 angled brackets for mir strength.
 

Lothar

Well-known member
324
661
93
Location
North Arkansas
Appreciate all the input. I have cut a hole in the back side of the bumper and I will make some braces that will attach to the pintle hook assembly from the rear as the original configuration did. This should be sufficient for what I will use the hook for. Once I have the braces made, if there is any space left under the castle nut, I will make a reinforcement plate at that thickness. Will most likely end up shaving that back piece a little shorter so the reinforcement plate is a minimum of 1/4".20210612_175017.jpg
 
Last edited:
Top