• Steel Soldiers now has a few new forums, read more about it at: New Munitions Forums!

  • Microsoft MSN, Live, Hotmail, Outlook email users may not be receiving emails. We are working to resolve this issue. Please add support@steelsoldiers.com to your trusted contacts.


Rear piston appears slightly melted. What to do about it?

rustystud

Well-known member
9,071
2,387
113
Location
Woodinville, Washington
If you have an inclusion, you simply stop welding, reheat around the weld area, grind the inclusion out and start again, you don't want to try welding over them.
When welding cast-iron you never know how large the inclusion will be. I had parts that when cut open were basically shells around an large inclusion ! Of course you must grind out the mess the inclusion caused as that is just mush metal at that point. I figured anyone who has welded cast-iron would know that. Also to properly cool down any welded part you need to use "welding sand" to control the cooling. My whole point was that it isn't worth the effort to try and weld a block especially a large diesel one due to the stress they must endure. In my 40 years of wrenching I never saw any good coming out of welding a block. Sure you might get a few years out of it but then it will crack again and the problem will be even worse then the last time. So do you want to spend all that money on basically an "in frame rebuild" and then a few years later do it all over again ?
 
Last edited:

orren

Active member
Steel Soldiers Supporter
240
25
28
Location
Live Oak, Florida, USA
Yes, you are exactly right. If you can reasonably replace a piece such as the ubiquious LTD-465 block
then by all means do it and not fool around with doubtful solutions.

However, do what you got to do when trying to keep an antique going and parts are not available.

Good luck.
 

M37M35

Well-known member
Steel Soldiers Supporter
572
648
93
Location
East Central Oklahoma
Thanks for all the info and experience! I really appreciate it! The more I research welding or brazing cast, the more I think it's probably going to end up cracking again around the weld, which will make things worse than if I didn't weld it at all. I even talked with an experienced engine builder, and he agreed with trying the following...

I'm thinking now what I'm going to try is just drilling and pinning the ends of the crack to keep it from spreading. Then coat the liner with some kind of high temperature sealing compound to keep the antifreeze where it belongs. I'll replace the melted piston with the take-out from Searls84, and not do anything else to the engine. It ran great, had minimal blow-by, and held 45 psi oil pressure at hot idle, so I don't see any reason to touch the rings, bearings, or valves at this point. That will give me time to track down a replacement engine to have on hand if it gives me problems later on.

It may only last 10 miles, or it may last 10,000. All it'll cost me is the used piston and gaskets, so I think it's worth a shot. I may even go with the cheaper old style head gaskets since that's what was on it and they were still good after 28 years. They weren't even seeping oil.

I think something extra I will do is try to make up a coolant port for the rear freeze plug like Winfred mentioned. I'd have to figure out how the coolant flows in these blocks to figure how to plumb it, but it might be a good upgrade for these engines to keep #6 cooler, since that seems to be where most of the issues occur. And it wouldn't be wasted time/expense because I'd move it to the next engine if this one gives out.
 

rustystud

Well-known member
9,071
2,387
113
Location
Woodinville, Washington
Thanks for all the info and experience! I really appreciate it! The more I research welding or brazing cast, the more I think it's probably going to end up cracking again around the weld, which will make things worse than if I didn't weld it at all. I even talked with an experienced engine builder, and he agreed with trying the following...

I'm thinking now what I'm going to try is just drilling and pinning the ends of the crack to keep it from spreading. Then coat the liner with some kind of high temperature sealing compound to keep the antifreeze where it belongs. I'll replace the melted piston with the take-out from Searls84, and not do anything else to the engine. It ran great, had minimal blow-by, and held 45 psi oil pressure at hot idle, so I don't see any reason to touch the rings, bearings, or valves at this point. That will give me time to track down a replacement engine to have on hand if it gives me problems later on.

It may only last 10 miles, or it may last 10,000. All it'll cost me is the used piston and gaskets, so I think it's worth a shot. I may even go with the cheaper old style head gaskets since that's what was on it and they were still good after 28 years. They weren't even seeping oil.

I think something extra I will do is try to make up a coolant port for the rear freeze plug like Winfred mentioned. I'd have to figure out how the coolant flows in these blocks to figure how to plumb it, but it might be a good upgrade for these engines to keep #6 cooler, since that seems to be where most of the issues occur. And it wouldn't be wasted time/expense because I'd move it to the next engine if this one gives out.
Now that is a good plan !
 

rustystud

Well-known member
9,071
2,387
113
Location
Woodinville, Washington
Yes, you are exactly right. If you can reasonably replace a piece such as the ubiquious LTD-465 block
then by all means do it and not fool around with doubtful solutions.

However, do what you got to do when trying to keep an antique going and parts are not available.

Good luck.
If you have the money you can just have a new block made like Tracey Varns did. He's the guy running a 5,000 HP Hercules in his tractor. Of course the block was made from a solid block of steel and machined out on a CNC machine. The only thing stock in this engine is the crankshaft and it was heavily modified.
 

o1951

Active member
899
155
43
Location
Bergen County, NJ
You, Patracy and others have found damage caused by severe overheating at the rear of #6. To the point of melting rear of #6 piston. I do not remember this issue when engines were in service, so something changed over the years, causing less coolant flow to the rear of the block.

Water pump may have eroded and be flowing less, coolant passages may be restricted with corrosion and dirt. While you have engine opened up, I would try to restore engine cooling system to close to new condition. Drop lower radiator hose and power wash exposed cooling passages in block and head while it is off. When done, borrow/ rent a boroscope and look inside pump for wear, and inside cooling passages for restrictions that need more attention.

If you can fix the cooling system issue, the crack repair you propose may last a while. If not, I would expect another failure, be it the cracked head failure after repair Patracy experienced or something else.
 

rustystud

Well-known member
9,071
2,387
113
Location
Woodinville, Washington
You, Patracy and others have found damage caused by severe overheating at the rear of #6. To the point of melting rear of #6 piston. I do not remember this issue when engines were in service, so something changed over the years, causing less coolant flow to the rear of the block.

Water pump may have eroded and be flowing less, coolant passages may be restricted with corrosion and dirt. While you have engine opened up, I would try to restore engine cooling system to close to new condition. Drop lower radiator hose and power wash exposed cooling passages in block and head while it is off. When done, borrow/ rent a boroscope and look inside pump for wear, and inside cooling passages for restrictions that need more attention.

If you can fix the cooling system issue, the crack repair you propose may last a while. If not, I would expect another failure, be it the cracked head failure after repair Patracy experienced or something else.
Actually this problem with this engine design goes back decades and doesn't seem to have anything to do with corrosion or water pump failure. In fact the tractor racing community has known and talked about this issue for years now. There seems to be two block designs according to "Tracey Varns" . In our last talk he mentioned it several times. It was never published but handled "in house" at Continental and Hercules Engines. During his design and build-up of his racing engine Tracey talked with several engineers from Hercules and they talked about this issue. It seems that they tried to "open" up the area around number 6 cylinder but that made the block too weak and it would crack and in some cases actually break off chunks of the block. So they went back to the beefier block. Tracey eliminated all these problems by building his block out of solid steel. Since we are stuck with the original block all we can do is closely monitor the engine temperature and not allow the heat to build up. Since I don't exceed the RPM of my engine and don't lug around heavy loads I have never had a temp problem.
 

doghead

4 Star General /Moderator
Staff member
Super Moderator
Steel Soldiers Supporter
26,247
1,166
113
Location
NY
Thick Deck. An improved casting of the original block. Has "TD" cast on the side of the block near where the alternator is mounted.
 

Jbulach

Well-known member
Steel Soldiers Supporter
2,563
1,974
113
Location
Sunman Indiana
Anyone have any leads on sealers for M37M35 to start researching?
Also what's the wall thickness on these liners, any chance of being able to throw it on a lathe and cut small o-ring grooves in it?
 

M37M35

Well-known member
Steel Soldiers Supporter
572
648
93
Location
East Central Oklahoma
Actually this problem with this engine design goes back decades and doesn't seem to have anything to do with corrosion or water pump failure. In fact the tractor racing community has known and talked about this issue for years now. There seems to be two block designs according to "Tracey Varns" . In our last talk he mentioned it several times. It was never published but handled "in house" at Continental and Hercules Engines. During his design and build-up of his racing engine Tracey talked with several engineers from Hercules and they talked about this issue. It seems that they tried to "open" up the area around number 6 cylinder but that made the block too weak and it would crack and in some cases actually break off chunks of the block. So they went back to the beefier block. Tracey eliminated all these problems by building his block out of solid steel. Since we are stuck with the original block all we can do is closely monitor the engine temperature and not allow the heat to build up. Since I don't exceed the RPM of my engine and don't lug around heavy loads I have never had a temp problem.
Mine is a Continental. Do you know if the engines made by White had the same issue?
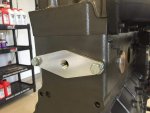
Does anyone have any thoughts on adding a coolant port to the rear freeze plug to increase flow, and possibly help this cooling issue? Help or hurt? How to plumb it?

freeze plug port.jpg

Anyone have any leads on sealers for M37M35 to start researching?
Also what's the wall thickness on these liners, any chance of being able to throw it on a lathe and cut small o-ring grooves in it?
I was thinking about a high temp thread sealant like one of these:
Loctite 5770. http://www.na.henkel-adhesives.com/industrial/product-search-1554.htm?nodeid=8797961060353
Loctite 567. http://www.na.henkel-adhesives.com/industrial/product-search-1554.htm?nodeid=8797713629185

I might try calling Loctite and see if they could recommend something for this...
 

rustystud

Well-known member
9,071
2,387
113
Location
Woodinville, Washington
Mine is a Continental. Do you know if the engines made by White had the same issue?
Does anyone have any thoughts on adding a coolant port to the rear freeze plug to increase flow, and possibly help this cooling issue? Help or hurt? How to plumb it?

View attachment 665357


I was thinking about a high temp thread sealant like one of these:
Loctite 5770. http://www.na.henkel-adhesives.com/industrial/product-search-1554.htm?nodeid=8797961060353
Loctite 567. http://www.na.henkel-adhesives.com/industrial/product-search-1554.htm?nodeid=8797713629185

I might try calling Loctite and see if they could recommend something for this...
That looks pretty slick ! I would install it to the water pump with a 1/2" hose. That would allow the coolant to flow completely out of the head instead of being forced down and into the intake manifold. There still would be enough flow for the manifold and the lower block I'm sure to prevent any problems.
 

M37M35

Well-known member
Steel Soldiers Supporter
572
648
93
Location
East Central Oklahoma
Well, it's been way too long but I'm finally putting the engine back together. I got frustrated with it and lost motivation to work on it, but I have some projects I need the crane for and dad wants it out of his shop.

I decided to replace the piston and sleeve with a used take-out. I used the rings that were on the take-out piston.

I called LocTite customer service and explained what I was trying to do. They recommended LocTite #640 or #641 retaining compound. #640 is high-strength high-temperature. #641 is low strength. I ended up using #641 to make it easier to remove the sleeve if I ever wanted to.

I ordered a 90 degree drill adapter and some stubby drill bits and drilled out the ends of the crack. I cut taper pins down to fit the holes, coated them with retaining compound before inserting them, and ground them down flush. I coated the sleeve and block with retaining compound and drove the sleeve in place. Then installed the head and torqued it down as quickly as I could before the retaining compound set up.

So far i have both heads back on and most of the other parts ready to go on. The intake manifold has slowed me down because I decided to check the thermostat and ended up twisting off one of the bolts. I also twisted off a couple heater hose fittings, so I have to deal with those.
I got the thermostat housing bolt and a heater fitting out, but still have another plug and broken off heater fitting to remove.

I'm sure I've missed some things... But here's pictures...

WP_20170121_001.jpgWP_20170120_001.jpgWP_20170611_006.jpgWP_20170611_001.jpgWP_20170611_005.jpgWP_20170624_010.jpgWP_20170624_008.jpgWP_20170624_004.jpgWP_20170624_002.jpgWP_20170624_007.jpg
 

M37M35

Well-known member
Steel Soldiers Supporter
572
648
93
Location
East Central Oklahoma
Thanks!


Making some progress. I got the intake and exhaust manifolds on. Turbo oil feed and drain lines on. Exhaust pipe hooked to turbo. Pushrods and rockers on. #5 and #6 rod bolts are torqued back down. I had taken out #5 piston and liner to check the block for cracks.

Hopefully tomorrow I can get the valves adjusted, the pan back on, and the injectors in. Then I won't be able to do much more until some parts come in.

Gates Green Stripe coolant hose PN 24226, 1-5/8" $9.18 per foot.
Gates Green Stripe coolant hose PN 24232, 2" $10.68 per foot.
Gates thermostat water outlet seal PN 33602 (Napa #4662), $2.73.
Gates lower coolant hose PN 20611, (Napa #7372) $8.31.
Stant thermostat PN 13938, (Napa #358180) $14.26.

All of that from RockAuto, which is 50% or better savings over the local autoparts store!


WP_20170703_002.jpgWP_20170703_003.jpg
Broke off heater fitting.

WP_20170703_004.jpg
The manifold gaskets were lacking a bolt hole. I had to punch one in each gasket. (Before and after pic) Also the smaller bolt holes were a bit too small, so I had to enlarge them. I coated them and the head gaskets with copper gasket spray.

WP_20170703_005.jpg
At some point someone had torched off a turbo to manifold bolt...

WP_20170703_006.jpgWP_20170703_008.jpgWP_20170703_007.jpg


WP_20170704_001.jpg


WP_20170704_002.jpgWP_20170704_006.jpgWP_20170704_005.jpg
I didn't notice until I started to put the rockers on, but the #4 intake valve is heavily worn on top where the rocker button rides. Maybe from lack of oil? But why? Not sure what happened here... Hopefully there's enough adjustment in the rocker to compensate for it.

WP_20170704_003.jpg
 

M37M35

Well-known member
Steel Soldiers Supporter
572
648
93
Location
East Central Oklahoma
IT'S ALIVE!!!!

Well, it was actually alive about three weeks ago but I've been too busy to sit down and post about it.

Got it all back together and started without much trouble, but by chance just happened to discover something that MIGHT have been the cause of the whole issue...


After I got it started I let it sit and idle for a few minutes to warm up and seat things in. While this was happening, I started wondering if the rockers were getting oil because of the aforementioned issue with the top of the valve where the rocker rides being worn. I took the oil fill cap off and watched the valves I could see, and it didn't look like they were getting any oil. I wasn't sure how much oil I was suppose to see, but I didn't see any. I let it idle for a few more minutes and checked again but still didn't see any oil.

I went over to another deuce I have and started it up and looked in the oil fill, and those rockers started getting oil in about 30 seconds, so I knew something was wrong...

I took the valve covers back off and looked things over, but didn't see anything obviously wrong. I started it back up, climbed up to look at the valves, and saw oil spraying all over the firewall! I jumped down and shut it off as quick as I could and started looking for the source...

Turns out the plug in the end of the rocker tube closest to the firewall was missing! I thought maybe it had just come out but I couldn't find it anywhere.
After taking the rear rocker assembly back off and looking things over very closely, I think that it's been missing for quite awhile, and that the valvetrain has been running without oil! Several of the valve stem ends have abnormal wear, but nothing seemed to be worn too excessively and the valves adjusted fine.


WP_20170716_005.jpgWP_20170716_001.jpg

The end of the rocker tube was 3/4" ID so I got some steel 3/4" freeze plugs from the local auto parts store. (That was an adventure in itself...) When I put a plug back in, it was barely even snug in the rocker tube. I'm guessing that was due to the tube being machined a little too big from the factory and that's why the original plug came out. Since the first plug was already in, I swedged out another plug and drove it in behind the first one.

WP_20170719_004.jpgWP_20170719_003.jpg


I put everything back together and ran it for a bit with the valve covers off and everything seemed to be getting oil.

So, Here's a theory... Please let me know y'all's thoughts on it...

It's my understanding that the rockers are fed oil from the rear of the rear head.WP_20170716_002.jpg
If that's the case, does that oil passage happen to be fed from the same oil passage that feeds the oil nozzle for the #6 piston?
If so, the passage to the rockers free-flowing oil could have reduced the pressure to the #6 nozzle.
If the #6 nozzle doesn't have enough pressure, it can't adequately cool the #6 piston.
Without enough oil to cool it, the #6 piston gets hot enough to melt slightly, and the back of #6 cylinder gets hot enough to cause a crack.

Possible? Thoughts?
 
Last edited:
Top
AdBlock Detected

We get it, advertisements are annoying!

Sure, ad-blocking software does a great job at blocking ads, but it also blocks useful features of our website like our supporting vendors. Their ads help keep Steel Soldiers going. Please consider disabling your ad blockers for the site. Thanks!

I've Disabled AdBlock
No Thanks