GunnyM1009
Well-known member
- 354
- 530
- 93
- Location
- Roanoke/Alabama
Steel Soldiers now has a few new forums, read more about it at: New Munitions Forums!

.View attachment 874332
1985 Rubber Trans mount versus new Polyurethane trans mount. Seeing this is what made me pull the trigger on redoing all the body mounts.View attachment 874333
Got the Energy Suspension body mount kit in today as well.


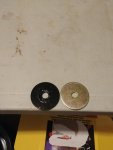
You may as well make a gantry and lift the body off the frame.So my kit from Energy Suspension was missing one of the 2-1/2 inch washers. I contacted ES and they would not send me a replacement because I ordered it from Amazon. Amazon issued me a $20 dollar refund to buy the piece since ES wouldn't honor there product. I couldn't find the correct size so I made one.View attachment 874429
One washer inside of another and welded. I realize I'm not a welder but they are permanently stuck together.
I know me to well. If the body comes off the frame entirely this will become a full blown restoration real quick instead of just a refresh and preservation. I'm trying to not let that happen because I would like to be driving it again sooner rather than later.You may as well make a gantry and lift the body off the frame.
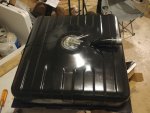
I got you. I misunderstood, I am replacing them all before the fuel tank, transmission, and transfer case go back in. The fuel tank being out makes getting to the rears easier. I'll have to start watching Little Reds thread a little closer glad you are finally going to get it completed.I was not talking body off restoration. I was talking getting the body up high enough to gain access to the current rear body mounts. Depending on rusted fasteners that can be a real chore. I use winches on the ceiling and bottle jacks to lift and shift the body around. A ratchet strap helps a lot also. I am doing the Energy Suspension cab/body mounts on my Little Red M1009 project today. I am going to complete this truck this year. I have screwed off long enough.
Appreciate it. I'll go with the Energy Suspension inserts.I heard a green grasshopper has a green Hiney hole. I never looked. I used Energy suspension motor mount inserts on every build. For someone to say these CUCV rattle boxes have more vibration is Ludacris. The only time I felt no vibrations on a CUCV was when it was parked and not running. My ears still vibrate a half hour after I get out of one. Ever hear katydids while driving? I do everytime I am in a CUCV. They are good and easy to install.
Give Energy Suspension #31152 G available on Amazon a look, I believe these are the correct ones. Others will say otherwise, and other ones will work, but I believe these are the correct ones. I researched for a M1008. if the M1009 is the same then these will work.Appreciate it. I'll go with the Energy Suspension inserts.
Thanks the ones for our trucks are 3.1116G though.Give Energy Suspension #31152 G available on Amazon a look, I believe these are the correct ones. Others will say otherwise, and other ones will work, but I believe these are the correct ones. I researched for a M1008. if the M1009 is the same then these will work.
I didn't think about trying that. I just figured the relay was bad since that seems like where the power is stopping even though I find that odd since the relay is clicking.Does it blow if you jump across the relay?
We get it, advertisements are annoying!
Sure, ad-blocking software does a great job at blocking ads, but it also blocks useful features of our website like our supporting vendors. Their ads help keep Steel Soldiers going. Please consider disabling your ad blockers for the site. Thanks!
