• Steel Soldiers now has a few new forums, read more about it at: New Munitions Forums!

  • Microsoft MSN, Live, Hotmail, Outlook email users may not be receiving emails. We are working to resolve this issue. Please add support@steelsoldiers.com to your trusted contacts.

Rim and tire set up

True Knight

Active member
673
179
43
Location
San Pedro, CA
True Knight - Looks like you have done quite a bit more in the back than just some lift for tires??? I see disc rotors back there but nothing obvious for the lift. Is the lift you did spring only? If so, why go with spring only and not a flip kits etc. etc.?

I love this whole thread by the way. Very good dialog, no mud slinging, great photos etc.

Thanks to everyone!

Yeah, I switched to disc brakes in the rear. For the lift it was all new springs all around. The old springs were extremely stiff, and the fronts were sagging too. I went with the "softride" springs to start off with. When I decide to go a bit higher I will do some shackle work and mess with the spring packs to soften them up a bit for better articulation. I'll have to do some more research to do before then though.
 

bshupe

New member
440
4
0
Location
Mount Vernon, WA
Yeah, I switched to disc brakes in the rear. For the lift it was all new springs all around. The old springs were extremely stiff, and the fronts were sagging too. I went with the "softride" springs to start off with. When I decide to go a bit higher I will do some shackle work and mess with the spring packs to soften them up a bit for better articulation. I'll have to do some more research to do before then though.
Thats great. How did you tackle the proportioning valve issues/master cylinder issues with the brake change and also the parking brake issue?

Thanks again!
 

IdahoPlowboy

Member
286
13
18
Location
Ririe Idaho
Thats great. How did you tackle the proportioning valve issues/master cylinder issues with the brake change and also the parking brake issue?

Thanks again!
What would the master cyl issues be? I ask because I would like to do the same thing myself. Can you just elimanate the proportioning valve?
 

Sharecropper

Well-known member
Steel Soldiers Supporter
1,836
987
113
Location
Paris KY
I recommend against eliminating the rear brake proportioning valve. It is designed to increase braking power to the rear wheels when a load is added to the bed. For instance, if you were to load 3000 pounds of gravel in the bed, you want the rear brakes to deploy first and strongest. As a load is added to the bed, the frame moves downward. The rod that connects the rear axle to the valve does not move downward (because it is connected to the axle), and this causes the rod to rotate the valve counter-clockwise thereby increasing the brake pressure to the rear wheels.

It's easy to fabricate a longer connecting rod. I posted details of this in Post #75 of my rebuild thread. After fabricating a longer rod, before connecting it to the valve make sure the little dot on the valve is pointed straight up.

Hope this helps.
 

bshupe

New member
440
4
0
Location
Mount Vernon, WA
IdahoPlowboy -

Disk brake calipers use far more brake fluid than a drum wheel cylinder so capacity could be an issue when pads get low. You will notice on the older MCs that the split reservoirs are not the same size because the disc in the front uses different amounts of fluid than the drum in the back.

I think removing the proportioning valve is one solution, I dont know if it is the right or complete solution. If you are only planning to drive the truck off-road or around the farm etc. it wont matter so much but if you are planning to drive on the highway or around town frequently it could become a life and death issue.

One side of the problem clearly is getting enough hydraulic fluid under the right pressure and volume to the rear brakes but the other side of it is only delivering enough pressure so you dont end up locking up the rear wheels all the time. Because of this, and my personal plans to drive on roads with other cars etc. Im not a fan of just disabling or removing the proportioning valve.

Hope that answered your question without creating too many more. lol
 

Sharecropper

Well-known member
Steel Soldiers Supporter
1,836
987
113
Location
Paris KY
As a follow-up to my previous post -

I installed rear disc brakes as part of my rebuild, and can attest that there are no issues regarding fluid capacity or braking capacity to the rear wheels. My truck will stop on a dime going forward or backward. And unlike the factory rear drums, there is no difference in brake action after fording a creek.
 

bshupe

New member
440
4
0
Location
Mount Vernon, WA
As a follow-up to my previous post -

I installed rear disc brakes as part of my rebuild, and can attest that there are no issues regarding fluid capacity or braking capacity to the rear wheels. My truck will stop on a dime going forward or backward. And unlike the factory rear drums, there is no difference in brake action after fording a creek.

Thanks Sharecropper, thats good to know. I was a little confused about your comments in your excellent rebuild thread on the p-valve arm. You said that the arm needs to be 90 degrees. Is that 90 between the two arm sections or to the axle?

Also, Im not sure I saw anywhere that you noted the total lift you achieved with the kit you installed where you were measuring from the frame to axle. Maybe I missed it but if you would indulge me here that would be great. It also looked like you removed an overload and perhaps some kind of zero rate block when you rebuilt the spring packs. Is that correct? If so, what was the purpose/reasoning behind it?

Thanks for all the great and well documented information on your truck.
 

Sharecropper

Well-known member
Steel Soldiers Supporter
1,836
987
113
Location
Paris KY
bshupe -

The connecting arm that comes up from the axle needs to be approximately 90 degrees to the short arm that connects to the proportioning valve. But what is more important is the radial position of the valve after the arm is connected. After you get the longer arm fabricated and installed, remove the nut and short arm from the valve, rotate the valve stem until the dot is at 12:00 o'clock, then reinstall the short arm and nut. These adjustments should be done with the truck sitting on level ground with no load.

The total lift was 5" achieved with ORD shackle flip kit and Zero Rates. When I rebuilt my rear spring packs I removed the top helper spring and spacer block because with the shackle flip kit the helper spring would never again touch the frame mounted landing brackets.
 

richingalveston

Well-known member
1,715
120
63
Location
galveston/Texas
i want sharecroppers wheels on my 1009

not to highjack a thread but i am building my 1009 now and really like your settup, do you think it would work under an 09 with the shorter wheelbase, and how do those tires run on the highway?
 

IdahoPlowboy

Member
286
13
18
Location
Ririe Idaho
IdahoPlowboy -

Disk brake calipers use far more brake fluid than a drum wheel cylinder so capacity could be an issue when pads get low. You will notice on the older MCs that the split reservoirs are not the same size because the disc in the front uses different amounts of fluid than the drum in the back.

I think removing the proportioning valve is one solution, I dont know if it is the right or complete solution. If you are only planning to drive the truck off-road or around the farm etc. it wont matter so much but if you are planning to drive on the highway or around town frequently it could become a life and death issue.

One side of the problem clearly is getting enough hydraulic fluid under the right pressure and volume to the rear brakes but the other side of it is only delivering enough pressure so you dont end up locking up the rear wheels all the time. Because of this, and my personal plans to drive on roads with other cars etc. Im not a fan of just disabling or removing the proportioning valve.

Hope that answered your question without creating too many more. lol
Yes it was helpful. Thank you.
 

twlinks

New member
225
3
0
Location
Hutchinson, KS
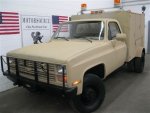
Okay, back to the rim and tire set-up. Are the 33x12.5x15 Duratrak's on stock wheels that I was planning to put on going to look really puny on my M1009? It isn't lifted (heck, it's not even here yet) and I'm not sure that I'm going to lift it, or will I need to for the 33's?
 
Last edited:

Sharecropper

Well-known member
Steel Soldiers Supporter
1,836
987
113
Location
Paris KY
Reply to Richingalveston -

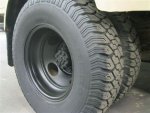
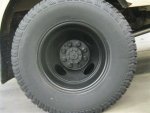
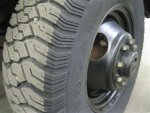
My tire/wheel setup consists of 11.00/20 NDT mounted on custom fabricated 20" Firestone split rims. They are 44" tall. In addition to a 5" lift, I also had to trim the front fenders substantially to facilitate clearance. I also had to move the front axle 1" forward via the Zero Rates to clear the inner fender housing.

So to answer your question - You could possibly get them on there, but you would be geared unbelievably high with the K5 gearing and would probably need to change ratios. This could get a little pricey, not to mention the cost of the custom 20" rims.

An alternative would be to mount 9.00/16 NDT on standard 16" rims. I have seen this done before and it really looks good, raises the truck slightly, and can be achieved without trimming the fenders. But one word of caution in this regard - the NDT tires are all nylon bias-ply and require tubes and boots. They are tough to keep balanced, especially during cold weather. I overcame this issue by running Balance Masters behind each wheel. This is a device that contains a tube with 40 oz of Mercury. At approximately 15 MPH, the Mercury will relocate inside the tube to automatically balance the entire wheel assembly. If mud or snow gets caked up in the wheel, the Balance Masters instantly adjust to this added weight and re-balance the entire wheel assembly. I love 'em. My truck is vibration-free and smooth as silk throughout all speed ranges.

I have been asked why I prefer the NDT tread over conventional treads. I explaind this in gret detail in Posts #62 + 63 of my rebuild thread.

Hope this helps.
 

richingalveston

Well-known member
1,715
120
63
Location
galveston/Texas
33x12.5x15

twlinks,
33x12.5x15 is the largest you can put on a stock m1009 that i know of, that is what is on mine (see avatar) I have mine painted now and plan to give picks of my rebuild soon. they look without lift get small with lift, i have mud kings now that are like new but i think are two old for the highway. They sat on my old 1009 for 6 years and only drove about 50 miles a year at deer lease, it was a rust bucket with brand new tires. be great for some one for all offroad.

Sharecropper, thanks for the reply, i plan on upgrading the axles to d60 and 14 bolt, not sure on gears but will make any needed changes.
I dont want to trim the fenders alot so i may just have to go shorter on tire.

This is my toy/part time driver will be about 50/50, street to offroad. My offroad is more deep mud and not a lot of rock climbing. i was only going to go 4 inches on lift, just enough for cross over and high steer but i dont guess another 2 inches would matter. I beleive i get an inch with axle swap. Zero rares are planned and I like the auto balancers, would run them two, i have a motorhome that I plan to purchase the balancers for also.
My biggest question on the tires would be how they ran on the streets at highway speeds and also in the rain, I read your post and am very jealous of your rebuild thread. I would like to copy it to my 1009

to stay on the tire size question, has anyone done a rear end gear to tire size calculator. would 4:10 rear end and 44 tires be same as 3:73 and 31 inch tires to your tranny. thus not changing your speedo and rpm's.

Thanks,
rich
85 M1009
 
Top