• Steel Soldiers now has a few new forums, read more about it at: New Munitions Forums!

  • Microsoft MSN, Live, Hotmail, Outlook email users may not be receiving emails. We are working to resolve this issue. Please add support@steelsoldiers.com to your trusted contacts.


Small bridging project M1009

Elektroman99

Active member
147
128
43
Location
Siegburg, Germany
"two steps forward and one step back..."

OK, after removing the dash and speedometer again over the weekend, I checked all the wires again and found a loose connector. After fixing the plug to its socket, the speedometer background light was also burning again.

Finally, at long last, this ToDo was done....
😅🙂😅

I had also once connected the voltmeter with alligator clips and wires directly to the distribution panel in the engine compartment. Here I would have expected a small response. The pointer did not move a millimeter, so the original voltmeter is defective.

After some research, I still had the engine coolant topped off and also the windshield spray water. 🧐👌

Checking the windshield wipers showed, they sit bombproof, no idea why in the rain the left one unlocks every now and then. I have taken from a cotter pin drilling in the wiper arm first of all distance. 😕

From the Venyl Dashboard are the screw sockets for the upper leftmost and upper rightmost screw of the dash cover broken out. Actually I wanted to fix that with perforated tape and some screws. Unfortunately I didn't find any more perforated tape with me, although I was convinced there would have been a roll lying around somewhere.

I polished the speedometer glass with an acrylic glass grinding paste. The result was satisfactory.
After reassembly, the day had passed and I drove the vehicle back to storage.


While parking in the underground garage I noticed that the rear right taillight was out, probably a loose contact. Again a ToDo more...

The following ToDo's are still open:
- Tailgate and window mechanics
- (4) Leakage during heavy rainfall
- 2te indicator light of generator 2 does not light up
- 4 WD lamp does not light
- Check fuel gauge
- Connect cigarette lighter
- Build screw socket for dashboard covers
- retrofit spare wheel
- a seat belt from the back seat is stuck
- in summer "interior painting"
- voltmeter line check
- Check both generators

Strange... it becomes simply not less ToDo's...
 

Elektroman99

Active member
147
128
43
Location
Siegburg, Germany
Dear Steel Soldier Community,

I have 1001 questions and every time I pull into the garage because I've spent hours on the vehicle again, I have "at least" one new question.
If I just ask them here in the thread, they get lost or we digress in parts.
😥

I will create a separate thread for each of my questions for this reason and my goal is to get answers. I assume that these are also somewhere in the forum also already. Some are also described in the TM - in parts. And I have already spent a lot of time collecting the TM, repairing manuels and all kinds of writing.

I also browsed the FAQ thread (link) for some pages and also used the search function of the forum. But I hope that the swarm knowledge of the forum leads the fastest to the goal.

I hope that you have understanding and do not punish me with ignorance.
🙂(y)
 

Mullaney

Well-known member
Steel Soldiers Supporter
Supporting Vendor
7,368
19,072
113
Location
Charlotte NC
Dear Steel Soldier Community,

I have 1001 questions and every time I pull into the garage because I've spent hours on the vehicle again, I have "at least" one new question.
If I just ask them here in the thread, they get lost or we digress in parts.
😥

I will create a separate thread for each of my questions for this reason and my goal is to get answers. I assume that these are also somewhere in the forum also already. Some are also described in the TM - in parts. And I have already spent a lot of time collecting the TM, repairing manuels and all kinds of writing.

I also browsed the FAQ thread (link) for some pages and also used the search function of the forum. But I hope that the swarm knowledge of the forum leads the fastest to the goal.

I hope that you have understanding and do not punish me with ignorance.
🙂(y)
.
As long as you have "cracked the books" and use what you have learned there - the guys will be happy to help. After all, that is the real purpose of this site.
 

Elektroman99

Active member
147
128
43
Location
Siegburg, Germany
1 Question:
"Technical inspection of the fuel gauge on the M1009 / Chevrolet Blazer K5 Diesel." -> Link

2 Question:
where is the simpelst Check for the control indicator "4 WD active" in the dashboard -> Link

3 Question:
how is the simplest check to Check generator 1 and generator 2 - M1009, 6.2 Diesel -> Link
 
Last edited:

Elektroman99

Active member
147
128
43
Location
Siegburg, Germany
With every move I make, I realize how inexperienced I am.


So over Easter was again some time to do some work on the Blazer.

First I checked the fuses to the warning light 4WD and alternator 1, both fuses are ok.

Then with the engine running I checked the generators. - From the driver's point of view - the left generator is working, because I could measure approx. 15 - 16 v at the contacts. With the right generator I measure somehow "nothing". But I am also a bit more cautious, because I have to reach into the engine via the batteries and have respect for the fan. I will have to help myself here once again with crocodile clips and test leads.

:unsure:


Once again some new questions arose

The locking "hook" is loose - How to tighten the locking mechanism again? M1009 / Chevrolet Blazer K5 Diesel. -> Link

"Handles" for rear side windows, anyone know what goes there? - M1009 / Chevrolet Blazer K5 Diesel. -> Link


https://www.dropbox.com/s/65d5xx1t1rgjd7o/20230410_101203.jpg?dl=0
https://www.dropbox.com/s/02bu0g6e9b5b6q8/20230410_101154.jpg?dl=0
https://www.dropbox.com/s/ek2mj9u7tuc566z/20230410_101218.jpg?dl=0

Best regards
Elektroman99
 
Last edited:

Elektroman99

Active member
147
128
43
Location
Siegburg, Germany
1 Question:
"Technical inspection of the fuel gauge on the M1009 / Chevrolet Blazer K5 Diesel." -> Link
Solved
In the answer to my question had been spoken of a 20 Ohm resistor and that the fuel gauge in the first third of consumption is somewhat "sluggish".
The resistance I had not ausgemwesen, but the weekend before last I had consumed about 11 liters, the display had moved by 1/10 or 1/8. So it is functional, how exactly with ¼ full tank I can not yet say....

The locking "hook" is loose - How to tighten the locking mechanism again? M1009 / Chevrolet Blazer K5 Diesel. -> Link
Solved
 

Elektroman99

Active member
147
128
43
Location
Siegburg, Germany
Next step and again the questions pile up...

Thread type and size of oil line radiator left - M1009 / Chevrolet Blazer K5 Diesel – Link

Maintenance Work "Lubricating" and "Greasing" - M1009 / Chevrolet Blazer K5 Diesel – Link

Dust cap for headlights - M1009 / Chevrolet Blazer K5 Diesel – Link

Best regards

Elektroman99
 

Elektroman99

Active member
147
128
43
Location
Siegburg, Germany
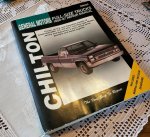
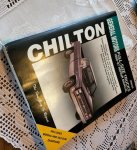
Last week it arrived...

20230615_204304.jpg

The service and repair Bible to the Chevrolet Blazer. I was a bit surprised myself, as I had already forgotten about the Ebay International order from early March 2023.
Yes, of course... I had been gathering all sorts of digital versions of the repair descriptions in the time between February and now and yes, it was unnecessary. It was pure luxury in retrospect.
I'm old fashioned and paper is just haptically different than a PDF. Probably printing a PDF at a copy store would have been cheaper than buying the original book.

Another step towards good recovery work on the M1009.


Best regards

Elektroman99
 

Attachments

Mullaney

Well-known member
Steel Soldiers Supporter
Supporting Vendor
7,368
19,072
113
Location
Charlotte NC
Last week it arrived...

View attachment 899809

The service and repair Bible to the Chevrolet Blazer. I was a bit surprised myself, as I had already forgotten about the Ebay International order from early March 2023.
Yes, of course... I had been gathering all sorts of digital versions of the repair descriptions in the time between February and now and yes, it was unnecessary. It was pure luxury in retrospect.
I'm old fashioned and paper is just haptically different than a PDF. Probably printing a PDF at a copy store would have been cheaper than buying the original book.

Another step towards good recovery work on the M1009.


Best regards

Elektroman99
.
That will make a neat coffee table book!

.
 

Elektroman99

Active member
147
128
43
Location
Siegburg, Germany
In the course of the last 2 days, some questions were added, enclosed the corresponding threads:

Tires and air pressure - M1009 / Chevrolet Blazer K5 Diesel - Link - Solved!

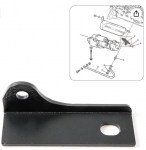
trapezoidal plate under the canister holder - M1009 / Chevrolet Blazer K5 Diesel - Link

Best regards

Elektroman99
 
Last edited:

Elektroman99

Active member
147
128
43
Location
Siegburg, Germany
Dear Steel Soldier Community,

Last weekend I had time again to do some work on the M1009. Thereby I had a short drive on a dirt road and during the inspection in the underground parking I discovered soil on the side skirt plate inside.

This led to my question whether there are optimizing measures / kits to improve the rear wheel arches here. -> Link


Best regards

Elektroman99
 

Elektroman99

Active member
147
128
43
Location
Siegburg, Germany
Dear Steel Soldier Community,

Small steps...

The Test
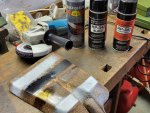
Finally, after an almost "endless story" I could take the spray cans with "Cosmoline RP-342 "Heavy" Military-Grade Rust Preventive Spray" and "Cosmoline RP-342 "Heavy" Military-Grade Rust Preventive Spray 'Black'" in my possession.
To see a little "surface study", I had used an old "coal shovel" as a test object. I had derusted the metal in the first step with a special "roughing wheel" and the angle grinder and then applied three different sprays. In addition to the above then Anti-Rust Primer.

20230729_203709.jpg

Engine hood
After the test it went then to the hood, this had - inside - two rust spots. So derusting, cleaning, priming and new paint and Cosmoline RP-342. Result was convincing.

20230730_170750.jpg

Windshield
I knew from working in the rain that the windshield had 2 leaks. These were leaking behind the dash into both foot wells. I thus avoided doing anything with the M1009 in the rain. Now finally the cartridge "LIQUI MOLY window seal (can be dabbed off)" was used. The goal was to improve the seal. This dragged on for a long time and yes and went only very sluggishly. But as far as I could tell, the seal was the cause of both cockpit leaks.
The result will probably scare off some and I think once you've done 2-3 windows, it looks nicer. But for me, the first step was to protect the stock of the vehicle from further wetness in the rain. But I am here about the practicality, because if it looks nice, but water runs into my footwell, I am not helped. It really only went millimeter by millimeter and dragged on for a long time.
Now I just have to see how I seal the lower edge of the windshield....

20230730_162552.jpg 20230730_162603.jpg


On the ramps

20230730_181052.jpg


Then it was time to put the wagon from "on ramps". Was not so difficult, but also a bit unfamiliar. A long planned quiet sighting of the underbody took place.
After I had convinced myself of it, I had changed all grease nipples I had found as far as necessary against new ones and provided with protective caps. Then my grease gun refused to work and I was done for the day.

20230730_193422.jpg 20230730_193429.jpg

Some done and again new questions raised, but it goes forward.


Best regards

Elektroman99
 

Elektroman99

Active member
147
128
43
Location
Siegburg, Germany
It's a horror... :cry:

If you don't have your own assembly hall or barn, you're very dependent on the weather.

Now that I have the suspected causes for the starter motor that keeps coming loose - see the thread - and the Blazer is covered in the underground garage, the parts I need have arrived bit by bit.

Unfortunately, however, the weather is now so "mixed" that I don't want to risk a drive and assembly in the open air. We've had fall weather here for a few days now. In Germany, unfortunately, it also means that "road salt" is being used by the towns.

I now hope that it will be dry for another 2-3 days and slightly above zero degrees Celsius or 32 degrees Fahrenheit.


Best regards

Elektroman99
 
Top
AdBlock Detected

We get it, advertisements are annoying!

Sure, ad-blocking software does a great job at blocking ads, but it also blocks useful features of our website like our supporting vendors. Their ads help keep Steel Soldiers going. Please consider disabling your ad blockers for the site. Thanks!

I've Disabled AdBlock
No Thanks