riderdan
Member
- 313
- 20
- 18
- Location
- Central Kansas
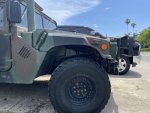
OK, now I've got real problems. ") Not only do I have this giant green thing in my driveway, I'm figuring out all the nifty stuff I need to buy to bring it back to a "more-like-it-was-issued" state.
Not only do I have this giant green thing in my driveway, I'm figuring out all the nifty stuff I need to buy to bring it back to a "more-like-it-was-issued" state.
Ordered a fire hydrant for the bracket next to the driver's seat. Buying some steel to make my own airlift bumper. Buying tools for the pioneer tool rack. Seat belt kit for the back seats. Radio tray. Plus, the stuff I need to get it to pass inspection: license plate holder and light, backup lights, etc. My wife's definitely going to think the humvee's another woman!
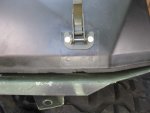
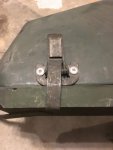
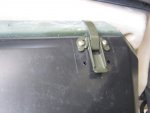
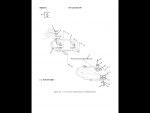
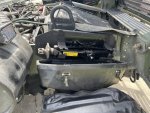
One thing I remember is that the jack and associated tools was stored under the hood. Not that fancy new-fangled bogert thing those spoiled kids get these days. A man's jack from back when we had to push humvees into the motorpool, uphill both ways! Anyway, I'm wondering if there's a source for those... I searched the usual suspects (ePay, a couple surplus sites) but couldn't locate anything more than the jack/tools and a cover. Ideally I'd like to have the whole thing. Any ideas?
Not only do I have this giant green thing in my driveway, I'm figuring out all the nifty stuff I need to buy to bring it back to a "more-like-it-was-issued" state.Ordered a fire hydrant for the bracket next to the driver's seat. Buying some steel to make my own airlift bumper. Buying tools for the pioneer tool rack. Seat belt kit for the back seats. Radio tray. Plus, the stuff I need to get it to pass inspection: license plate holder and light, backup lights, etc. My wife's definitely going to think the humvee's another woman!
One thing I remember is that the jack and associated tools was stored under the hood. Not that fancy new-fangled bogert thing those spoiled kids get these days. A man's jack from back when we had to push humvees into the motorpool, uphill both ways! Anyway, I'm wondering if there's a source for those... I searched the usual suspects (ePay, a couple surplus sites) but couldn't locate anything more than the jack/tools and a cover. Ideally I'd like to have the whole thing. Any ideas?
.JPG)