• Steel Soldiers now has a few new forums, read more about it at: New Munitions Forums!

  • Microsoft MSN, Live, Hotmail, Outlook email users may not be receiving emails. We are working to resolve this issue. Please add support@steelsoldiers.com to your trusted contacts.


The beast died after hitting a bump!!

Ford Mechanic

Active member
1,805
6
38
Location
Edenton, NC
My last post I just gave you a easily understood explanation of some basic auto electrical theory.

Unfortunately I don't have a wiring diagram available so I can't contribute to how to test the pcb.

I belive I saw you post that you had a volt meter? I would suggest checking for voltage at that battery cut off and a volt drop test across that switch. Since your questioning it anyway.

Your truck should be able to start and run without the alternator at all.

I would really suggest grabbing a wiring diagram and follow the power flow thru the truck instead of jumping around. You'll learn alot more and spend less money. Sorry

Sent from my SM-G900V using Tapatalk
 

Brutacus

Active member
Steel Soldiers Supporter
240
198
43
Location
Marion, AR.
My last post I just gave you a easily understood explanation of some basic auto electrical theory.

Unfortunately I don't have a wiring diagram available so I can't contribute to how to test the pcb.

I belive I saw you post that you had a volt meter? I would suggest checking for voltage at that battery cut off and a volt drop test across that switch. Since your questioning it anyway.

Your truck should be able to start and run without the alternator at all.

I would really suggest grabbing a wiring diagram and follow the power flow thru the truck instead of jumping around. You'll learn alot more and spend less money. Sorry

Sent from my SM-G900V using Tapatalk

I've already printed a copy of the wiring diagram form the tech manual. I would like to get my copy laminated. LOL We've followed it down from the ignition switch, to the kill switch. The Battery cut-off switch feels as if it is mechanically loose on the inside. This could account for another poor connection. As you said, "Corrosion and loose connections draw amps and can act as a load in a circuit causing heat, burned connectors, and burned wires", so it's possible my switch might be burnt out. My buddy in Memphis is getting me a replacement for $20, so when he comes through I'll get that issue ruled out. Now if this doesn't fix my problem, my assumptions will go towards the PCB. That's what is next inline, down from the ignition switch. This is turning into a good learning experience for me, albeit through the process of elimination.
 

big block 88

Member
862
17
18
Location
Topeka/Kansas
Once again i guess i dont follow your method of elimination at all. Why not just jump around the switch and bam it either works or doesnt and you KNOW it is either that or not.
 

Jbulach

Well-known member
Steel Soldiers Supporter
2,592
2,052
113
Location
Sunman Indiana
I don't yet have enough experience with the gear reduction starters, if they actually use less current or not, and so on...
...I hope they do consume less current, this would be a great benefit for our hobby because most of us only run 2 batteries.
By the nature of their design they will, and do consume considerably less power.
 

Jbulach

Well-known member
Steel Soldiers Supporter
2,592
2,052
113
Location
Sunman Indiana
Have never seen a data plate on my alternator but havn't looked either. Both look like the above pictures, but my starter zips pretty quick.
It's very possible it has been painted over.

The 8.3 cranks very fast, unless your batteries are down or junk.
 

Jbulach

Well-known member
Steel Soldiers Supporter
2,592
2,052
113
Location
Sunman Indiana
I've already printed a copy of the wiring diagram form the tech manual. I would like to get my copy laminated. LOL We've followed it down from the ignition switch, to the kill switch. The Battery cut-off switch feels as if it is mechanically loose on the inside. This could account for another poor connection. As you said, "Corrosion and loose connections draw amps and can act as a load in a circuit causing heat, burned connectors, and burned wires", so it's possible my switch might be burnt out. My buddy in Memphis is getting me a replacement for $20, so when he comes through I'll get that issue ruled out. Now if this doesn't fix my problem, my assumptions will go towards the PCB. That's what is next inline, down from the ignition switch. This is turning into a good learning experience for me, albeit through the process of elimination.
If your luck is like mine, with your process of elimination of new parts and poor test methods, then your solution will be the last component you replace.

I'm assuming you don't have a load tester for your batteries? Just checking volts with a meter is not good enough, as gimpyrobb stated. Pull those big boys out and take them to have them tested with a carbon pile. Anyone that sells batteries should do it for free. If only ONE is bad buy TWO new ones, too replace your old ones! Reinstall your proven good, fully charged batteries, then try to crank.

Also checking voltage on both sides of the battery disconnect will not rule it out, you can get residual through a bad switch that will read fine on a volt meter, unless under load. Disconnect your batteries, then unbolt the cable off one side of your disconnect switch and bolt it on top of the cable on the other side of the switch. Reconnect the batteries and try to start. This is a method of jumping around the switch as big block 88 suggested.

Be sure to try and start after every thing you do, or you might not know exactly how you fix it.

If the truck does start you need to immediately check the voltage to verify your alternator is not junk and high volting, so you can shut it down quickly!
I'll let someone else answer what voltage is too high...

Good luck!
 

Ford Mechanic

Active member
1,805
6
38
Location
Edenton, NC
If your luck is like mine, with your process of elimination of new parts and poor test methods, then your solution will be the last component you replace.

I'm assuming you don't have a load tester for your batteries? Just checking volts with a meter is not good enough, as gimpyrobb stated. Pull those big boys out and take them to have them tested with a carbon pile. Anyone that sells batteries should do it for free. If only ONE is bad buy TWO new ones, too replace your old ones! Reinstall your proven good, fully charged batteries, then try to crank.

Also checking voltage on both sides of the battery disconnect will not rule it out, you can get residual through a bad switch that will read fine on a volt meter, unless under load. Disconnect your batteries, then unbolt the cable off one side of your disconnect switch and bolt it on top of the cable on the other side of the switch. Reconnect the batteries and try to start. This is a method of jumping around the switch as big block 88 suggested.

Be sure to try and start after every thing you do, or you might not know exactly how you fix it.

If the truck does start you need to immediately check the voltage to verify your alternator is not junk and high volting, so you can shut it down quickly!
I'll let someone else answer what voltage is too high...

Good luck!
Checking for voltage on the 2 terminals will show if it's closing or not, then a Voltage Drop test will show any load present across the 2 terminals. Don't even have to turn a wrench and you've tested the switch.

Check this out www.engine-light-help.com/voltage-drop.html

Sent from my SM-G900V using Tapatalk
 

Jbulach

Well-known member
Steel Soldiers Supporter
2,592
2,052
113
Location
Sunman Indiana
Checking for voltage on the 2 terminals will show if it's closing or not, then a Voltage Drop test will show any load present across the 2 terminals. Don't even have to turn a wrench and you've tested the switch.

Check this out www.engine-light-help.com/voltage-drop.html

Sent from my SM-G900V using Tapatalk
Yeh, trying to keep it simple, without knowing what he really has where and more than likely caused two problems trying to fix one.
 

big block 88

Member
862
17
18
Location
Topeka/Kansas
Yeah thats the thing on these old trucks you have to be ready to learn and listen. There is no magic answer any of us can give that will make the truck start to run. There is an issue i assure you it is an easy fix and would take very little time to diagnose if the system is gone through in order from one end to the other.

I recommended jumping the switch to give the easiest method of detection to a guy newer to these trucks and diagnosing.

If this were me i would have hooked 24volts straight to the starter and see what happened. If that worked i would make jumper leads and see if that worked if it didnt i would go to the batteries and check condition and charge of bats then connections, the the cut off switch, checking to see if the truck would start between each change i made. Then follow the cables checkin condition all the way to the starter checking connection of starter. Then finally the pcb.

perhaps the truck is not easily accessable and diagnostics cant be done easily? None of it is hard or tales that long just a bit of patients.
 

74M35A2

Well-known member
4,145
312
83
Location
Livonia, MI
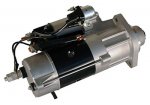
A gear reduction starter pulls 200 amps less initial inrush current, and 50 amps less continuous current while cranking. They weight half of stock, and are 1/3 smaller in diameter and length.

If your volt gauge is out of the green with the engine running, your alternator is a POS. Pic in my avatar shows an aftermarket alt and A/C compressor on an 8.3L. I will find a starter pic and post it.

Weight is 28lbs, the small relay attached to the solenoid is optional, and can replace the older style solenoid in the PCB. Can wire directly to starter switch. 4:1 planetary gear reduction in the nose cone. Guaranteed performance down to -40, 50,000 cycle design life, all junctions sealed with O rings, 2 separate water drains, 5 different greases throughout. Pinion shaft has a seal. Full bearing construction, no bushings. Armature high speed computer balanced, operates at 20,000rpm. Over-running clutch equipped.

IMG_3933.JPG
 
Last edited:

Brutacus

Active member
Steel Soldiers Supporter
240
198
43
Location
Marion, AR.
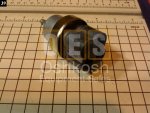
I can't bypass my battery disconnect that way. Mine has four leads , three of which run into the PCB. Mine is worn out! I was going to replace it with a new one sometime in the future, but for $20 dollars, I can't say no to the weekend after next. Here is picture of the same switch my truck uses, the data plate around it says battery disconnect. It's right next to the fuel tank switch on the dash. My voltage tester does have a load tester, it's an older snap-on my dad used from when he was a diesel mechanic. Now PLEASE keep this in mind, I cannot relay any of the information from you guys to him, because he ALREADY KNOWS EVERYTHING!! Besides ripping my beard out in frustration the batteries are testing in the green on a load, and that's testing them one at a time. Right now the batteries are ok, but sometime in the future they will get replaced eventually. I won't be able to work on truck this weekend or next weekend due to family stuff. If I get a minute, I'll try out the things what you guys are telling me. This is the only way I will learn, or my father... hopefully. LOL
391.jpg
 

big block 88

Member
862
17
18
Location
Topeka/Kansas
Lol. OOOOOOPPPPSSS....That is not what i was expecting when you said battery disconnect switch. Perhaps i am alone on this but to me a battery disconnect and the main power are different things entirely. I was picturing in my head an after market type kill switch. My apologies. You can jump it by the way it could have 73 wire and it could be jumped.... But thats beside the point.

and dont feel ashamed of not knowing things man. There are guys here that have forgotten more than i will ever know on these trucks. We were all new at one point. Just ask questions dont assume anything and listen. This site will get you guided in the right direction.
 
Last edited:

gottaluvit

Active member
I too thought it was a second hidden switch in addition to the main battery power switch, to stop thieves. However, if it feels sloppy, the replacement is a good idea, as it could fail at a time most inconvenient.
 
Last edited:

Robo McDuff

In memorial Ron - 73M819
Steel Soldiers Supporter
2,863
1,407
113
Location
Czech Republic
Maybe for the moment, forget about the BUMP thing. It looks that you started out with multiple problems and this bump may or may not have been the final bump that started the house to fell down, exposing different problems while doing that. Like breaking an already corroded wire inside the insulation.

Maybe the US polarity is reversed, but in Europe I would test as following

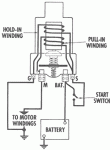
1) If a direct connection battery - starter (connection point M on the diagram below, use jumper cables or thick enough wires) makes the starter work, starter is ok (you tried that, it works).
2) Put a direct connection from battery to the solenoid connection that comes from the starter switch (connection S). If this makes the solenoid engage and the starter works, solenoid is ok.

Always check 1 first, a good solenoid can have problems getting an almost fried starter to work.

If 1 and 2 are ok, your batteries are suitable ok also, otherwise the engine would not start up with the direct contacts.

3) If 1 and 2 and batteries are ok, your problem is in the connections between batteries to switches to starter, or in the switches themselves, maybe even in all.

Just continue isolate/bypass (if possible) individual switches, and that will isolate the culprit (or more of them).

If money/time is a problem in replacing the PCB, I would install a temporary push button that links a simple thin wire from the battery to the solenoid engage contact S. About 15 minutes work with materials you probably have laying around somewhere. If the main cable goes through the PCB as well, make a direct link with heavy cable from the battery to the Bat connection on the solenoid in addition to the thin wire to your temp push starter.

Once your electrical problem is solved, drive over a bump and see if the engine still stalls. Success.

For newbies reading this thread, below a schema of a solenoid, coming from a very good article on truck starters including test methods.

One question. What is the purpose of this PCB box on a war-time truck? I had to look it up to begin with because the M39 does not have it.

Another one: in the TMs for M39s, I found the M39 wiring diagram for the gassers but not for a multifuel. Any idea where I can find those?


solenoid.gif
 

Brutacus

Active member
Steel Soldiers Supporter
240
198
43
Location
Marion, AR.
Thank you Robo McDuff, I have been looking for an something like this since all this began. As for what is the purpose of the PCB box on a war-time truck? I have no idea. I would like to know this myself.
 

big block 88

Member
862
17
18
Location
Topeka/Kansas
Pcb is a protection against reverse polarity and volatge spikes in the system. Basically its deemed easier and or better to replace the box than the alt or starter.

Theres several threads on this site about its purpose and even a break down of its workings...
 

Brutacus

Active member
Steel Soldiers Supporter
240
198
43
Location
Marion, AR.
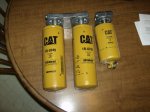
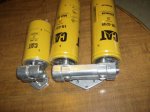
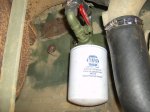
Update, my buddy came through a week early and I replaced the switch and re-checked all my connections. The beast roared to life, but it was choking, with a rough idle. I'm still going over the electrical system, because I'm not sure I've ruled everything yet. On an earlier response to this post some suggested I change the fuel filter. This has not gone un-noticed. When I get the bracket, new fuel hose, and fittings in, I'll be installing a new fuel filter system. This will be my next step in solving these problems. I've measured the space, and I have enough room for the three filters. I also have the little screen filter that goes in the PT pump. My fuel lines are only plumbed for the driver side tank. The fuel diverter valve was not on the truck when I bought it. I plan on going thru all the fuel lines to make sure I have no air leaks and replacing any lines that need replacing. I'm hoping this will help with the rough idle.

HPIM2351.jpg HPIM2352.jpgHPIM2335.jpg
 

Brutacus

Active member
Steel Soldiers Supporter
240
198
43
Location
Marion, AR.
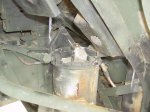
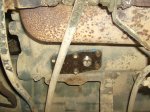
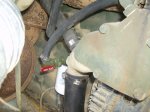
It's been over 2 months since my last update, and I have been busy with the truck and other things. Since my last post, I have solved the screeching belts by replacing and correctly tightening them. I have checked every electrical connection I can see and most of them are loose or rusty crusty. I have fixed all that I could find. I also replaced all the hoses and flushed out the radiator. That was a nightmare left over from 1989. LOL Since I had a block heater, and the coolant was drained I put that in too. I was able to install a coolant heater on inplace of the heater core lines. ( I have previously fallen, and landed on the heater core tubing and broke my heater core. :-x) I checked the voltage with the engine running and it shows in the green, but not on the mark. Is this OK or not.


HPIM2364.jpgHPIM2365.jpgHPIM2366.jpgHPIM2354.jpg
 

Attachments

Top
AdBlock Detected

We get it, advertisements are annoying!

Sure, ad-blocking software does a great job at blocking ads, but it also blocks useful features of our website like our supporting vendors. Their ads help keep Steel Soldiers going. Please consider disabling your ad blockers for the site. Thanks!

I've Disabled AdBlock
No Thanks