• Steel Soldiers now has a few new forums, read more about it at: New Munitions Forums!

  • Microsoft MSN, Live, Hotmail, Outlook email users may not be receiving emails. We are working to resolve this issue. Please add support@steelsoldiers.com to your trusted contacts.

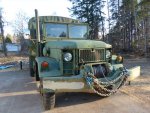
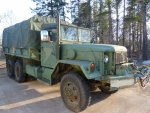
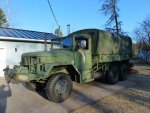
UPFINN's Deuce Build

UPFINN

Member
231
4
18
Location
Ishpeming Michigan
I forgot to take pictures today of the sanded truck but hopefully tomorrow if it is not raining.

I have some pics of how dirty the bed was before sanding but as I was just going to post them we had a power failure, but it came back on. (I think someone hit a pole) The pics are on an external drive and I don't want to chance another outage damaging it haha.

Tomorrow I want to try pulling the rear drums. Does anyone know how heavy they are, like can two people manage to lift one off without damaging the spindle threads or do I need a special jack?
 

gimpyrobb

dumpsterlandingfromorbit!
27,786
758
113
Location
Cincy Ohio
The drums are the same, front or rear. They are not light, but one person should be able to lift it off.

When ever I work on my axles and the drum needs to come off, I run the (top)adjusters all the way in, so there is plenty of slack. Its 11/16 wrench.


With the wrench at the 12 O'clock position, spin the nut toward the other one.(this is just informing you of the relation to spin it- to loosen)


Edit, I usually run my arms around the bottom of the drum and lock my hands together underneath. You can use your arms to tilt the drum if needed.
 

Kaiser67M715

Member
699
26
18
Location
NH
What I do is start to pull drum and hub, until I can fit my fingers into the drum, then I can grip the drum, and put my other Hand where the outer bearing race is. This allows the most movement for me, without allowing it to tip when it is almost off the spindle
 

UPFINN

Member
231
4
18
Location
Ishpeming Michigan
Thanks for the advice all!

One thing I am wondering is when I put the drum back on (brakes backed off of course) and I tighten the bearing nut, do I need to have the wheel on when checking for bearing tightness and any play? The TMs say to put the wheels back on, spin the wheel until there is drag, and back the nut off 1/8 to 1/4 turn. Then you need to grab the sides of the wheel and try to wiggle. Well if I put the wheels back on, I would have to take them off again to do the brake adjustment. I'm wondering if I could get away with just spinning the drum/hub without putting the wheels back on.
 

gimpyrobb

dumpsterlandingfromorbit!
27,786
758
113
Location
Cincy Ohio
Yes you can just spin the drum to adjust.

Just so you know, its easy to get one pad closer to the drum than the other. If I have my wheels off, it takes hardly any time to pull the window off the drum and adjust the brakes to 15thou top and bottom. Then you know your good.
 

UPFINN

Member
231
4
18
Location
Ishpeming Michigan
Tomorrow (Today actually) I am going to start masking the windows, lights, and mirrors then spray either the rustoleum rust converter or rusty metal primer. The rust converter and rusty metal primer seem to have the same ingredients. I have to wait 24 hours between each coat so if I did rust converter I would have to spray primer Sunday.

One thing I am worried about is the fuel tank cap and pump gasket leach diesel through capillary action. Will this affect the primer and paint? I clean it and the next day it is back! Tomorrow I will need to clean it again. Mineral spirits and degreaser work good to clean it, but then I have to pressure wash it to rinse and I cant get the primer wet on the rest of the truck. I'm wondering if just a wet rag and a bit of water from the hose will be enough to rinse it. To stop the leaching the best way would be to . I know it is non vented, so I am thinking when it heats up in the sun it builds pressure and pushes out. Maybe if I loosen the cap it will quit?
 

HanksDeuce

Well-known member
1,082
246
63
Location
Prairieville, LA
I eliminated the wet fuel tank issue by coating the top and bottom of the fuel tank gasket with Permatex The RIGHT stuff. Smear the coating on both sides, bolt the pump down, and smear a bead around the pump flange. No leaks.
 

UPFINN

Member
231
4
18
Location
Ishpeming Michigan
I eliminated the wet fuel tank issue by coating the top and bottom of the fuel tank gasket with Permatex The RIGHT stuff. Smear the coating on both sides, bolt the pump down, and smear a bead around the pump flange. No leaks.
Did you disconnect the fuel line and remove the pump assembly? Could I just undo the screws holding the pump assembly on and lift it up a bit to access the gasket? The last time I removed my fuel pump I made a mess and when I bled the little bit of air in the fuel line after disconnecting it, it sprayed diesel everywhere.
 
718
9
18
Location
Springfield Or
Pull the pump, clean and paint tank. Then reinstall pump. The Right Stuff does not take paint well. Also it is only good for about a year before it starts seeping again. That is what I used on mine.
 

HanksDeuce

Well-known member
1,082
246
63
Location
Prairieville, LA
Both times I removed the fuel pump assembly completely. First time was to replace the rubber discharge line and put double clamps on it, and the second time was to replace the factory pump lines with a SS siphon for the Cummins 12valve. If you want it done right I would remove it completely. A half job might lead to diesel wicking on new primer/paint. Good luck!
 

UPFINN

Member
231
4
18
Location
Ishpeming Michigan
Today my dad and I built a temporary tent around the deuce to paint it out of the elements. Only problem is that since I last pressure washed it a few days ago there is a slight layer of dust. I think i can just wipe it off. There is drop cloth under it and that is one reason why I want to avoid any more washing as the water might pool on it.

P1090586.jpg P1090585.jpg
 

rustystud

Well-known member
9,302
3,089
113
Location
Woodinville, Washington
What if I just loosen the pump and lift it up a bit? I would think the wicking would stop.
There is no way to get the gasket under the pump without completely removing it. The gasket goes on from the bottom up. This way you can replace the hose and put on new stainless steel clamps. Plus you can adjust it to set almost on the bottom of the tank. When I removed mine the first time I found it was setting 2 inches from the bottom of the tank. Adjusted it down to 1/4" of the bottom. Now I know I'm getting all the fuel out plus any water that might have accumulated. My first filter has a water trap.
 

UPFINN

Member
231
4
18
Location
Ishpeming Michigan
There is no way to get the gasket under the pump without completely removing it. The gasket goes on from the bottom up. This way you can replace the hose and put on new stainless steel clamps. Plus you can adjust it to set almost on the bottom of the tank. When I removed mine the first time I found it was setting 2 inches from the bottom of the tank. Adjusted it down to 1/4" of the bottom. Now I know I'm getting all the fuel out plus any water that might have accumulated. My first filter has a water trap.
I took it off last year to replace the pump, and now the gasket it leaking.
 

UPFINN

Member
231
4
18
Location
Ishpeming Michigan
Today I got the headlights, turn signals, and winch data plates masked with tape. We also took off the soft top and soft top frame to paint separately.

As the the fuel pump gasket, I found that I could not tighten the philips head screws without stripping out the slots. The pump was so loose I could see space between the gasket and tank. I was able to find hex head machine screws of the same size. The hex head let me use a wrench and I was able to really tighten it down and the gaps went away. I pressure washed the tank and it is nice and clean. I also cracked the cap to relieve any pressure. Tomorrow morning I will find out if the problem is fixed.

I still have to mask the windows, mirrors, reflectors, and rear lights. I will then be ready to spray the primer.
 
Top
AdBlock Detected

We get it, advertisements are annoying!

Sure, ad-blocking software does a great job at blocking ads, but it also blocks useful features of our website like our supporting vendors. Their ads help keep Steel Soldiers going. Please consider disabling your ad blockers for the site. Thanks!

I've Disabled AdBlock
No Thanks