• Steel Soldiers now has a few new forums, read more about it at: New Munitions Forums!

  • Microsoft MSN, Live, Hotmail, Outlook email users may not be receiving emails. We are working to resolve this issue. Please add support@steelsoldiers.com to your trusted contacts.

Valence's 1997 Pribbs M101A3

Valence

Well-known member
Steel Soldiers Supporter
2,112
555
113
Location
Davis County, UT
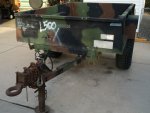
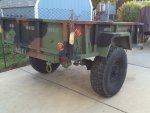
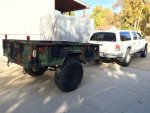
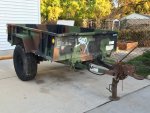
Well, I sold my 1968 M101A1 and, in favor of the surge brakes, bought this 1997 Pribbs M101A3 from Gunzy!
2018-10-27 16.24.13 HDR.jpg 2018-10-27 17.27.56 HDR.jpg 2018-10-27 17.28.07.jpg 2018-10-27 17.28.22.jpg 2018-10-27 17.28.34 HDR.jpg 2018-10-27 17.28.41.jpg

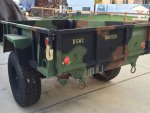
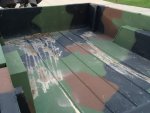
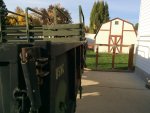
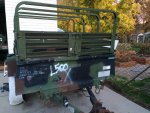
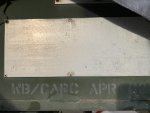
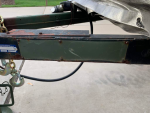
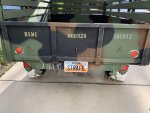
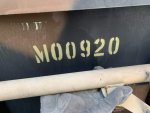
Obviously from the stenciling it places it as a former USMC trailer. It hardly has been used too, but not surprisingly the surge shock is bad and the master cylinder was dry and rusty. It also has a slightly damaged passenger fender, but *shrug* it's not all that bad.

A little side-by side comparison of the A1 vs the A3. A few of the differences to note of the A3 over the A1
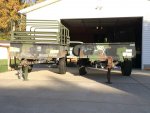
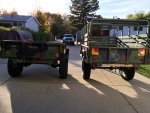
  • Surge brakes (just like the A2)
  • 4" tall frame vs 3" (the tongue is still 3" tall though)
  • Tongue jack vs kick stand
  • Wider spacing between the interior wheel wells vs 45.5"
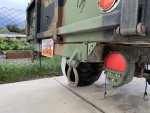
  • More pronounced exterior fenders for the wider tires and slightly wider wheel base
  • Reinforced cargo body by the tailgate
  • Raised center portion of the axle for increased ground clearance
  • Reinforced axle ends by the brake drum
  • HMMWV wheels, tires (supposedly with run flats?) and 8 x 6.5" wheel bolt pattern
  • Larger looped shackles
  • No rear stabilizer leg
2018-10-27 17.17.23-1.jpg 2018-10-27 17.16.22 HDR.jpg 2018-10-27 17.16.52-1.jpg

Of course, I transferred over all the goodies from my A1 to this A3 before I sold it. ;)
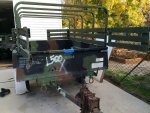
LED tail lights with much more straight brackets, license plate mount, longer, zinc yellow 3/8” grade 70 safety chains, new suspension shocks, new A3 jack (sold the rustier one), and fiberglass side racks & all-steel bows. (I should have kept the military 12-pin trailer plug though, oh well, it wasn't in the best shape anyway).

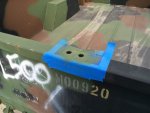
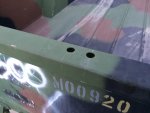
Oh, and I drilled the holes up front for double end-gates for increased usability! Note: I haven't yet drilled the holes on the side rails for latching the gates open.
2018-10-28 16.56.34-1.jpg 2018-10-28 16.56.17.jpg 2018-10-28 18.26.16.jpg 2018-10-28 18.35.45.jpg

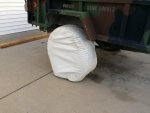
The 36"-39" ADCO 3950 tire covers that fit the 9.00-16 NDTs a bit loose fit the HMMWV tires a bit tight and don’t fully cover the lower tread, but they a decent fit otherwise.
2018-10-27 17.50.48.jpg
 
Last edited:

Valence

Well-known member
Steel Soldiers Supporter
2,112
555
113
Location
Davis County, UT
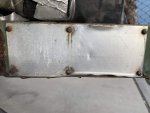
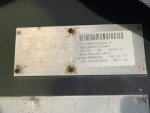
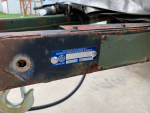
Unfortunately this trailer was missing the data plate (well, all the data plates are basically illegible) on the tongue that would have had its Serial Number so I had to jump through the additional hoops to get a Utah issued VIN and have a VIN inspection, twice.

The hoops consisted of filling out an additional form, an officer inspecting that the trailer verifying there was no VIN, a trip to the DMV to get a VIN and a new form. Then attaching the new VIN and proceed forward with the 'normal' process for applying for a title (3 forms, all containing about the same info, another VIN inspection, and at least 2 pictures of the trailer). Then another 30 min wait at the DMV. :roll: It sounds more complicated than it really is, *if* you know what to do, and I'm sure that's the hangup for most folks.

2019-06-02 19.47.40.jpg 2019-06-02 19.48.07.jpg 2019-06-02 19.48.16.jpg 2019-05-31 19.19.13.png 2019-06-02 19.42.23.png


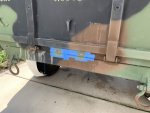
I drilled and painted the holes to hang the license plate on the A3 (it only sticks down below the frame by 1", not bad IMO):
2019-05-31 16.28.58.jpg 2019-05-31 18.48.19.jpg 2019-05-31 19.02.05.jpg 2019-05-31 18.48.46.jpg

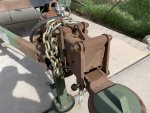
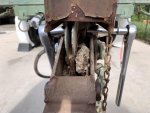
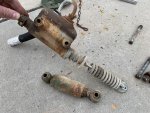
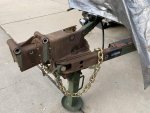
Then I pulled apart the lunette surge assembly to retrieve the wore out shock and master cylinder (I don't honestly know if the master cylinder does NOT work, but I don't have faith in it and I don't want to do the work twice, so it's getting replaced). The insides were just PACKED with old wasp nests (and I killed two trying to make a new one)
2019-05-31 17.27.44.jpg 2019-05-31 18.02.56.jpg 2019-05-31 18.28.51.jpg 2019-05-31 19.19.17.jpg

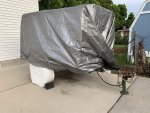
And then my usual trailer bundling back up for the weather and wasps ;)
2019-05-31 19.23.37.jpg
 
Last edited:

Valence

Well-known member
Steel Soldiers Supporter
2,112
555
113
Location
Davis County, UT
Using the USMC RUC (M00920), looks like your trailer last belonged to:

2nd LAAD of MACG-28; 2nd MAW; II MEF

2nd Low Altitude Air Defense Battalion
---> Marine Air Control Group 28​
---> 2nd Marine Air Wing​
---> II Marine Expeditionary Force​


Great looking A3!

[thumbzup]
That's cool info, thanks so much!
 
Last edited:

Tinstar

Super Moderator
Super Moderator
Steel Soldiers Supporter
4,292
1,779
113
Location
Edmond, Oklahoma
Good score!
Too bad you couldn’t keep the one you sold.
Really nice that you know where it’s last assignment was.

I’m sure you already know that Croft Trailer has all the factory parts for the surge assembly.
They also have the best price on the shock.
www.crofttrailer.com
Great prices and selection
Excellent customer service
Dexter and Redline for the axle and brake parts.
 

Valence

Well-known member
Steel Soldiers Supporter
2,112
555
113
Location
Davis County, UT
Yes, thank you! But it doesn't hurt to be reminded and have it documented where I can easily find it ;)

I would have liked to keep the A1 trailer, but it would have just sat around outside like everything else. Now, if I had a large indoor storage for a proper "collection"... things might be different. :p


What I ordered from Croft's website:

Damper Shock
P/N: 1844-2
$121.95
https://www.crofttrailer.com/1844-2-hydro-act-actuator-damper-shock/


Marine Master cylinder with fittings & boots (a much more study marine zinc finish for very wet environments)
P/N: 10614-M
$139.95
https://www.crofttrailer.com/10614-m-hydro-act-actuator-master-cylinder-marine-finish/

FYI: to save $30 the non-marine finish Master cylinder:
Master cylinder (complete with fittings and boot)
P/N 10614
$108.95
https://www.crofttrailer.com/10614-hydro-act-actuator-master-cylinder/#gallery


Hydro Actuator Breakaway chain
P/N: 10511-1
$21.95
https://www.crofttrailer.com/10511-1-hydro-act-actuator-breakaway-chain/

Hydraulic Brake Line Kit for Single Axle Trailer
P/N: 80881
$49.95
https://www.crofttrailer.com/80881-hydraulic-brake-line-kit-for-single-axle-trailer/

Hydro-Act Actuator Nylon Bearings x8
P/N: 1745
$3.95 ea
https://www.crofttrailer.com/1745-hydro-act-actuator-nylon-bearings/

UFP by Dexter Pin & Lanyard Retainer Kit
P/N: 71-767
$12.95
https://www.crofttrailer.com/71-767-ufp-by-dexter-pin-lanyard-retainer-kit/
 
Last edited:

M813rc

Well-known member
Steel Soldiers Supporter
4,235
3,318
113
Location
Near Austin, Texas
Valance, thank you for the good photos of all the markings! [thumbzup]
I keep a file on USMC vehicle markings, trying to document the standard and any deviations therefrom.

Quick question - are the light coloured USMC markings tan or yellow? I can't really tell from the photos.
Neither is "officially correct" for 383 painted vehicles (should be black on green/brown, green on black), though I have seen some like this in the past, but couldn't confirm the colour.

Oh, and very nice trailer!

Cheers
 

Valence

Well-known member
Steel Soldiers Supporter
2,112
555
113
Location
Davis County, UT
You bet M813rc, and thanks for the complements! (Many thanks to Gunzy too for the good price too)

As far as the color question, I am not sure. I'll see if I have something that is 686 tan in color to hold up next to the light colored markings and see if they match. I don't believe I have any new Rapco 686 color match substitute. My gut guess is that they're yellow, not tan. Though faded 686 CARC can sure look yellow against other colors...
 
Last edited:
Valence

Well-known member
Steel Soldiers Supporter
2,112
555
113
Location
Davis County, UT
Nice trailer!
Thanks SCM35A2!


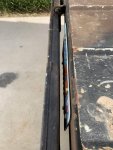
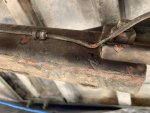
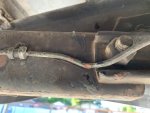
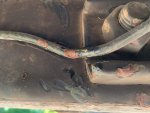
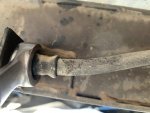
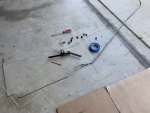
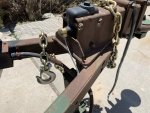
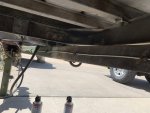
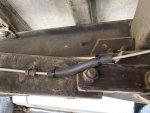
I forgot to post this earlier. The flexible brake line was showing signs of cracking/deterioration and I noticed one point on the hard brake line was severely damaged and rusty. The hard line wasn't ruptured, but it is only a matter of when, not if. So I've decided to replace them both.

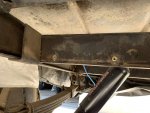
As I mentioned earlier, the trailer doesn't seem to have seen much use, except for some reason the paint on the trailer tongue is sure much more beat up and rusty than the rest of the trailer and you can clearly see drag/heavy scraping marks on the underside and the exposed metal has turned to rust. There are also deep marks in the thick, tar-like anti-corrosion under coating. I can only guess as to the cause. Probably the same event(s) that damaged the front lip of the cargo box and possibly the right fender too.

2019-06-03 19.33.44.jpg 2019-06-03 19.33.26.jpg 2019-06-03 19.33.26_zoom.jpg 2019-06-03 19.33.55.jpg
 
Last edited:
412
17
18
Location
Lutherville, MD
Yes, thank you! But it doesn't hurt to be reminded and have it documented where I can easily find it ;)

I would have liked to keep the A1 trailer, but it would have just sat around outside like everything else. Now, if I had a large indoor storage for a proper "collection"... things might be different. :p


What I ordered from Croft's website:

Damper Shock
P/N: 1844-2
$121.95
https://www.crofttrailer.com/1844-2-hydro-act-actuator-damper-shock/

****, those have gone up in price!
 
412
17
18
Location
Lutherville, MD
Thanks SCM35A2!


I forgot to post this earlier. The flexible brake line was showing signs of cracking/deterioration and I noticed one point on the hard brake line was severely damaged and rusty. The hard line wasn't ruptured, but it is only a matter of when, not if. So I've decided to replace them both.

As I mentioned earlier, the trailer doesn't seem to have seen much use, except for some reason the paint on the trailer tongue is sure much more beat up and rusty than the rest of the trailer and you can clearly see drag/heavy scraping marks on the underside and the exposed metal has turned to rust. There are also deep marks in the thick, tar-like anti-corrosion under coating. I can only guess as to the cause. Probably the same event(s) that damaged the front lip of the cargo box and possibly the right fender too.

View attachment 766896 View attachment 766894 View attachment 766895 View attachment 766897
I would think your frame had a new bed put on.
 
412
17
18
Location
Lutherville, MD
Yea, that was 2014.
Now their expensive.
Croft was the least expensive of all other sellers when I researched prices about a year ago.
When I did a quick search it looked like there were shock still avalible for around that price just without bushings. I’m sure bushings are available for someone who wants to roll their own and save a few dollars.
 

Tinstar

Super Moderator
Super Moderator
Steel Soldiers Supporter
4,292
1,779
113
Location
Edmond, Oklahoma
Without bushings?
Then it’s not the same shock.
Post the link.


If anyone wants the exact, correct shock to install, the Croft price is the lowest price.
Several different shocks look like they might fit, but the surge assembly accepts only one.

This has been discussed in depth before.
 

Valence

Well-known member
Steel Soldiers Supporter
2,112
555
113
Location
Davis County, UT
Valance, thank you for the good photos of all the markings! [thumbzup]
I keep a file on USMC vehicle markings, trying to document the standard and any deviations therefrom.

Quick question - are the light coloured USMC markings tan or yellow? I can't really tell from the photos.
Neither is "officially correct" for 383 painted vehicles (should be black on green/brown, green on black), though I have seen some like this in the past, but couldn't confirm the colour.
M813rc,

I'm sorry for taking literal months to get you this comparison. I did take this comparison photo two months ago... Here is a rear kick-down leg from an M105. It appears to be 686 CARC painted over 383 CARC. I'm sure it's faded. Comparing it against the "M00920" stenciled letters on my M101A3, it appears the letters are, or were, much yellower than 686 CARC.

2019-06-21 20.00.49.jpg
 
Last edited:
Valence

Well-known member
Steel Soldiers Supporter
2,112
555
113
Location
Davis County, UT
In the end of June I removed the old main hard line. I had to drill out two of the rusted screws above the axle and install 1/4" rivnuts.

2019-06-15 13.41.16.jpg

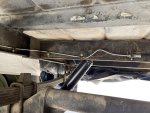
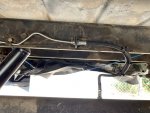
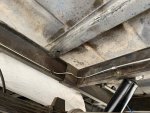
Then I installed the master cylinder, the bent new steel hard line and new flexible hose. I reused the copper crush washer when attaching the new flexible line to the stock 3-way fitting as I left the hard lines on the axle to the wheel ends untouched as I couldn't budge them anyway without destroying the hard lines - which I didn't see the need to replace them. And yes, all frame mount screws and bolts were reassembled with liberal amounts of copper anti-seize. ;)


2019-06-15 12.57.17.jpg 2019-06-21 13.37.57.jpg 2019-06-21 15.03.13.jpg 2019-06-21 15.06.31.jpg
2019-06-21 14.21.02.jpg 2019-06-21 15.02.51.jpg 2019-06-21 15.03.02.jpg

In the final picture there the hard line has an extra bend in it because I cut it long in case I messed up the double flaring process. It was my first after all; I hadn't flared a line before. Though it went smoothly and the end looked nice so I put in an extra bend for distance so I didn't have to cut the line shorter and repeat the process.

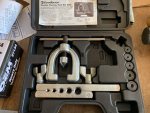
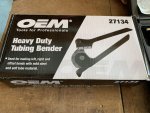
I used the following rented tools to make the new double flare and bend the hard line.

Rented from O'Reilly's:
Single & Double Flaring Tool
EverTough #67001
2019-06-21 16.24.41.jpg

Rented from AutoZone:
OEM Heavy Duty Tube Bender #27134
2019-06-21 16.24.50.jpg

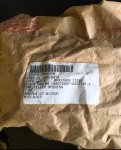
I then due to a discussion in another thread, I ordered a new surplus "hat" master cylinder cap from eBay (saved a bundle, $15 vs $60 from Croft P/N 850279)
https://www.crofttrailer.com/850279-hydro-act-actuator-metal-vented-filler-cap/

(This first photo is from Tinstar)
NSN:
2590-01-388-2416
CAGE 7Z016 MFR/CAGE 17098
I/A/W DWG NR 19207ASSY12331725-2
CAP, FILLER OPENING
1 EA
SPM7L4-07-M-0031
M10-4/07

hat_master_cylinder_cap.jpg

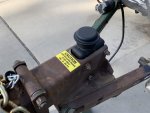
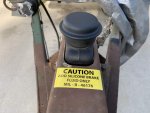
The surplus "hat" cap fit perfectly. I just lightly sanded it and painted it with self etching primer and then flat black to match the master cylinder paint job. I also ordered and placed a "silicone brake fluid only" sticker.

2019-06-26 18.56.22.jpg 2019-06-26 18.57.47.jpg

Since this trailer has the omi-volt (10-30 volts) LED tail lights, I also wired in parallel a 7-pin civilian (or "RV") trailer plug. I used the strain relief spring from a scrapped pioneer tool trailer on the 7-pin plug (top most of the two black cables).

2019-06-29 12.56.56.jpg 2019-06-29 12.56.44.jpg
 
Last edited:
Top
AdBlock Detected

We get it, advertisements are annoying!

Sure, ad-blocking software does a great job at blocking ads, but it also blocks useful features of our website like our supporting vendors. Their ads help keep Steel Soldiers going. Please consider disabling your ad blockers for the site. Thanks!

I've Disabled AdBlock
No Thanks