• Steel Soldiers now has a few new forums, read more about it at: New Munitions Forums!

  • Microsoft MSN, Live, Hotmail, Outlook email users may not be receiving emails. We are working to resolve this issue. Please add support@steelsoldiers.com to your trusted contacts.

Volvo Sugga Restoration underway

bbftx

Member
121
2
18
Location
Austin, TX
Ready to Register

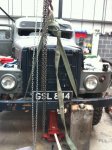
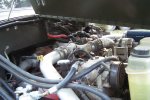
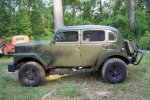
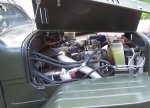
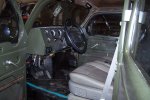
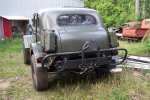
Well, the Volvo Sugga is moving under her own power. Just need to get her registered and inspected. Then, there is a lot of interior work left to do. I have a pair of the MasterCraft Defense seats I may want to put in the front.
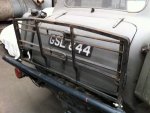
Also, I may have to get a set of the new Camo license plates that Texas just released today.

BBFTX

Engine-100_4694.jpgLeft-100_4687.jpgRight-100_4689.jpgEngine-100_4693.jpgDash-Interior-100_4695.jpgRear100_4688.jpgGauges-DSCN0379.jpgPLPC160.jpg
 

rodbargee

New member
28
0
1
Location
UK. North Yorkshire
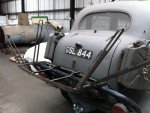
Looking good, the finish is immaculate but still refers to its heritage. I particularly like the instruments very much in keeping. I'm the proud owner of an original bike rack for mine, which I bough from Sweden! I am also still searching for original bits! let me know if you want to offload any! Here is my bike rack, Not quite as finished as yours!!
2013-05-10 16.43.17.jpg2013-05-10 16.42.34.jpg
 

bbftx

Member
121
2
18
Location
Austin, TX
You need two original Swedish army bikes to put on that rack, Rodbargee!

It might not be totally obvious, but my reconfigured rear end now has a spare tire holder occupying the space where the bike rack used to reside.
 

Karl kostman

Well-known member
Steel Soldiers Supporter
2,308
893
113
Location
Fargo ND
Concerning the Sugga BBFTX, I am sure that your realize by now that there are some VERY talented folks on this site and some of the levels of restoration work done by some of these individuals is more ART work than restoration, I have been watching your Sugga resto from the beginning and although it not original and for what you want to do with I understand how that would not work the best. I will say that I know how much work you have put into this rig and it looks really da-n beautiful, I have alway really admired the Sugga and yours is going to be a traffic stopper! Your work is ranking you right up there with some of the best on this site, THANKS for sharing BBFTX!
KK
 

bbftx

Member
121
2
18
Location
Austin, TX
Sugga Becomes Official Texas Citizen

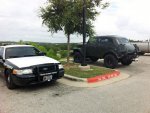
Big day for the Sugga. She visited the Safety Inspector to get the thumbs up (photo1). Then she had a nice (informal) chat with a State Trooper interceptor (photo 2), while I was inside making her a naturalized citizen of the Republic of Texas. She's all legal....

Sugga-inspection.jpgSugga-Trooper.jpg
 

M813rc

Well-known member
Steel Soldiers Supporter
4,235
3,318
113
Location
Near Austin, Texas
She is a beauty!

Hopefully we will see her at an event of two? The local MVPA club are not purists, so you'd be welcomed. It would also be nice to have another vehicle in the "foreign" category to keep my Mog company.

http://www.lonestar-mvpa.org/

Cheers
 

bbftx

Member
121
2
18
Location
Austin, TX
She is a beauty!

Hopefully we will see her at an event of two? The local MVPA club are not purists, so you'd be welcomed. It would also be nice to have another vehicle in the "foreign" category to keep my Mog company.
Thanks. Yes, I do hope to make a Lonestar MVPA event or two. Glad to hear they welcome "modifieds". While much of her innards might be Ford now, her soul is still Swedish. ;-)
 

rodbargee

New member
28
0
1
Location
UK. North Yorkshire
You need two original Swedish army bikes to put on that rack, Rodbargee!

It might not be totally obvious, but my reconfigured rear end now has a spare tire holder occupying the space where the bike rack used to reside.
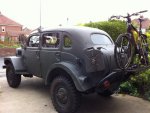
Well here's my preferred Bike (I have now fabbed the missing hoop)

2013-06-16 11.29.13.jpg

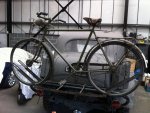
and here's one made in the fifties....

2013-06-06 14.40.54.jpg
 

bbftx

Member
121
2
18
Location
Austin, TX
and here's one made in the fifties....

View attachment 435834
Nice! Always cool to see a Sugga with her bikes on board.

You might prefer the nice, newer, shinier one, but I think your Volvo likes the one from the fifties....
The bike from the fifties is closer to your old girl's age, and won't show her up in the "beauty" category!:p They look good together!
B B
 

bbftx

Member
121
2
18
Location
Austin, TX
Beauty and the Beast

I notice this Ferrari didn't pull up too close behind the Sugga...

Ferrari Sugga AGC.jpg


Cheers,
B B
 
Last edited:

bbftx

Member
121
2
18
Location
Austin, TX
Passenger Seat in Place

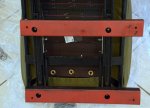
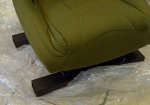
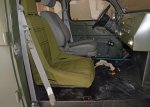
I've started more work on the interior of the Sugga. First up is to take out the temporary Kia seats that had been installed in the front and replace them with Mastercraft Defense seats. I had to fabricate new mounting brackets. The passenger side went in with no problems. On to the driver's seat!

I've also started insulating the roof with Low-E foil. I'll probably get outside help to make the headliner. I'll also be insulating the floor and firewall with the Low-E foil and use elephant bark for the floor covering.
B B

Seat MountsDSC_9024.jpgSeat on MountsDSC_9034.jpgseat on mounts DSC_9033.jpgPass Seat in SuggaDSC_9035.jpg
 

rodbargee

New member
28
0
1
Location
UK. North Yorkshire
Bin a while so here's a quick catch up... BBftx hope you don't mind!? If you want I'll nuke the post but I thought you guys on this side of the pond might like to see this.......trying work out why I cant link to the photo's!!!

Finally the time has come to change the front springs, so here's part one. The easy way to jack up the whole vehicle, so you can juggle the axel around to remove the spring.
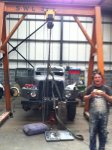

2013-07-17103222_zpsfdfbf9c0.jpg

2013-07-17103235_zpsba558567.jpg


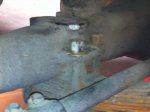
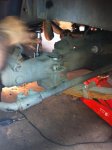
The whole construction of this vehicle is big and solid. It makes Landrover running gear look like a toy. U bolt nuts were 1'' UNF and mighty tight but with a 1" drive socket and a scaffold bar they did finally submit. I couldn't photo that bit cos it needed both of us to do it, but once loosened they came off pretty well. The chap before had painted everything up really well and under the paint everything is in great nick. You can see the massive drop link from the front of the chassis locating the Axel to stop it being ripped off....off road.
2013-07-17110739_zpsfac7ed85.jpg

2013-07-17110711_zps9326531c.jpg


Spring delivered to Owen springs in Gateshead. We now have to sort out uprating them a bit to cope with the big lump that is the Perkins engine. (currently too soggy)


Well the springs are here. Uprated, same number of leaves but thicker metal to beef up the front. They are beautifully made and match the original unit well with chamfered ends.

2013-09-07103259_zps1f7dd78f.jpg


I have also got new U bolts to allow for the extra thickness.

2013-09-07103149_zpscd4a7986.jpg


On first sight they look almost perfect but I do think they are a tiny bit shorter "eye to eye" but the swinging shackle I hope will allow for this....


So I set to and offered the spring up tp the front mounting point to find that the width is 2.5 mm wider than the original spring (the thicker leaves) so first job was to grind down the ends equally so they could be located. Little anoying but there we are.

2013-09-07144139_zpscfc5a037.jpg

2013-09-07144106_zpsc3db1566.jpg

So once angle ground and painted (yes its a different black) I fitted them....

2013-09-07144251_zps3db8d16b.jpg


The more observant will notice that the axel is not bolted up, in fact its about 1/4" off the locating bolt on the spring. The problem is trying to move the axel forward. It has a huge drop link locating it and on my own I couldn't persuade it to move forward at all. You can see the swivel shackle is well forward and if it was a landie you could lever the axel into place. Not on this one i can't. So I took the front mounting bolt off the chassis and managed to locate the axel properly and nipped everything up...Hoping that with judicious force I can with a mixture compressing the spring and forcing the axel forward a little finally get to put the final bolt in.

2013-09-07144242_zpsbe6bf98f.jpg

2013-09-07155618_zps19fb347b.jpg

2013-09-07155631_zps0ca6ce7a.jpg

So far I have tried a bottle jack to bend the spring (putting wood between the jack and the chassis)

2013-09-07160423_zps89e8dbad.jpg


Its really a two person job one on the lifts/jacks and one with a carefully placed sca-fold pole, easing the bolted up spring and axel forward the final little bit....I hope. I do think its just a tiny bit shorter:(

So finally its stopped raining and the suns out and there are no more excuses to be made so yesterday I finished off fitting the springs. My theory in the above post about why the axel wouldn't locate on the spring was the case. The other side once unbolted and with the wheel removed now allowed some movement of the axel...enough for it to locate properly!! I had to use a lorry ratchet tie down, wrapped round the axel and the bumper, thus dragging the axel forward 1/4 inch and it then dropped onto the locating pin (which goes through the spring)
Here they are fitted

P1040028_zpsb0b8481a.jpg


You can get an idea of how heavy duty it all is look at the bulk of the diff! it really is a monster. The difference in it moving or not was hardly noticeable I was though shattered after I had fitted the second spring. The effort of moving such heavy stuff around lying down is considerable!

P1040025_zps7bb84289.jpg

P1040030_zps7219414b.jpg

P1040027_zps8e064120.jpg


Now this is more like the ride height! nice and level.... the back looks like they might need a freshen up next. You can see how the front was low on some of the earlier posts in this thread, it now looks intimidating!!

P1040021_zpsab6218f9.jpg


Rather annoyingly since my last visit to the shed one of the other Shedders (must be a better collective noun....)has started to dismantle a Jeep almost in-front of the Sugga, with that and two other cars parked in the way I couldn't take it out for a drive, it could have driven over the tarped up MG but I don't suppose he'd have been too happy.

P1040023_zpsbbb5b078.jpg

P1040024_zps4ccceade.jpg


Still its ready to go!.....My only slight concern is that the springs might be too stiff, I cant suss that out without giving it a go off road...me jumping up and down on the bumper didn't really compress them much....:eek:
 
Last edited by a moderator:

bbftx

Member
121
2
18
Location
Austin, TX
Bin a while so here's a quick catch up... BBftx hope you don't mind!? If you want I'll nuke the post but I thought you guys on this side of the pond might like to see this.......trying work out why I cant link to the photo's!!!
Hi Rodbargee,
Love seeing your updates -- no worries on my part putting them here. Makes me realize I haven't posted any updated photos recently.
Those springs are massive. Pretty cool.

To insert images inline with your post, try clicking on "Go Advanced" beneath the "Quick Reply" box you can normally type in. Once in Advanced mode, you'll see an icon with a tree in the middle row of icons. Click on that, and a popup window will appear, allowing you to choose picture files from your computer to upload and insert directly in your message.

Cheers,
B B
 

rodbargee

New member
28
0
1
Location
UK. North Yorkshire
Excellent! Very good of you! I'll try and up-load the photos....I was trying to link to my photo-bucket album directly....has
links been disabled??
 
Last edited:

Flat Black

New member
139
9
0
Location
Georgia state
Tried to fix links but it does not appear that it worked...

Oh well, Sugga's are cool. I have only seen one in the states.

Guess it fits right in there in Austin :D
 
Last edited:

mp_tx

Member
38
1
8
Location
Austin, TX
I have been keeping my eyes peeled for your Sugga around Austin, but no sightings yet!

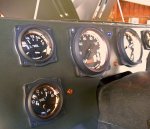
Where did your source the new military looking gauges for the dash?
 

bbftx

Member
121
2
18
Location
Austin, TX
Hi MP
The gauges were a custom job from New Vintage. They had to cast the bomber-style bezels for me, as they hadn't had much interest in the style up to that point.

Work has really taken away time from driving and working on the Sugga. But I have started some more of the interior work. I'm fabricating door panels and will try to create a headliner. Also, I just picked up a couple of Mastercraft Defense jump seats to put in the back. I've had the rear bench seat from an old Lincoln in there up to this point. It fits well, but I want to lean more to the military look.

Keep your eyes open, and hopefully you'll see me around town someday.
B B
 
Top
AdBlock Detected

We get it, advertisements are annoying!

Sure, ad-blocking software does a great job at blocking ads, but it also blocks useful features of our website like our supporting vendors. Their ads help keep Steel Soldiers going. Please consider disabling your ad blockers for the site. Thanks!

I've Disabled AdBlock
No Thanks