• Steel Soldiers now has a few new forums, read more about it at: New Munitions Forums!

  • Microsoft MSN, Live, Hotmail, Outlook email users may not be receiving emails. We are working to resolve this issue. Please add support@steelsoldiers.com to your trusted contacts.

Was looking for a shop in or near Milwaukee to work on M1008; then did it all myself!

chevymike

Well-known member
603
468
63
Location
San Diego, CA
That barb is just to vent the pressure from the transfer case so it’s not too crucial that’s it’s slightly bent I suppose. I called in and they said that I can just run a hose from it into the frame rail with a one way valve on the end (not included in kit….)
Yep, just was going to say that. I actually want to change to a 90* fitting on mine as with a hose on, it rubs the underside of the floor.
 

chevymike

Well-known member
603
468
63
Location
San Diego, CA
Installation is cake, as far as the mechanical part. Took me about 2-3 hours total. Longer part was wiring. I was able to run the wiring up the backside of the pass. side cab, since the M1010 had a hole there for wires. I used a plug and sealed it, with a smaller hole and rubber grommet for the wiring. Ran it under the pass. side plastic floor trim and put the computer on a bracket up under the dash, where the foot well and firewall meet. Worked out well.
 

retro_life

Well-known member
243
629
93
Location
Los Angeles, California
Yep, just was going to say that. I actually want to change to a 90* fitting on mine as with a hose on, it rubs the underside of the floor.
Yeah I will probably replace the fitting with something like that before putting it on. Looks like something that could be found at Home Depot. I am going to get the mechanical part of the installation done and then I will see about how to run the wiring. Did yours also come with the foot switch?

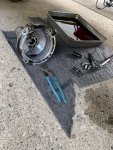
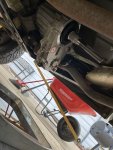
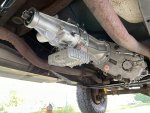
Right now it just started raining as I was getting going on the job, but so far I got the transfer case drained, drive shaft removed and tail shaft/adapter removed.


2983FBE0-4FCD-4B26-8A5A-DFB5C5E2CF13.jpeg29F21D52-ECB0-4932-A68A-7B18435A94C8.jpeg
 

retro_life

Well-known member
243
629
93
Location
Los Angeles, California
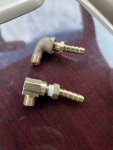
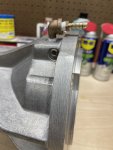
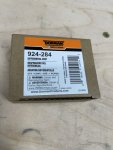
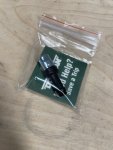
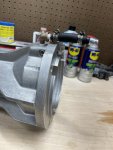
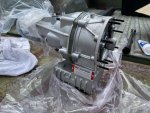
I ended up going with the “street pipe” style 1/8 mip to 1/8 fip elbow because it had more clearance without using additional pieces. I also got a new barb since the one in the kit got bent in shipping. I could’ve reused the stock breather valve but I decided to replace it with a new one from Dorman. Used a piece of fuel line and some hose clamps and called it a day! The breather setup is now pretty much identical to the factory setup on the 208.
5FBB1186-E201-427B-8926-60EFB360C685.jpegF3CFF0C0-E087-40DE-BEE4-E82473CCA89B.jpegC3C0102B-4AA3-4739-92EB-926388F7E4A9.jpeg523E6F5F-F27A-4CFE-B37D-D79AB277DB3E.jpeg
 

Mullaney

Well-known member
Steel Soldiers Supporter
Supporting Vendor
7,771
19,877
113
Location
Charlotte NC
I ended up going with the “street pipe” style 1/8 mip to 1/8 fip elbow because it had more clearance without using additional pieces. I also got a new barb since the one in the kit got bent in shipping. I could’ve reused the stock breather valve but I decided to replace it with a new one from Dorman. Used a piece of fuel line and some hose clamps and called it a day! The breather setup is now pretty much identical to the factory setup on the 208.
View attachment 841442View attachment 841445View attachment 841443View attachment 841444
.
Nice! Looks good too!
 

ezgn

Well-known member
650
1,039
93
Location
Lake Elsinore Ca.
I ended up going with the “street pipe” style 1/8 mip to 1/8 fip elbow because it had more clearance without using additional pieces. I also got a new barb since the one in the kit got bent in shipping. I could’ve reused the stock breather valve but I decided to replace it with a new one from Dorman. Used a piece of fuel line and some hose clamps and called it a day! The breather setup is now pretty much identical to the factory setup on the 208.
View attachment 841442View attachment 841445View attachment 841443View attachment 841444
I know it is just breather hose, but in general I prefer fuel line hose clamps. Good job!
 

retro_life

Well-known member
243
629
93
Location
Los Angeles, California
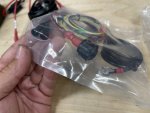
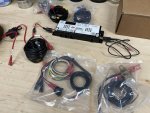
I got the overdrive mounted and the driveshaft measured and dropped off at the shop to get shortened. Now I’m looking at the electronics. It seems pretty straightforward, but one thing I’m noticing is that they got rid of that little control box that I’ve seen in @chevymike video and replaced it with a switch and two loose LEDs connected to the wiring… Driveshaft shop was slammed and said they would try to get it done ASAP but to expect up to a week… so I guess I got plenty of time to do a nice job on the wiring.
060E9326-BBD1-4088-B90A-C12E55388F88.jpegF2F19BC0-BC01-40DC-AD8C-CFC8E860D73C.jpeg7CE39171-F055-49B5-9706-85B25A8C52B9.jpeg9EABD20D-3D71-499E-8E4A-44206422A02F.jpeg
 

retro_life

Well-known member
243
629
93
Location
Los Angeles, California
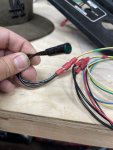
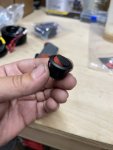
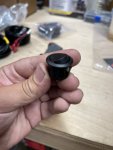
Looks like I’m gonna have to cut these connectors off and redo them in order to pull the wiring through the hole I drill to mount these LEDs… pretty dumb. I also called in to ask them which position on the rocker switch is auto/manual? Every time they answer the phone they sound angry and annoyed… I guess that’s the type of customer service one can expect after spending close to $4000 on a product…
For reference red on the rocker switch = auto and black = manual… this is referenced nowhere in the manual, as the manual still shows the old box they use to include….
5D4E69BC-F400-44D0-B272-B1052FBF9D17.jpeg1182B6D5-DCBD-48F4-B589-A5271E1A56F8.jpegEB40E8F5-AE9B-4579-B1D8-A9A82BCB5FBC.jpeg
 

chevymike

Well-known member
603
468
63
Location
San Diego, CA
I think you can buy that with either setup, the individual lights/switch or the box type like I have in mine. Not sure if there was a price difference but your setup can make for a cleaner install.
 

retro_life

Well-known member
243
629
93
Location
Los Angeles, California
I think you can buy that with either setup, the individual lights/switch or the box type like I have in mine. Not sure if there was a price difference but your setup can make for a cleaner install.
No the guy on the phone said I got the “new setup” when I asked about it… which looks like they just cut costs IMO.. The only options given when ordering a kit (besides application) is tire size and gearing. I obviously would’ve gotten all the extras offered as I was already being taken to the cleaners on the cost of the kit… it’s not a big deal I will drill it into the blank spot where the radio is supposed to be.. I just don’t get it.
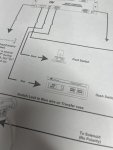
Here’s the diagram in the manual.. it still shows the old setup…
EC9918FD-CED4-4A54-86FC-73F1AA162F9F.jpeg
 

retro_life

Well-known member
243
629
93
Location
Los Angeles, California
Called back again and this time talked to sales (much nicer attitude than the support team) and talked to Nick and he confirmed once again that they no longer offer the control box. He said that they stopped using them “quite a while ago” when they moved away from their analog controllers. He also said that a lot of customers didn’t like them because they looked “80s” and out of place on a lot of builds and people were taking them apart anyway… and he also said he didn’t even have any even if I wanted to buy one.. And I say this with 100% respect and in no way aggressive but feel free to call and ask them about it yourself… it kinda blew my mind…. Anyway guess I’m about to drill these things into my dash. I will report back and show what I come up with.
 

ezgn

Well-known member
650
1,039
93
Location
Lake Elsinore Ca.
No the guy on the phone said I got the “new setup” when I asked about it… which looks like they just cut costs IMO.. The only options given when ordering a kit (besides application) is tire size and gearing. I obviously would’ve gotten all the extras offered as I was already being taken to the cleaners on the cost of the kit… it’s not a big deal I will drill it into the blank spot where the radio is supposed to be.. I just don’t get it.
Here’s the diagram in the manual.. it still shows the old setup…
View attachment 841521
So are you saying that you did not put in tire size and gearing when you purchased?
 

retro_life

Well-known member
243
629
93
Location
Los Angeles, California
So are you saying that you did not put in tire size and gearing when you purchased?
No no… what I’m saying is those are the only options you have to fill in when ordering a kit. Of course I told them the tire size and gearing.
What I was trying to emphasize is that there was no options for example “ADD CONTROL BOX” or something like that. Obviously if I had the choice I would’ve wanted that because it would make the installation a lot easier to just mount that box rather than have to drill holes for everything individually. And as I said earlier they just don’t offer that box anymore unfortunately. I was just a little frustrated earlier when going through my kit and seeing that after spending all this money on it, and then being told that I must have not purchased that extra part, when that’s not even a thing. I didn’t mean to come off negative I was just surprised because instead of that cool box that I’ve seen in all the review videos on these things is now replaced with what looks like a cheaper cost reduction alternative.
 

ezgn

Well-known member
650
1,039
93
Location
Lake Elsinore Ca.
No no… what I’m saying is those are the only options you have to fill in when ordering a kit. Of course I told them the tire size and gearing.
What I was trying to emphasize is that there was no options for example “ADD CONTROL BOX” or something like that. Obviously if I had the choice I would’ve wanted that because it would make the installation a lot easier to just mount that box rather than have to drill holes for everything individually. And as I said earlier they just don’t offer that box anymore unfortunately. I was just a little frustrated earlier when going through my kit and seeing that after spending all this money on it, and then being told that I must have not purchased that extra part, when that’s not even a thing. I didn’t mean to come off negative I was just surprised because instead of that cool box that I’ve seen in all the review videos on these things is now replaced with what looks like a cheaper cost reduction alternative.
When it is all said and done you are going to be stoked. Working through the rough spots will get you to the prize! Your doing great, thanks for helping me understand what you were saying. Gear Vendor Overdrive is a high quality product that will give you a dependable quality product, well worth the money you spend. I was born and raised in San Diego and have driven by their establishment on countless occasions. I have considered using one on my truck, but a cross country trip would definitely make it a must priority.
 
Top
AdBlock Detected

We get it, advertisements are annoying!

Sure, ad-blocking software does a great job at blocking ads, but it also blocks useful features of our website like our supporting vendors. Their ads help keep Steel Soldiers going. Please consider disabling your ad blockers for the site. Thanks!

I've Disabled AdBlock
No Thanks