• Steel Soldiers now has a few new forums, read more about it at: New Munitions Forums!

  • Microsoft MSN, Live, Hotmail, Outlook email users may not be receiving emails. We are working to resolve this issue. Please add support@steelsoldiers.com to your trusted contacts.

WC-51 Restoration or Bust!!

m1010plowboy

Well-known member
Steel Soldiers Supporter
3,912
2,724
83
Location
Edmonton, Canada
Rust

Subscribed but C'mon Tinman, have a heart.....:-D....share some more pictures.

Love watchin' these builds, when I'm not paying, so thanks for 'photo documenting' as much as you can. There is so much to learn. Congrats on the DMV success.

Had to post up Gunfreaks electro...rust go away remover thread because it's got pictures and a nice description on how to build one. He also options the cel charger as a power source.
Surplusrifle Forum • View topic - How to make and use an electrolysis tank *PICS*

WC-51.........Can you imagine the first day you get to take it for a drive!
 

Tinwoodsman

Well-known member
Steel Soldiers Supporter
3,923
76
48
Location
Comfort, Texas
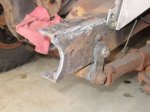
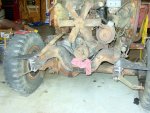
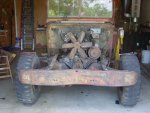
I have cut off the heavy pipe that had been welded on the frame ends and am now prepping it to accept the original bumper supports that I obtained from Midwest Military. I have the used bumper and original tow hooks so it should be back to original soon. Removing the heavy welds without doing to much damage to the frame ends is a real chore. Combination of cutting torch and grinder. Pictures coming soon.
 

Tinwoodsman

Well-known member
Steel Soldiers Supporter
3,923
76
48
Location
Comfort, Texas
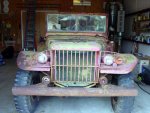
After a full day of cutting, grinding, welding patches and, what I am sure is a pending case of black lung, I removed the pipe bumper and temporarily installed the WC-51 bumper. Not purty yet but I promise it will be when done.

This one is for your Panshark!!!!
 

Attachments

papabear

GA Mafia Imperial 1SG
13,520
2,464
113
Location
Columbus, Georgia
After a full day of cutting, grinding, welding patches and, what I am sure is a pending case of black lung, I removed the pipe bumper and temporarily installed the WC-51 bumper. Not purty yet but I promise it will be when done.
This one is for your Panshark!!!!
You are doing excellent work TWM[thumbzup][thumbzup]

Not being too nosey I hope...but have you been taking lessons from Zout??:popcorn:
 

Tinwoodsman

Well-known member
Steel Soldiers Supporter
3,923
76
48
Location
Comfort, Texas
Yes PB. I took Zout 101 and 102 and am enrolled in 201 (first semester 2012). He has forgotten more than I will ever know and he is very fast. I am like the turtle. I go staight and slow......:cool:
 

nattieleather

Well-known member
1,883
145
63
Location
Cleveland, OH
Slow and steady wins the race they say. If that's true I may be slower than you... :) You work looks fantastic! Great job putting that back to original.
 

Tinwoodsman

Well-known member
Steel Soldiers Supporter
3,923
76
48
Location
Comfort, Texas
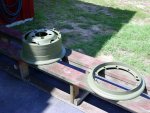
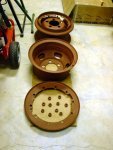
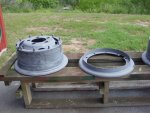
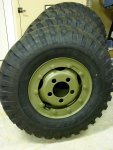
Back to the project today. Started with cleaning all the sandblasted combat wheels and then applying primer. With the rims being 65 years old, it has taken a lot of work but I sprayed the first one OD to see how it will look. The next shots will be an assembled new 9.00x16 NDT on the painted combat wheels. Can't wait to see that.

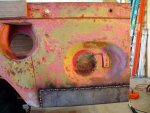
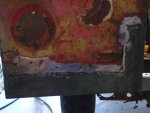
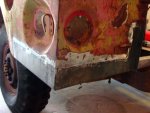
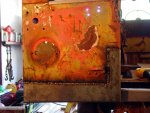
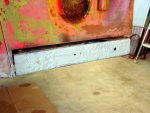
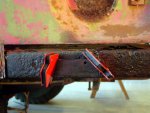
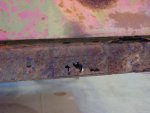
Then I tackled the first rusted rear corner of the cargo box. I needed to repair some rust holes in the cargo box frame and then treated the area with rust preventative and primer. Then I stitch welded in the first patch panel and sanded down the area for now. I will apply Duraglass once the remaining 2 corners are done.

So far I think it is going well. This is the most extensive patch panel work I have tackled to date and I proclaim myself "Mini Zout". Enjoy the photos and more to come.
 

Attachments

Tinwoodsman

Well-known member
Steel Soldiers Supporter
3,923
76
48
Location
Comfort, Texas
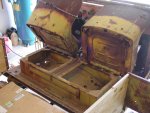
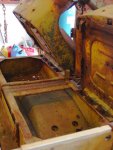
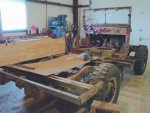
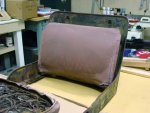
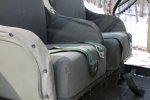
Removed the seats today to make more room to work on the cargo bed frame. The front passenger side box which house the 12V battery has corroded over the years and I need to patch one of the cross members before I put in the patch panel and new floor for the box.

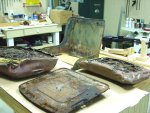
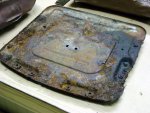
Overall the seats are not in too bad of shape but I don't know if the seat bottom springs can be salvaged. The seat pans need some patch work and I need to fabricate a fascia strip around the seat pan so I can fasten the new upholstery with hog rings. I may just fabricate new seat bottoms with high density form glued to the wood base and screw the base to the pan. I will look for a source that has the seat formed if available.

The seat frames and backrests are in decent shape and I can refurbish them. Will definitely take some work though. But isn't that what this is all about???? :)
 

Attachments

CatMan

New member
172
10
0
Location
Denmark Wisconsin USA
WC-51 Restoration or bust

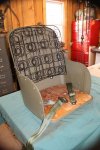
I know all about the seat options. We went back and forth on the seat rebuild in our WC21 about two monts back. I had original springs and had them blasted and epoxy primed but had to replace several broken coil springs. The original coil springs are bouncy and the 70 year old coils are likely to fail and stab you or soldier B in the butt in the future. Several people told me of this happening to them with old Dodge seat springs

We went with new automotive foam in the seat bottoms. Attached by staples to a fabricated plywood bottom. Better than hog ring technology. And added seat belts so soildier B doesn't fall out.

The new seat covers are from Mona at New Life and fit great. We reused the original seat back springs. I'm happy with the change and glad I went with the foam bottoms. The foam is not cheap, but worth the price.

Cat Man
 

Attachments

rchalmers3

Half a mile from the Broad River
Steel Soldiers Supporter
1,926
30
48
Location
Irmo, South Carolina
Hey there Tin Man,

Great work on the vehicle, you are saving a piece of the past for a future generation to appreciate and I thank you for that.

The first photo of the truck on the driveway looks like you are near the coast. Just wondering where you are working such that that incredible view is visible from in the shop!

Rick
 
Top