• Steel Soldiers now has a few new forums, read more about it at: New Munitions Forums!

  • Microsoft MSN, Live, Hotmail, Outlook email users may not be receiving emails. We are working to resolve this issue. Please add support@steelsoldiers.com to your trusted contacts.

What have you done to your 5 ton this week?

gottaluvit

Well-known member
Installed my rear air brake relay that I got from Castle Bravo. It don't leak anymore! An hour later and 108 psi primary and 104 psi secondary. That works for me! I was concerned it wouldn't pass the DOT inspection last year, but it barely did on that. Now it will with no worries.
 

tbar123

Member
691
24
18
Location
enon,oh
Installed my rear air brake relay that I got from Castle Bravo. It don't leak anymore! An hour later and 108 psi primary and 104 psi secondary. That works for me! I was concerned it wouldn't pass the DOT inspection last year, but it barely did on that. Now it will with no worries.
Your truck only builds psi to 108? It should build to 125 in both tanks. If it doesn't you still have issues.
 

archmark

Member
267
20
18
Location
Woodway, TX
My 5 ton learned me something today (like every day!) I've had an air leak at a joint on the downhill leg of the air hose from the upper passenger side tank. Having ALWAYS hated ************* with compression fittings and their **** ferrules, I've been dreading fixing it but decided that today would be the day. I broke the connection apart and sure enough both ferrules had been tightened down at an angle so the resulting leak. Since I was working in cramped conditions I broke the hose apart at the tank connection also, which wasn't leaking and was installed straight as could be. Examining the end of the hose I noticed a metal "insert" installed in the hose after the ferrule was installed. Come to find out this "insert" was exactly that, an "insert" meant to keep the end of the hose straight as the fitting is tightened down on the ferrule. Of course my friendly Ace hardware man didn't ask me if I needed any "inserts" when I initially purchased a half-dozen ferrules, so I guess he didn't know about them either.

Like I said, I've never seen an "insert" in all my years nor has anybody ever asked me if I needed some with my ferrule purchases. They sure would have made my previous fiascos with compression fittings, and the related mental anguish, non-existent. Tomorrow I tackle an air leak(?) on my Deuce located in the fuel system. Guess it'll learn me something too...

Mark
 

Plane Fast

Member
408
3
18
Location
Panama city FL
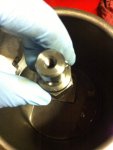
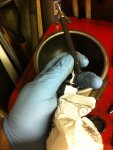
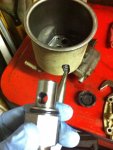
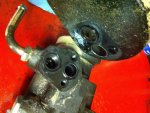
Replaced the o-rings on my power steering pump reservoir. It was just a weep, but I don't like leaks. Found an old chunk of hose in the oil pickup. I replaced the hose with a new one to be on the safe side.
image.jpgimage.jpgimage.jpgimage.jpg
Cleaned everything up and installed a new o-ring and filter kit.


While I had the pump off I pulled the compressor unloader. I'm glad I did, It was gunked up. The unloader piston was sticking. This is what was causing my intermittent over pressure. I had about 1/8" of cooked carbon. I forgot to take pics. Sorry. I went ahead an installed a new rebuild kit with new gaskets and o-rings.
All back together, and it worked like a charm.
For those who want to check the unloader. On the 8.3l you can just take off the from air inlet (two bolts and a hose clamp)
you can look right into the chamber and see if it has carbon build up. You could even go one step further, and disconnect the air line at the top.(one from the governor) Then you could apply a little compressed air to the fitting and see if the valve goes up and down.

To pull the top of the head, you do not need to drain the coolant. It is in four parts. Starting from bottom to top. Compressor, coolant chamber, unloader chamber, and then the unloader. (Not the technical terms:-D) but you get the idea.
You will loosen the two bolts on the round unloader.(this helps get clearance for the spring) Then remove the 4 bolts holding the top chambers together. The bolts in the back are hard to grab. Although there is room to pull them up and out behind the IP. More then likely the top chamber will pop right up leaving the coolant chamber on the compressor. The spring in the middle of the unloader piston will need to be pushed up a little to clear the chamber. I would look at the TM so you can get an idea how the parts look.
 

gottaluvit

Well-known member
Replaced the o-rings on my power steering pump reservoir. It was just a weep, but I don't like leaks. Found an old chunk of hose in the oil pickup. I replaced the hose with a new one to be on the safe side.
View attachment 613564View attachment 613565View attachment 613566View attachment 613567
Cleaned everything up and installed a new o-ring and filter kit.


While I had the pump off I pulled the compressor unloader. I'm glad I did, It was gunked up. The unloader piston was sticking. This is what was causing my intermittent over pressure. I had about 1/8" of cooked carbon. I forgot to take pics. Sorry. I went ahead an installed a new rebuild kit with new gaskets and o-rings.
All back together, and it worked like a charm.
For those who want to check the unloader. On the 8.3l you can just take off the from air inlet (two bolts and a hose clamp)
you can look right into the chamber and see if it has carbon build up. You could even go one step further, and disconnect the air line at the top.(one from the governor) Then you could apply a little compressed air to the fitting and see if the valve goes up and down.

To pull the top of the head, you do not need to drain the coolant. It is in four parts. Starting from bottom to top. Compressor, coolant chamber, unloader chamber, and then the unloader. (Not the technical terms:-D) but you get the idea.
You will loosen the two bolts on the round unloader.(this helps get clearance for the spring) Then remove the 4 bolts holding the top chambers together. The bolts in the back are hard to grab. Although there is room to pull them up and out behind the IP. More then likely the top chamber will pop right up leaving the coolant chamber on the compressor. The spring in the middle of the unloader piston will need to be pushed up a little to clear the chamber. I would look at the TM so you can get an idea how the parts look.
Wow, you must be one patient individual. Getting that unloader apart and/or together nearly made me blow a gasket. Whew, was I angry at the "engineers" who came up with the placement of that whole setup. My cats wouldn't even come around for hours.

Oh, by the way, did some wedging of my left headlight bucket to cut down on vibration that was eating headlights, and cleaned my windshield washer nozzle that was partially plugged and squirting in random directions. All this during a idle cooldown of the turbo after hauling a load of river gravel for a neihbor.
 
Last edited:

fuzzytoaster

Well-known member
Steel Soldiers Supporter
4,300
3,130
113
Location
Fort Worth, Texas
Working on this right now. Ungreased M923 front bearing on an 08' RRAD rebuild, made it home 100 miles before giving up. I need a replacement hub, anyone parting a truck out? I've read that one can use an A2 hub if you seal the CTIS hole...thoughts?
 

Attachments

gottaluvit

Well-known member
Working on this right now. Ungreased M923 front bearing on an 08' RRAD rebuild, made it home 100 miles before giving up. I need a replacement hub, anyone parting a truck out? I've read that one can use an A2 hub if you seal the CTIS hole...thoughts?
Nice job they did on that "rebuild". I think they meant repaint and change speedo and tach, by looking at that.
 
Top