• Steel Soldiers now has a few new forums, read more about it at: New Munitions Forums!

  • Microsoft MSN, Live, Hotmail, Outlook email users may not be receiving emails. We are working to resolve this issue. Please add support@steelsoldiers.com to your trusted contacts.

What have you done to your 5 ton this week?

mdainsd

Member
198
25
18
Location
San Diego, CA
Lots of options, thanks. Going to contact Vintage Air and see if they can equip their systems to 24V. If Im going to do it might as well do it right ;-). Im spoiled by my daily drivers, so I would like bi-level automatic control (why not?). Perhaps if V/A doesn't support 24V systems a change to a dual output alternator is in order. I do have the under-seat option as the batteries have been relocated to the toolbox already. But I would really prefer an integrated heat/defrost/air automated solution.

Thoughts?
 

simp5782

Feo, Fuerte y Formal
Supporting Vendor
12,125
9,384
113
Location
Mason, TN
Well besides get the transfer case swapped and some of the 915 torn apart. I did install another air tank in the spare tire carrier area and added some grab handles to the passengers side for that larger tank climb and battery relocation box. One is a handle off a 915, the other is just a frame tie down point off a truck. Air tank is off the 915 as well. Air tank total is up to to 8. Should be plenty.
 

Attachments

Elijah95

Certified Rookie
1,239
1,196
113
Location
Georgia
Well besides get the transfer case swapped and some of the 915 torn apart. I did install another air tank in the spare tire carrier area and added some grab handles to the passengers side for that larger tank climb and battery relocation box. One is a handle off a 915, the other is just a frame tie down point off a truck. Air tank is off the 915 as well. Air tank total is up to to 8. Should be plenty.
What are you trying to inflate with all that volume on tap?
 

simp5782

Feo, Fuerte y Formal
Supporting Vendor
12,125
9,384
113
Location
Mason, TN
What are you trying to inflate with all that volume on tap?
Helps in case I need to air up a 16.00 onto a wheel. 2 of the tanks are solely for the transmission operation as it requires alot of air. There are 4 regular tanks on the truck alone. So I added these two. Plus Using just the wet tank to air tires up it tends to pull too much air on the tank and the trailer control valve usually pops cause the tires take too much pressure to air up and kill the tank.
 

Elijah95

Certified Rookie
1,239
1,196
113
Location
Georgia
Helps in case I need to air up a 16.00 onto a wheel. 2 of the tanks are solely for the transmission operation as it requires alot of air. There are 4 regular tanks on the truck alone. So I added these two. Plus Using just the wet tank to air tires up it tends to pull too much air on the tank and the trailer control valve usually pops cause the tires take too much pressure to air up and kill the tank.
I bet it’ll make a big difference
 

simp5782

Feo, Fuerte y Formal
Supporting Vendor
12,125
9,384
113
Location
Mason, TN
I'll upgrade you to AT3s when you are old enough to get big tires and your training wheels off


How do the AT/3As compare to the XZLs? Ride, noise, price, availability...??
They are cheaper. They ride pretty well, not like AT2s at all. I do not have many miles on em as of now. They are out there. Shipping to WA would be killer though. Around $300 for brand new ones 2015 and newer date codes. They are no louder than 1600 XZLs roar.
 

8madjack

Active member
416
78
28
Location
Gold country Ca.
Aired up my two tires that bleed down slowly and then took pebbles for a ride she definitely doesn't like it! It was all I could do to stop her from jumping out when I stopped in front of the barn, �� I think she doesn't like the loud noises anyway she was in my lap definitely not good when trying to drive on the streets this was just a putt from the house to the barn.

I lowered the sides on my drop side bed and it's a little rusty under them I'm going to wire wheel them and hit them with some paint. Then I'm going to clean her up and get her ready for kid to work day next week. I also want to make some bows even if it's just temporary so I could put some cargo netting on top until I make a proper set of troop seats and bows.

I also have a question when I stop I can hear some air leaking out and I'm thinking maybe it shouldn't be it's coming from the haldex air dryer. Everything works on the truck and I haven't messed with it at all but I want to start going through everything and making it just right.

Anyway my question is should it be bleeding air when I shut the truck off and if not how do I fix it? I have seen some threads on replacing an air dryer but I don't remember which one is desirable. I also don't know if it's necessary if it's a simple service then I'll just do that unless there's a big benefit to switching.
 

sandcobra164

Well-known member
2,999
295
83
Location
Leesburg, GA
Drove mine to a friends shop for temporary storage on Wednesday. I'm going out of town for a few days and my better half doesn't like to mess with the 5 ton while I'm gone. Fresh diesel, desplined front caps, and dual fuel modification helped me run with traffic on the bypass at 70 mph. I know, tires are rated at 55 MPH. I'm just happy the truck has as much get up and go again. I've got a good friend who will help me go through the overhead adjustment when I get back who goes by screen name Welder1. I think it's fine but I need to re-seal the rocker boxes and valve covers on all 3 heads so it'll be a good day of maintenance. Nice thing about having friends like Welder1, no charges for storage next to his sandblasting operation. He's been a great mentor to me over the years.
 

Ford Mechanic

Active member
1,805
6
38
Location
Edenton, NC
Mine has gotten alot of work done in the last 2 weeks. Started with a oil change, grease job, rotated all 6 tires, replaced one of the bolts in the door hinge, replaced the return fuel line, fuel filters, cleaned and repacked the front wheel bearings.

I also removed the VHF from my hunting truck and installed it in the 923 so I can have comms with the wife during the trip to the Denton Rally. She has a handheld she will be using in her truck. I also installed a speaker just behind my head on the hard top so I can actually hear it.

I also bought a ram mount cell phone holder for the trip. So far so good.

Sent from my SM-G900V using Tapatalk
 

mdainsd

Member
198
25
18
Location
San Diego, CA
Started the long job of changing out the spring brake diaphragms. Not a fun day :x. Started at Napa and of course they don't have size 16. But Whetford's down the street had them. Bought four of them and a brand new American caging bolt and nut. Off to the truck (an hour away in the mountains).

I started with the drivers side one at the far back as it had easy access and I wanted to learn my skills with a minimum of wriggling out from under the truck for another tool, bottle of water etc. First issue. the brand new caging bolt while looking exactly like the ones in the cans would not engage the hole in the spring plate. I wasn't going to do anything with it unless the caging bolt went in just like all the ones you see in the videos or for that matter like all of mine did when I initially caged the spring brakes.

I inspected the ones from the cans and there is no corrosion on them, the tangs look great. So I caged the first one and gently started removing the clamp. Voila! No surprises and no shrapnel. Pulled the diaphragm out for inspection - tons of tiny cracks and dry. This part was good as it pretty well confirms where the air was going when the hand brakes is released.

No matter what I did, I couldn't get the chamber and the diaphragm to all line up on the piggyback housing. I used small amounts of soap and water to wet the ouster edges, no go. Rggggg. My biggest concern here was the chance of getting careless with the spring chamber, so I stopped.

Then I got the bright idea to take the piggyback chamber off of the service brake. That went smoothly. One i did that the next battle was with the spring loaded plunger that goes between the two chambers. It was what was causing me all the grief trying to line everything up. So I took the piggyback body and depressed that plunger against its spring fully and locked it there with an improvised tool. Now it was cake to put the chamber and spring back onto the piggyback body! Even the clamp went on with no fuss.

But that was the end of the success. There was no way that the old service brake diaphragm was going back in. 1) it had cracks too so what would be the point? 2) it had deformed over the years to where it just was not going to go back together.

So that was it for the day. I learned some things...

1) the service brake diaphragms are NOT #12 as documented here, they are #10, at least on my truck.
2) Now I have developed my technique, I believe the rest will go much better, once I get the right parts.
3) The parts are dirt cheap, diaphragms less than four bucks each. Saves some serious coin not having to replace the four piggybacks.
4) While you are doing this job, do all of the diaphragms!
5) It would be very easy to get careless handling the spring chamber, don't!
 
Last edited:

simp5782

Feo, Fuerte y Formal
Supporting Vendor
12,125
9,384
113
Location
Mason, TN
Started the long job of changing out the spring brake diaphragms. Not a fun day :x. Started at Napa and of course they don't have size 16. But Whetford's down the street had them. Bought four of them and a brand new American caging bolt and nut. Off to the truck (an hour away in the mountains).

I started with the drivers side one at the far back as it had easy access and I wanted to learn my skills with a minimum of wriggling out from under the truck for another tool, bottle of water etc. First issue. the brand new caging bolt while looking exactly like the ones in the cans would not engage the hole in the spring plate. I wasn't going to do anything with it unless the caging bolt went in just like all the ones you see in the videos or for that matter like all of mine did when I initially caged the spring brakes.

I inspected the ones from the cans and there is no corrosion on them, the tangs look great. So I caged the first one and gently started removing the clamp. Voila! No surprises and no shrapnel. Pulled the diaphragm out for inspection - tons of tiny cracks and dry. This part was good as it pretty well confirms where the air was going when the hand brakes is released.

No matter what I did, I couldn't get the chamber and the diaphragm to all line up on the piggyback housing. I used small amounts of soap and water to wet the ouster edges, no go. Rggggg. My biggest concern here was the chance of getting careless with the spring chamber, so I stopped.

Then I got the bright idea to take the piggyback chamber off of the service brake. That went smoothly. One i did that the next battle was with the spring loaded plunger that goes between the two chambers. It was what was causing me all the grief trying to line everything up. So I took the piggyback body and depressed that plunger against its spring fully and locked it there with an improvised tool. Now it was cake to put the chamber and spring back onto the piggyback body! Even the clamp went on with no fuss.

But that was the end of the success. There was no way that the old service brake diaphragm was going back in. 1) it had cracks too so what would be the point? 2) it had deformed over the years to where it just was not going to go back together.

So that was it for the day. I learned some things...

1) the service brake diaphragms are NOT #12 as documented here, they are #10, at least on my truck.
2) Now I have developed my technique, I believe the rest will go much better, once I get the right parts.
3) The parts are dirt cheap, diaphragms less than four bucks each. Saves some serious coin not having to replace the four piggybacks.
4) While you are doing this job, do all of the diaphragms!
5) It would be very easy to get careless handling the spring chamber, don't!
Service sides are all 12s. Your spring side is a 16. They do not make a 10/16 chamber.

Get longer 5/16 bolts. It helps and channel locks. When you put the pancake in the spring housing you slide it down from the top. The housing should have 2 tiny ears that will assist you with getting it on. Getting 1/2 or 3/4" longer bolts will make getting it back together easiest. Especially If your clamps are only single bolts and not doubles

Use the channel locks on the clamp. One side holding the bolt head then the other on the clamp so the bolt can go thru the hole to start a nut

Should be about 3 to 5min for each diaphragm

Sent from my SM-G965U using Tapatalk
 
Last edited:

mdainsd

Member
198
25
18
Location
San Diego, CA
Thanks. Are you saying to put the pancake in after the housing has engaged the the two ears?

The service diaphragm is marked "Rockwell D10"

3 to 5 minutes would be awesome!
 

simp5782

Feo, Fuerte y Formal
Supporting Vendor
12,125
9,384
113
Location
Mason, TN
Thanks. Are you saying to put the pancake in after the housing has engaged the the two ears?

The service diaphragm is marked "Rockwell D10"

3 to 5 minutes would be awesome!
Put the pancake in the spring housing then slide it down onto the tube assm.

The pancake may say 10 but doesn't mean it's right. It should be stamped into the outside cover on the service chambers. If it's the service diaphragm on the spring side it's a 12.

Sent from my SM-G965U using Tapatalk
 

Swamp Donkey

The Engineer
Steel Soldiers Supporter
1,450
120
63
Location
Gray, GA
Thanks. Are you saying to put the pancake in after the housing has engaged the the two ears?

The service diaphragm is marked "Rockwell D10"

3 to 5 minutes would be awesome!
M939 spring brake chamber. There is a lot of information under all the CARC.

20180422_173714.jpg

Notice the model number. They use #12 and #16 diaphragms.

20180422_173728.jpg

This is a Rockwell service brake diaphragm out of a chamber I pulled from a spare axle. It's a #12 diaphragm.

20180422_173616.jpg
 

TechnoWeenie

Well-known member
Steel Soldiers Supporter
1,653
1,669
113
Location
Nova Laboratories, WA
Pulled more of the rotten wood panels out of my M934, gaining acess to the exterior metal from the inside. Definitely tiresome but cool knowing how everything fits together.. Or.. In the case of the walls, doesn't fit together. Heh. There's a good 2 inch gap between the the top of the wall panel and the bottom of the roof panel. Sunlight is readily visible. I will have to find a way of stealing that up. I think I may have to use a another piece of aluminum and have it welded around the edges to essentially seal it all up.
 

TechnoWeenie

Well-known member
Steel Soldiers Supporter
1,653
1,669
113
Location
Nova Laboratories, WA
I started a rebuild thread. I'm really bad at taking pictures as I work though.

I got most of the wiring out, most of the ceiling out, most of the wood out that was riding on the side panel but I'm going to remove all of it anyway and put different insulation in there.

One thing I've seen a lot of people do is make huge plans and try to dump a lot of money in it and once and then run out of steam halfway through.

I've realized I need to take one step at a time, and finish one project first. So the first thing that needs to be done is removing all the paneling and all the insulation.

Next will come replaxcing the insulation and resecuring the panels, in addition to running new wires for the new 12 volt electrical system that's going back there. Nothing fancy, very simple.

I expect to spend around two grand removing all of the panels replacing the insulation running new wires adding new lights adding solar panels, Etc. One step at a time.

I need to get a composting toilet, and I figured a 55 gallon drum or two for water, needs to be designed into the vehicle. I think I might use the 55 gallon drums as support for the countertop sink. Basically making a wooden support and frame around the 55 gallon barrels.

Being that each Barrel will weigh close to 400 pounds when full, I may have to factor that into my design. I did however lose probably 1600 to 2000 pounds in removing the sides.
 
Last edited:

Mos68x

Active member
827
36
28
Location
Seligman,AZ
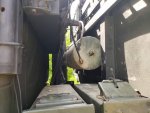
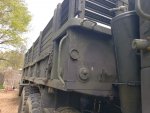
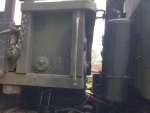
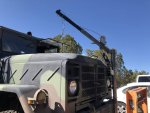
C3E8F9FA-07DA-4921-9016-6DB528977CB9.jpgBC65BBA4-B1C0-4D7B-94A9-C377075551A8.jpgDF8FD934-2C05-458E-ACB9-88A9AB0B0163.jpg
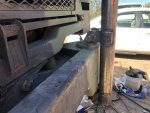
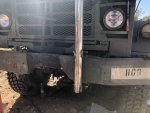
Finally finished building the front bumper mount for the HF crane. As soon as I finish grinding away on the C-channel and I-beam for the ISO frame I’ll start on disassembling the engine.
 
Top
AdBlock Detected

We get it, advertisements are annoying!

Sure, ad-blocking software does a great job at blocking ads, but it also blocks useful features of our website like our supporting vendors. Their ads help keep Steel Soldiers going. Please consider disabling your ad blockers for the site. Thanks!

I've Disabled AdBlock
No Thanks