Brutacus
Active member
- 242
- 208
- 43
- Location
- Marion, AR.
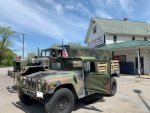
I replaced my upper torque rods. I spent more time modifying a 2" wrench to fit behind the spring than it took me to put them in. I used 2-1/4" socket end I found for $25, and the wrench was $5 from a pawn shop. Some cutting disc, a flap disc, and some ugly welds gave me the tool to fit it just right. When I cut the back of the wrench to clearance it, I used that crescent shaped part to fill the gap. It did take some trail and error, and some test fittings to make it work. The torque rods have the safety bar installed on them. Since I have two dogbones left over, I'll just buy the safety bar bushing and press the bushings in for the lowers. Probably just one dongbone at a time.


Attachments
-
 134.7 KB Views: 25
Last edited: