• Steel Soldiers now has a few new forums, read more about it at: New Munitions Forums!

  • Microsoft MSN, Live, Hotmail, Outlook email users may not be receiving emails. We are working to resolve this issue. Please add support@steelsoldiers.com to your trusted contacts.

What have you done to your 5 ton this week?

Brutacus

Active member
Steel Soldiers Supporter
242
207
43
Location
Marion, AR.
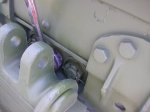
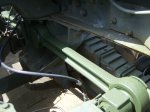
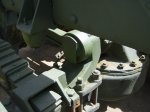
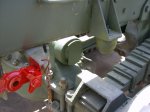
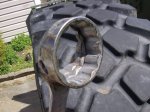
I replaced my upper torque rods. I spent more time modifying a 2" wrench to fit behind the spring than it took me to put them in. I used 2-1/4" socket end I found for $25, and the wrench was $5 from a pawn shop. Some cutting disc, a flap disc, and some ugly welds gave me the tool to fit it just right. When I cut the back of the wrench to clearance it, I used that crescent shaped part to fill the gap. It did take some trail and error, and some test fittings to make it work. The torque rods have the safety bar installed on them. Since I have two dogbones left over, I'll just buy the safety bar bushing and press the bushings in for the lowers. Probably just one dongbone at a time.
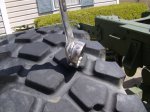
modified wrench 7.JPGmodified wrench 6.JPGmodified wrench 5.JPG
HD Torque Rod with Saftey Bar 3.JPGHD Torque Rod with Saftey Bar 5.JPGHD Torque Rod with Saftey Bar 5.JPGHD Torque Rod with Saftey Bar 4.JPG
 

Attachments

Last edited:

Ajax MD

Well-known member
1,569
1,414
113
Location
Mayo, MD
I replaced my upper torque rods. I spent more time modifying a 2" wrench to fit behind the spring than it took me to put them in. I used 2-1/4" socket end I found for $25, and the wrench was $5 from a pawn shop. Some cutting disc, a flap disc, and some ugly welds gave me the tool to fit it just right. When I cut the back of the wrench to clearance it, I used that crescent shaped part to fill the gap. It did take some trail and error, and some test fittings to make it work. The torque rods have the safety bar installed on them. Since I have two dogbones left over, I'll just buy the safety bar bushing and press the bushings in for the lowers. Probably just one dongbone at a time.
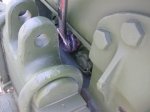
View attachment 795391View attachment 795392View attachment 795393
View attachment 795394View attachment 795396View attachment 795396View attachment 795395
Can I borrow that? I don't have a welder...and I don't know how to weld effectively.
 

Brutacus

Active member
Steel Soldiers Supporter
242
207
43
Location
Marion, AR.
Can I borrow that? I don't have a welder...and I don't know how to weld effectively.

Don't feel bad, I can't weld effectively either. That's why I used the flap disc, and it took me more time to modify the wrench than it took to replace to upper dogbones. I don't have an expensive welder. With a coupon, I paid $70 at harbor freight for my stick welder. After that, I practiced on some scrap metal, and found that 7014 rods work best with that welder. Thats what I used on the wrench
 

74M35A2

Well-known member
4,145
330
83
Location
Livonia, MI
That weld looks dam good for what we're doing with it. 2nd place in the beauty contest is still a hottie. Nice job.

Ajax you can borrow mine for a refundable deposit, but you can't hang onto it forever. Let me know once you are ready and have all your parts including the time to do so, and I'll send it to you. 1 week time limit.
 

Ajax MD

Well-known member
1,569
1,414
113
Location
Mayo, MD
That weld looks dam good for what we're doing with it. 2nd place in the beauty contest is still a hottie. Nice job.

Ajax you can borrow mine for a refundable deposit, but you can't hang onto it forever. Let me know once you are ready and have all your parts including the time to do so, and I'll send it to you. 1 week time limit.
I'll contact you once I have the parts and I'm ready.
 

74M35A2

Well-known member
4,145
330
83
Location
Livonia, MI
I'll contact you once I have the parts and I'm ready.
Easiest way is to use a tow strap on the wrench and a vehicle to pull the tow strap with. One person to hold the wrench on squarely and strap onto end of wrench, then one person pulling slowly on strap with another vehicle. Go slow, once broke free it will turn easily. I used a forklift in my case, but pickup or whatever will work same. Go slow, be careful, and it will work well. Reposition as often as needed to keep wrench handle straight up. Few minutes gets both done.
 

tpiekbp

Member
32
36
18
Location
Artesia, NM
D1DD2137-C9E5-4637-BD21-BD97D30DCA19.jpeg
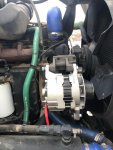
I swapped the alternator on my 934a2....Thanks to all the help from everyone blazing the trail in the electrical forum!

Used a Wilson alternator 90-01-4152, Cummins bracket 3929418, pulley WAI 24-1753, and best boat wire made 6awg cables with a 1/2” lug to 1/4” lug end and the project was just under $300 after searching everywhere for the best deals.

I went straight from the alternator to the starter lugs and capped the four wires that that were going to the original alternator. I used a 5/16”x1” bar with the holes at 8.75” as recommended on here for the bottom alternator support.... and it took less than an hour to do.

Thanks again for everyone who shared info before me to make my swap super smooth
 

msgjd

Well-known member
1,079
3,313
113
Location
upstate ny
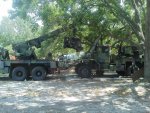
got one of the M818's stuck while yanking the stepdeck out of winter storage. Got it free just as GF showed up to help. IMAG0174.jpg

And then off we went and installed a load of stone on one of the ol' Brush Burners . One of these days if it sits still long enough somebody might be able to put the L gas tank and spare tire rack back on it.
IMAG1074.jpg
 
Last edited:

Ajax MD

Well-known member
1,569
1,414
113
Location
Mayo, MD
Huh. Upon closer examination of my suspect torque rod, it turns out that it was just the inner, circular flap of rubber that peeled off. That piece of rubber doesn't actually do anything other than cap off the inner metal part.

I gave all my torque rods the "pry rod test" from the TM and they all sprung back nicely. I'm still planning on replacing them, it's just less of a crisis than I originally suspected.

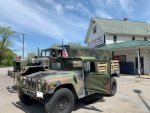
On that note, the local high school senior class got gypped out of their graduation ceremony by the virus. They "walked" by driving though the village in their cars, parade style, escorted by the local VFD. The residents lined up on the streets to wave and blow horns as they passed. Wife and I brought the green trucks to the road side with flags, and gave them a good blast as they passed by. Judging by the looks, everyone seemed to really enjoy it, especially the kids with jacked up pickup trucks.
 

Attachments

Ajax MD

Well-known member
1,569
1,414
113
Location
Mayo, MD
Oh, almost forgot-

When I did the coolant flush, belts and hoses, I replaced the water pump gasket with a fresh crush gasket. I put a little anti-seize on it, as Wes suggested.
No leaks.

After a few drives and a general warming up as spring has arrived, it started leaking. I found a spot on the driveway and tracked it down to the bottom part of the seal of the water pump. Definitely not coming from the water pump shaft seal. I found the bolts looser than I expected. I went around and snugged them all down again. It took several circuits around the pump-

Steady drip
2nd time, 1 drip/second
3rd time, 1 drip/5 seconds
4th time seemed to be the charm, no drips.

I know this started within the last few days because there was no appreciable loss of coolant at the overflow tank.

Is this normal to have to go back and snug it down? Does the metal crush gasket compress a little, requiring a "follow up visit?"
 

Crf450x

Well-known member
275
350
63
Location
Fall Branch, TN
Is this normal to have to go back and snug it down? Does the metal crush gasket compress a little, requiring a "follow up visit?"
I just replaced my water pump a couple weeks ago and I know I had to go around it like 10 times with a torque wrench before all the bolts quit turning. It seemed to compress quite a bit.
 

Redpawn

Active member
146
28
28
Location
St.Cloud FL
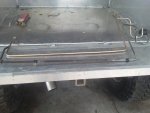
Finished putting the engine in the 816 last week and started it up. Took it for a short drive around the yard and when I pulled back up on the concrete it was pouring oil on the ground. After a little inspection found out it was power steering oil. One of the steel lines running across the frame to the cylinder on the right side of the frame had rusted through. I just happen to have two ends and the right size steel line from another project I had so I made a new line and installed it. No more power steering leaks.

IMG_20200419_113306.jpg
 

77 AMG

Active member
403
62
28
Location
Owingsville, KY
Yeah, speaking of the leaking, I get to order a cylinder rebuild kit for the passenger side ram. Also, Any ideas why the power steering pump would be puking out of the little "neck" on the side? Stopped up filter or something, maybe? M813, btw.
 
Top