cpf240
Active member
- 1,479
- 5
- 38
- Location
- Free in Northern Idaho
Pmramsey - do those seats tilt at all? I'm wondering how they would work in an M1009, allowing access to the back seat. What are those seats from? Did they use the stock mounting locations in the floor pan?
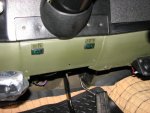
I really like that M101A3 bed on there! I just might have to look for a project truck and do the same, thanks for the pictures!
I really like that M101A3 bed on there! I just might have to look for a project truck and do the same, thanks for the pictures!


 !!!
!!!