• Steel Soldiers now has a few new forums, read more about it at: New Munitions Forums!

  • Microsoft MSN, Live, Hotmail, Outlook email users may not be receiving emails. We are working to resolve this issue. Please add support@steelsoldiers.com to your trusted contacts.

What have you done to your CUCV today/lately - Part 2

bkwudzhom

Member
322
1
18
Location
ga
Ground the bracket out of the way so I could replace the lower oil cooler line and not cuss...added a bit of heater hose for padding and ziptied it to the upper one until I can get the proper brace and replace it....Serviced the Transmission... Replaced both rear wheel cylinders .... hand bent and replaced the rear axle brake lines.. Replaced rear brakes... Stops a LOOOT better with a load now!!
 
Last edited:

Mainsail

Well-known member
Steel Soldiers Supporter
1,512
1,696
113
Location
Puget Sound, WA
I started mine.

I haven’t driven it in over a week and it was 28⁰ outside. Cycled the GPs a few times, tap-danced on the throttle, and it fired right off.
 

Drock

New member
1,020
12
0
Location
Eatonton GA
Took off the door strikers and installed some 7/16 rubber hose over them. Now the door closes ah little easier and no more rattles. Then took off the passenger side mirror and pulled out the factory plastic sleeve, and replaced it with ah piece of rubber inner tube. Now hopefully the mirror will stay in place when I close the door.
 

ODFever

Madness Takes Its Toll...
Steel Soldiers Supporter
2,011
73
48
Location
Orlando, FL
CUCVRUS - Congratulations on figuring out how to post pictures!!! :-D I like your field repairs as well!! [thumbzup] :)
 

edpdx

Active member
795
75
28
Location
Oregon
I changed out my NAPA Heater Core for the OEM it replaced 3 years ago.

You don't need many tools: Flat/Phillips screwdrivers (MED), 7mm deep socket, 7/16" deep socket, 9/16" socket, long extension (Taller than seat height), socket ratchet, headlamp.

I tore my liner behind the heater plenum, so I repaired it by using spray adhesive. I also used a hammer to bump the plenum bolts (3) from the firewall side.

View attachment 530007View attachment 530008

Essentially:
1. Remove back battery and passenger seat (6 bolts 9/16").
2. Remove heater hose at top HC Tube at firewall, and then the bottom one. Prop up so you don't lose coolant (See pictures).
3. Remove 4 screws (Phillips #2) from glove box (TM says "instrument console") Pull glove box out.
4. Remove 2 screws from cable ends on plenum- see picture (7mm). Pry cable end 'loops' off of posts- may have spring nut keepers.
5. Remove 3 nuts from engine bay side (1, 2 & 3 in picture). Two are on blower flange, #2 is to the right as pictured. 7/16" open or deep socket and various extension or configuration wrenches. Be careful not to stress the fuel filter tubes. All battery cables should be removed.
6. Carefully tap #2 bolt with hammer and extension to dislodge plenum.
7. Work carefully here to avoid tearing the floorboard liner behind the plenum. FIRST pull the plenum straight back until the bolts that pass through the firewall completely clear the liner. Then pull the plenum down and free of the glove box frame. If you tear the liner, use a little spray adhesive to press it back down into place.
8. The HC seal should come out with the HC. If not, remove it now (See Picture).
9. Compare heater core top the one you are replacing. The ones pictured are correct depth. Some will have a 'skinny' body allowing air to flow around them, and you will not get much heated air. Yours may come with foam blocks to place on either side- forcing air through properly. Secure them by threading mechanics wire through the block and twist the ends to secure them to the Heater Core.
NOTE* Force air (Blow) through either side of the HC to be sure there is no blockage BEFORE securing it to the plenum. There are two brackets to secure the HC to the plenum.
10. Replace the seal- a new one is preferred. Replace the plenum; carefully guiding the #2 bolt through the liner and firewall. Rotate into position and replace the nuts (3) on the firewall side.

The rest is just the reverse of this removal.

The last part was to assure that there is no air in the heater hose or heater core: After securing the top and bottom heater hose, AND with the radiator completely topped-off, remove the heater hose from the offset fitting above the passenger-side alternator. Hold your thumb over the fitting. Coolant will flow from the radiator through the HC pushing any air out of the hose. Reconnect, tighten and check for leaks. If you don't bleed the air out your water pump may squeal.

I've done this twice now. It's not very hard- well under an hour if you have all tools in place. You should definitely remove the battery and the seat. Each part takes only a few minutes, and will save you time and frustration.
 

Mainsail

Well-known member
Steel Soldiers Supporter
1,512
1,696
113
Location
Puget Sound, WA
For $5 you can get a Christmas tree tag from the NFS, so every year we head up to the forest and cut a very plain looking tree. No tree that was farmed to look like a cone for us, just a small tree with some character.

Since I have over a week of use-or-lose leave saved up I took today off so we could go scout around, find a tree, and mark the GPS coordinates so we could find it next weekend.

The roads are glare ice in most places, and the QD2, traction control, and antilock brakes were getting a serious workout. We didn’t get very far before we discovered a huge SUV overturned and down the embankment. I climbed down to make sure nobody was still inside, then we pressed on. As the mountain road got steeper, we started getting nervous; there are very steep drop-offs on the side and even the jeep was having trouble. I gave some consideration to the even steeper hills ahead and we decided to turn back.

Downhill on the ice was even more nerve wracking and my wife wanted to walk down instead. I was good with that because if she was way out in front she could alert me to another vehicle coming up the hill, and them to me coming down. Just stopping the jeep to let her out was a challenge, even with the anti-locks cycling the jeep just kept sliding towards the edge.

So here's the big question: Which is better on snow/ice, the jeep with the quadra-drive 2 (electronic fully locking diffs), traction control, and anti-skid brakes -OR- the M1009 with the open front diff, gov-lock rear, and chains all around?
 

Attachments

swiss

Well-known member
Steel Soldiers Supporter
2,733
863
113
Location
Oakwood, Ga
For $5 you can get a Christmas tree tag from the NFS, so every year we head up to the forest and cut a very plain looking tree. No tree that was farmed to look like a cone for us, just a small tree with some character.

Since I have over a week of use-or-lose leave saved up I took today off so we could go scout around, find a tree, and mark the GPS coordinates so we could find it next weekend.

The roads are glare ice in most places, and the QD2, traction control, and antilock brakes were getting a serious workout. We didn’t get very far before we discovered a huge SUV overturned and down the embankment. I climbed down to make sure nobody was still inside, then we pressed on. As the mountain road got steeper, we started getting nervous; there are very steep drop-offs on the side and even the jeep was having trouble. I gave some consideration to the even steeper hills ahead and we decided to turn back.

Downhill on the ice was even more nerve wracking and my wife wanted to walk down instead. I was good with that because if she was way out in front she could alert me to another vehicle coming up the hill, and them to me coming down. Just stopping the jeep to let her out was a challenge, even with the anti-locks cycling the jeep just kept sliding towards the edge.

So here's the big question: Which is better on snow/ice, the jeep with the quadra-drive 2 (electronic fully locking diffs), traction control, and anti-skid brakes -OR- the M1009 with the open front diff, gov-lock rear, and chains all around?

You our may not like my answer but the best thing is always to drive the conditions within the safe operating parameters of the conditions no matter what you drive. Outside of that if you want any traction in the prescribed conditions chains win hands down
 

antennaclimber

Moderator
Moderator
Steel Soldiers Supporter
1,370
960
113
Location
State College, PA
Mainsail;1637331 [B said:
So here's the big question: [/B]Which is better on snow/ice, the jeep with the quadra-drive 2 (electronic fully locking diffs), traction control, and anti-skid brakes -OR- the M1009 with the open front diff, gov-lock rear, and chains all around?
A good set of tire chains is hard to beat. There are all different types for various conditions.
Mud, Ice Snow etc. Driving skill and knowing your limitations are critical in conditions like this.

I think you made a wise choice and turning around when you did.
Karl
 

Evil Dr. Porkchop

Well-known member
Supporting Vendor
1,964
295
83
Location
Colchester, VT
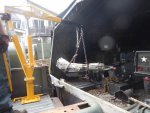
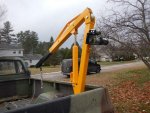
I recently got a 3500lb winch from tractor supply, and after drilling two holes it bolts right up to the bed crane on the m1028. I only used the original hand crank winch to pick up a th400/np208, didn't care for it. The new winch was only $75. I still need to run some wiring to the back of the truck for it. I'm going to run some heavy cable back there for a receiver tube mounted winch, so I'll use that to power the crane winch as well.

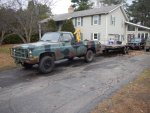
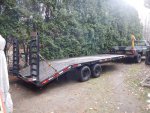
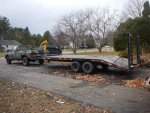
I also bought a new trailer to pull with the m1028, so now I shouldn't have to borrow one every time I buy anything.:D
 

Attachments

Evil Dr. Porkchop

Well-known member
Supporting Vendor
1,964
295
83
Location
Colchester, VT
That crane has me drooling. How well does it swivel when it's loaded?
It swiveled fine, the only downside was I had to hold the handle for the winch to keep it from dropping. Of course the turbo 400 / np208 combo only weighs around 200 pounds I think. The electric winch has a brake so it should fix that problem. I'll try to get the measurements on the support set-up tomorrow if you are interested still.
 

Evil Dr. Porkchop

Well-known member
Supporting Vendor
1,964
295
83
Location
Colchester, VT
Get a rattle can of OD Krylon and paint the crane. It'll look as good as it works! :)
Yeah I agree it looks a little out of place, I'm planning on painting the whole truck next year, crane included.
Very! That sounds like a next summer project for me. :beer:
It rained all day here today, I can tell you that the tubing is 2 x 3 x 1/4 inch and each support is 70" long. It should be nice enough out tomorrow to take the rest of the measurements.
 

rsh4364

Active member
1,372
15
38
Location
greensprings ,ohio
Received rebuilt IP today,not sure I want to tackle this on my own for first time.Changed thermostat and upper hose,switched KC Highlite lenses from offroad long range to fog lenses,much nicer.Still kept 100w bulbs and no one flashes brights at me.
 

srodocker

Well-known member
6,549
69
48
Location
Lacey, Washington
Had it towed home on sunday. Loss power out on the road and it shut off. Was able to restart it and get it on to a side street then it died again. Changed the fuel filter as mines a civi 6.2 and put on a new one, and cranked away to no avail. So now it sits in my side yard.
 

RobM36A2

Member
302
9
18
Location
The Netherlands
Finally got my visco clutch and put it on.
Now the M1028 is ready for driving action. :driver:

Went for orange marker/flasher lights, but the auto store only had white.

Removed one of the BO lights in the front bumper, to examin them and to know how they work.
Turned out there is a small board with 2 LEDs inside, there goes my plan to make driving lights of them.
 
Top
AdBlock Detected

We get it, advertisements are annoying!

Sure, ad-blocking software does a great job at blocking ads, but it also blocks useful features of our website like our supporting vendors. Their ads help keep Steel Soldiers going. Please consider disabling your ad blockers for the site. Thanks!

I've Disabled AdBlock
No Thanks