• Steel Soldiers now has a few new forums, read more about it at: New Munitions Forums!

  • Microsoft MSN, Live, Hotmail, Outlook email users may not be receiving emails. We are working to resolve this issue. Please add support@steelsoldiers.com to your trusted contacts.

What have you done to your CUCV today/lately - Part 2

cucvrus

Well-known member
11,475
10,452
113
Location
Jonestown Pennsylvania
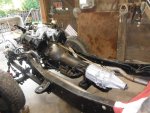
DSCF3041.jpgI just had this transfer case resealed and checked out. It cost me $250. I could take it apart and put it back together. That part is easy. It is knowing everything about the tolerances and settings that I let up to an experienced transmission shop. They warrant the work. I have been dealing with the same guy for over 20 years on all differentials, transmission, and transfer cases. I have not had to do any warranty repairs yet. So that is good. Keeping the fluid full and clean is the answer to most of the problems. I have a few with well over 100K on them use them hard and maintain them harder. Good luck on your rebuild.
 

MarcusOReallyus

Well-known member
4,524
818
113
Location
Virginia
I just had this transfer case resealed and checked out. It cost me $250. I could take it apart and put it back together. That part is easy. It is knowing everything about the tolerances and settings that I let up to an experienced transmission shop. They warrant the work.
I'm with you on that, Rick. I'll tackle just about anything on a vehicle, but transmissions and differentials I leave to the pros. Some things require specialized tools and knowledge.
 

cucvrus

Well-known member
11,475
10,452
113
Location
Jonestown Pennsylvania
The bolt that holds the bracket to the block was a grade 8 1/2" hex head, 5/16x18 thread. I had to run it through a die to clean up the threads as it was loose on the old starter and had the threads beat up.

I had a friend call me about a month ago and ask me if I was correct in the starter support bracket size from bracket to engine block. I had told him is was an M8 X 1.25. He said he was looking for starter bolt torque specs and found a thread in the CUCV helpful threads with the above size listed. I said it was wrong and he still insisted that it was standard. Today he called and said his starter is hanging from the wiring and cable. Both main bolts are gone. He said he also read that the main pair of starter bolts were 3/8" x 16. I ask him who told him that? He said he read it on the internet in a forum. He said the starter support block bolt is broken off flush. Oh Joy it was forced into the hole. Joy to get it out. I bowed out of that job. But I did go back to search and sure enough the support block bolt size is listed as 5/16" X 18 and un corrected in the Helpful threads. Not very helpful. Just thought I would mention it. NOT everything you read in helpful hints is helpful. This guy has a lot of work to get a bottomed out wrong thread bolt broken off it cast iron over head. I would pull the engine and save the time and cussing. That's me. I like pulling engines. Easy as that.


Check the TM but if I recall correctly the starter bolts are torqued to 30-33 FTlb.

I checked the GM manual and they list 35 lbs for the starter bolts. That is fine at 30 - 35 FT LB's

Blake stopped over and ask if I had any starter bolts. I do. GM PART # 15544950. Keep that for your records. I bought 2 replacements today and they list for $6.55 each. Still available today at the GM dealer. Good deal. You do as you want. I trust new bolts EVERYTIME I remove a starter. It is piece of mind and worth the $13. in sweat and cussing to NOT have to deal with them again. And use a new NYLOK nut on the starter stud. A flanged NYLOK if you can get one or a flat washer will do. Hope that helps.
He is going to run it with out the starter support bracket. Can tell people. If they don't listen that's NOT my problem. Thank you.
 
Last edited:

computer54

Member
317
1
18
Location
Nashville,TN
I have a 93 Chevy 4 by 4 K1500 6.2L motor that I got from GP and the transfer case jumps out of gear if I don't shift it need the four wheel Hi mark . And it has an 4L60 transmission.
 

cucvrus

Well-known member
11,475
10,452
113
Location
Jonestown Pennsylvania
I have a 93 Chevy 4 by 4 K1500 6.2L motor that I got from GP and the transfer case jumps out of gear if I don't shift it need the four wheel Hi mark . And it has an 4L60 transmission.
That could be as simple as adjusting the 4WD shift linkage rod or worn transfer case/ transmission mounts. Or a bent cross member.
 

RobM36A2

Member
302
9
18
Location
The Netherlands
Since I regretted selling my M101 with shelter, I was looking for a small cheap caravan to paint camo and, ofcourse, tow behind the truck.
As usual, nothing suited my needs and the caravans that were for sale online, went for way to much money.

Saturday afternoon, it hit me, I should look for NATO/ex-army/militairy stuff.
So typed that in the search bar and after wrestling trough some pages with pins, patches and truckparts, I found a trailer in very good condition and very cheap.
then gave my buddy the link and he said: For that price, it is a steal, just go and get it. You know what, come pick me up, so I can give advice.

We called the guy who had it for sale, (airsoft and lasergame company) If I could come and take a look.
Sure, but at 5pm we close.. No worries, be there at 4! Ok, see you in an hour!

Well, 50 miles later arrived, very nice reception, The guy there loved the truck, as they never see one.
Went to look at the trailer, it's like new! only used to go to 4 events, Always slept inside a garage, inside a drawer cabinet and a little safe-box.
I said: I want it, I have cash with me if you have the registration papers.
He: that will be a little problem, the papers are at the old office, but we can have them here tomorrow..
Me: Then I will pick it up tomorrow.

Today, (sunday), I went there again to pick up the trailer.
Did have to change the lights to 12V, as the used it behind a 24V truck.
Did notice the normal lights don't work, but the signals do. Since it is light outside, I will check them later, as long as the brakes/signals are visible, fine with me.
The seller could not find all the papers, but they requested new papers. They will send me those and the key for the safe-box by courier when the papers arrive, on their cost!

It tows like a dream, brakes work, the bearings are in excellent condition.
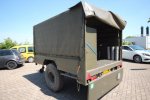
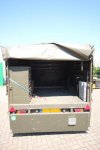
Some pictures of my new (to me) Saris 10KN.
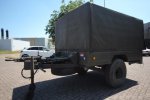
Saris-10KN-side.jpg Saris-10KN-back-side.jpg Saris-10KN-back.jpg
 

RobM36A2

Member
302
9
18
Location
The Netherlands
Did notice the normal lights don't work, but the signals do. Since it is light outside, I will check them later, as long as the brakes/signals are visible, fine with me.
Just found the culprit for the non-functioning tail lights. at least, I think I found it.
First measured if all the pins connected to ground, all but pin J did.
Put a ground wire on pin D and 12V + to pin J (lights), nothing happened.
Put a ground wire to pin D and a 12V + to a wire going into the lights, presto, all of them came on.

The rest of the pins do work, BO left and right, turn signals, brake lights and even the BO brake light!

Another project at my hands. :carnac:.
 

Tinstar

Super Moderator
Super Moderator
Steel Soldiers Supporter
4,302
1,809
113
Location
Edmond, Oklahoma
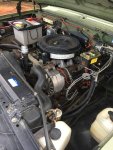
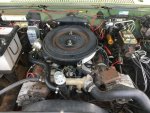
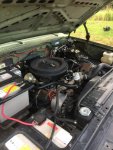
IMG_6470.jpgIMG_6471.jpgIMG_6472.jpg
Washed the engine. Was very dusty.
I know your not supposed to, but stay away from the alternators and you'll be fine.

Changed fuel filter after pics were taken.
 

TechnoWeenie

Well-known member
Steel Soldiers Supporter
1,661
1,684
113
Location
Nova Laboratories, WA
Finally decided that I need to stop procrastinating and do all my fluids.

I kept telling myself that since I didn't drive it much, I could put off fluid changes.... I'll do it next week.... Next weekend when the weather is better.... Well maybe in 2 weeks because I'm too busy, etc... Well, that was 2 years ago....

Sigh...

Rear diff - almost black, very runny, very slight signs of surface rust, almost not enough to mention.. ...No chunks of metal, only very tiny amount of particles on magnet. Filled with a mix of 80/90 and 75/140
Transfer case - NP205 - Should be 80/90 (later spec'd to ATF for MPG), but filled with ATF... ultra deep red, almost brown... replaced with 80/90
Transmission - Fluid was dark red, not bad really, a little particulates on magnet but not horrible. Replaced with dexIII

Have to wait until tomorrow morning to tackle the front diff, as I underestimated the time it would take for me to get these things done.... But I have Friction modifier on standby.. heh..
 

rustystud

Well-known member
9,312
3,127
113
Location
Woodinville, Washington

Tinstar

Super Moderator
Super Moderator
Steel Soldiers Supporter
4,302
1,809
113
Location
Edmond, Oklahoma
We steamed cleaned our engines all the time at Metro. It never caused any problems, unless you had a bad electrical connector ! Then you would be chasing a faulty circuit all day long !!!
I usually wash it once a month or more.
I have NO-OX-ID grease in every single connection and never had a problem with water or anything.

The car wash I use has very hot water. Gets it really clean.

Someday I will paint alternator brackets, air cleaner, etc.
Sure would make it look better.
 

Tinstar

Super Moderator
Super Moderator
Steel Soldiers Supporter
4,302
1,809
113
Location
Edmond, Oklahoma
That engine compartment sure looks clean. :beer:
It really surprises people who come up to talk about truck.
I open the hood and they always say "wow"!
Not sure what they were expecting.
I absolutely hate a dirty engine.

To me, it could look a lot better with the alternator brackets, etc repainted.
Just not that important right now and not worth the down time to do it.

Definitely not a show truck.
 

edpdx

Active member
796
75
28
Location
Oregon
Changed out all injectors, and fuel lines (Tygon-yellow), hose clips (HELP parts from Oreilly spec'd for 6.2 & 6.5 diesel GM). First ones I ever tackled. Had to buy a 30 deep well from Oreilly ($10). Other tools: 3/8" rachet with 1/2 adapter, Kroil to loosen difficult couplings, 7mm to loosen steel fuel line clamps, 9/16" for my battery posts (custom), 3/4" open end wrench for steel lines to injectors, med size and needle nose vise grips, head lamp, cheater pole to help turn wrenches, anti-seize needle nose pliers.

No big mysteries here. I followed a Youtuber's advice and did two, tested them, did two more, repeat. Beats having to deal with any leaks on both banks. Prepped: Kroil the connectors to the injectors first. (The back passenger side injectors were so tight that when I turned them out with the 3/4" wrench, the injectors started coming as well-I had to gauge the vise-grip to the 30mm injector waiting to go in, and THEN apply the preset GRIPS to the pesky injector from below. That allowed me to break the two free and get the steel line off of the injector.

I cut all the Tygon lines and slipped the new clips on them before starting, so I wouldn't have to mess with the tubing with diesel-ly hands. Also if you use anti seize, dress all the injectors, loosen the caps and have them ready as well. The clips are a pain to seat with the larger Tygon tubing, so use a little silicone lube on the ends of the tubing to seat them easily with needle-nosed pliers.

After tweaking the steel lines to get clearance for the injectors, the tiny bracket screw was a pain to reinsert into the sprung brackets. I used a socket driver to help force the bracket closed, and clamped it shut with a small needle-nose vise grip.

Not a difficult task, just a little awkward bending over the fenders- the headlamp helped. Fired right up afterward- no leaks...
 
Top
AdBlock Detected

We get it, advertisements are annoying!

Sure, ad-blocking software does a great job at blocking ads, but it also blocks useful features of our website like our supporting vendors. Their ads help keep Steel Soldiers going. Please consider disabling your ad blockers for the site. Thanks!

I've Disabled AdBlock
No Thanks