• Steel Soldiers now has a few new forums, read more about it at: New Munitions Forums!

  • Microsoft MSN, Live, Hotmail, Outlook email users may not be receiving emails. We are working to resolve this issue. Please add support@steelsoldiers.com to your trusted contacts.

What have you done to your FMTV or LMTV today

Third From Texas

Well-known member
2,765
6,494
113
Location
Corpus Christi Texas
Had my drivers side hydraulic cylinder start leaking for the suspension compression system so I did what most would. I removed the whole system and capped the outlets at the manifold. Took a little while but nothing hard. Much cleaner now on the frame. I still have to paint the frame back green but that’s no big deal.
On my todo list.

Useless added weight and hardware.
 

ckouba

Well-known member
Steel Soldiers Supporter
609
1,724
93
Location
Oregon
Had my drivers side hydraulic cylinder start leaking for the suspension compression system so I did what most would. I removed the whole system and capped the outlets at the manifold. Took a little while but nothing hard. Much cleaner now on the frame. I still have to paint the frame back green but that’s no big deal.

I'll bite: how the heck did you get that done? I found the access to the back side is..... problematic.
 

TomTime

Well-known member
Steel Soldiers Supporter
678
1,664
93
Location
MD.
Had my drivers side hydraulic cylinder start leaking for the suspension compression system so I did what most would. I removed the whole system and capped the outlets at the manifold. Took a little while but nothing hard. Much cleaner now on the frame. I still have to paint the frame back green but that’s no big deal.
I'm been looking to remove them from mine for sometime. I have watched a couple Youtube videos where they had a very hard time getting them off. One even used a handheld band saw to cut them off.

How hard was it to access and get the bolts/nuts off?
 

Godspeed131

Well-known member
Steel Soldiers Supporter
278
933
93
Location
Knoxville, TN
Honestly in my opinion it wasn’t to bad just a little time consuming. The three bolt heads on each hydraulic cylinder are 24 mm but a 15/16 shallow socket will work if you don’t have a 24. I tried at first to use a large snap on 1/2 in power bar but I couldn’t budge them. Plus I felt that I was going to remove my face if and when the socket slipped. So I highly suggest the use of a 1/2 drive impact. A 3/8 drive might work but I don’t own one. The impact removed the bolts so easily I had to question my manly hood afterwards lol.

On the passenger side I just clipped a few of the zip ties that bundled the electrical and air lines together and removed the one p clamp closest to the bolt heads and that gave me enough wiggle room to get the socket on the bolt heads. I just used the impact and socket nothin else. That’s the easy side.

The drivers side was a little more time consuming First off I did the same thing by removing the zip ties and the p clamp. There’s only one bolt that comes out easily with the impact and socket it would be the upper back one. The fwd top one I used a swivel on the impact to get out. The fwd motor mount blocks a straight path to the bolt with the impact. And lastly the hardest bolt is the very lower bolt. The motor mount sits two close to the bolt head to get anything other than a wrench on it, and I couldn’t budge it with a wrench. The best way I found to remove it was with the other two bolts removed take a 8 lb sledge and love tap the top of the hydraulic cylinder to the front of the truck. You can only go so far before it hits the motor mount hard ware. Once I hit the hardware I still couldn’t loosen the bolt so I removed the top motor mount bolt and as soon as I did that and tapped the cylinder maybe 1/4 inch the bolt finally broke loose.

Besides that it’s just removing hydraulic lines and going back and ziptieing everything back. the caps are a 1/4 inch jic or #4an. If people want I could possibly do a stand alone separate thread and lay it out a little more clearly.
 

chucky

Well-known member
Steel Soldiers Supporter
6,612
18,940
113
Location
TN .
No, I wish I did. It was direct from the OEM. Never issued to Uncle Sam too.
Yea 1 of the 9 that bullseye had in ga ? I bid on couple but went higher than i wanted to put in it but after it was over wished i had atleast got 1 of them I noticed today TEXAS surplus has 1 listed at 2500 too far for me but not you to grab it you have to be on their list i feel sure you know about them
 

fuzzytoaster

Well-known member
Steel Soldiers Supporter
4,292
3,114
113
Location
Fort Worth, Texas
Yea 1 of the 9 that bullseye had in ga ? I bid on couple but went higher than i wanted to put in it but after it was over wished i had atleast got 1 of them I noticed today TEXAS surplus has 1 listed at 2500 too far for me but not you to grab it you have to be on their list i feel sure you know about them
That's them. It was a cluster-f because the OEM didn't issue titles or certificate of manufacturer yet agreed to furnish them to the auction company. 5 months later I got it situated but it shouldn't have been a thing. Anyway, no more in the pipeline surplus wise to the public. Uncle Sam didn't order any more but the OEM is contemplating making them for civilians with a modified chassis.
 

Wingnut13

Well-known member
235
562
93
Location
Strafford, NH
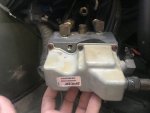
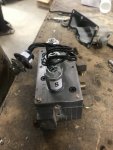
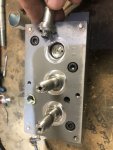
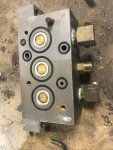
Fixed my CTIS! The truck I bought had the solenoid control block removed, bought a used unit in fair shape. The solenoids checked out, but in removing the cover I snapped 3 each bolts. Steel bolts in aluminum..... nice. The block is assembled from two chunky non weldable aluminum parts bolted together. So I drilled the stuck screws out to 1/4", countersunk from the bottom and pressed in solid rivets with locktite. Drilled and tapped new screw holes, added the missing pressure sensor ($13) and installed it. Didn't work the first time, but then reversed the main air lines. Works great!

tempImage0TDfKt.jpgtempImagev7FD1k.jpgtempImageeFCXTE.jpgtempImageW8arcJ.jpg
 

BERZERKER888

Well-known member
Steel Soldiers Supporter
414
892
93
Location
Daytona, FL
W13..
When my PPV diaphram took a dump and subsequently killed my CTIS , fan clutch soleniod and fan clutch, I unplugged the CTIS , replaced (fabbed) the torn diaphragm and all was good...but I chose to leave the CTIS unplugged and inflate the GY MVTs to 70 psi...the ride ,albeit slightly harsher but im happy with it. the CTIS is "governed" on HWY mode to @55psi....don't think I can go back to 55psi.... but I plan on installing the higher PSI transducer very soon..
 
Top