• Steel Soldiers now has a few new forums, read more about it at: New Munitions Forums!

  • Microsoft MSN, Live, Hotmail, Outlook email users may not be receiving emails. We are working to resolve this issue. Please add support@steelsoldiers.com to your trusted contacts.

What have you done to your FMTV or LMTV today

GeneralDisorder

Well-known member
Steel Soldiers Supporter
2,034
5,224
113
Location
Portland, OR
I wondered why the spare tire lift on my 1998 M1079 would not lower the tire. It appears that the lift was too high when the new box was put on in 2013. I had to lift the box about 2" to be able to get the lift in proper position. It worked perfectly after repositioning.
My 2008 had the same problem - original 2008 truck and box. I am sure the box was removed for transport at some point in it's life. My truck went to Kuwait.
 

Third From Texas

Well-known member
2,766
6,498
113
Location
Corpus Christi Texas
My 2008 had the same problem - original 2008 truck and box. I am sure the box was removed for transport at some point in it's life. My truck went to Kuwait.
Now I need to go check mine. I used the tire lift on my two other trucks, but I honestly don't know that I've ever had my M1079 spare down. I checked the tire presser once a year, but did that in the stowed position.
 

coachgeo

Well-known member
5,147
3,462
113
Location
North of Cincy OH
Now I need to go check mine. I used the tire lift on my two other trucks, but I honestly don't know that I've ever had my M1079 spare down. I checked the tire presser once a year, but did that in the stowed position.
Also @Bryteayes @GeneralDisorder

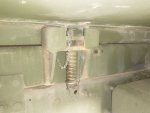
is your rubber pad in your rectangular cup that your 1079's home plate sits in?
 

Attachments

Bryteayes

Active member
Steel Soldiers Supporter
74
107
33
Location
San Angelo, TX
Also @Bryteayes @GeneralDisorder

is your rubber pad in your rectangular cup that your 1079's home plate sits in?
E
Also @Bryteayes @GeneralDisorder

is your rubber pad in your rectangular cup that your 1079's home plate sits in?
There is about 1/4” of what appears to be rubber in the rectangular cup. Not as thick as what you show in your pic. I think the more material in the cup the less the habitat can safely flex on the frame.
 

coachgeo

Well-known member
5,147
3,462
113
Location
North of Cincy OH
E

There is about 1/4” of what appears to be rubber in the rectangular cup. Not as thick as what you show in your pic. I think the more material in the cup the less the habitat can safely flex on the frame.
think that pic is of a newer unit maybe?? Agree that most 1079's have seen the rubber is thinner.. 1/4" maybe
 

Third From Texas

Well-known member
2,766
6,498
113
Location
Corpus Christi Texas
think that pic is of a newer unit maybe?? Agree that most 1079's have seen the rubber is thinner.. 1/4" maybe

Mine is the later small window shelter, and it has the 1/2" looking block of rubber.

Just looking at things, it would appear the shelter has only about 1/4" of space between the subframe and truck frame. I think that distance is about the max the shelter is raised (and could collapse if the rubber block failed). So I'm not sure how much a 1/4" would lead to trapping the spare (but I guess it's possible).

At the end of the day, it's the gap between frame and subframe that matter with regards to the block being intact (older models may have used a thinner rubber block, but the gap/elevation should still remain the same assuming the block retainer also varies with the OEM rubber block designed thickness)). Dunno.

Looking at the spare tire cradle, I can see how Bryteayes ' shelter trapped the cradle when re-assembled. With the shelter off, the cradle was retracted beyond it's normal stopping position. It looks like it was then trapped well over an inch above the a/c frame structure (and that corresponds with what he had to d to alleviate the issue) .

I'd be a bit shocked if a 1/4" drop of the shelter (a result of the failed capture spring block) would interfere with an otherwise normally unobstructed spare operation, but it's a good point of inspection none the less. Again, the lack of gap between frame and subframe being the tell tale of a problem.
 
Last edited:

aw113sgte

Well-known member
Steel Soldiers Supporter
634
947
93
Location
La Crosse, WI
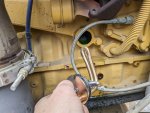
I put a zero start block heater in. This thing takes forever to drain coolant out of the radiator. I got impatient and figured enough coolant had come out that it would surely be below the freeze plug. Turns out it drains super fast out of the freeze plug hole.
I did that the other day, although I just tried to install it as fast as possible to save as much coolant as I could....works okay, was only a few seconds but you're right it comes out real fast!
 

Ronmar

Well-known member
3,846
7,476
113
Location
Port angeles wa
I did some light work also:)

Replaced the front bumper lights with LED headlights and driving/fog lights. Both have halo ring DRL and turn signals. Also updated the lower cab and door marker lights and incorporated turn signals into them as well. Have a little more wiring to do(fog light switch). I may have to reconfig the setup as DRLs + headlights is a bit much in the dark:)


serpico760

Well-known member
Steel Soldiers Supporter
687
1,753
93
Location
San Diego, CA
I did some light work also:)

Replaced the front bumper lights with LED headlights and driving/fog lights. Both have halo ring DRL and turn signals. Also updated the lower cab and door marker lights and incorporated turn signals into them as well. Have a little more wiring to do(fog light switch). I may have to reconfig the setup as DRLs + headlights is a bit much in the dark:)

That's awesome can you show how you rigged up those other lights to work with the turn signal cuz I think that's a very useful feature. especially for these trucks half the time I have the turn signal on seems like nobody can see them because they don't respond to it
 

Wingnut13

Well-known member
235
562
93
Location
Strafford, NH
I did some light work also:)

Replaced the front bumper lights with LED headlights and driving/fog lights. Both have halo ring DRL and turn signals. Also updated the lower cab and door marker lights and incorporated turn signals into them as well. Have a little more wiring to do(fog light switch). I may have to reconfig the setup as DRLs + headlights is a bit much in the dark:)

Very nice update. I like the extra blinkers, and yes it’s my experience too that nobody can see the stock units flashing.

I was working lights yesterday as well. I added bed work lights and reverse lights too. Both are a big help!
 

Ronmar

Well-known member
3,846
7,476
113
Location
Port angeles wa
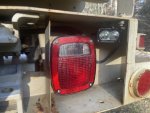
Well the leds I am putting on the cab rear bumper and habitat are two level, designed to be running and signal lights. They are surface mount aluminum base with plastic lenses. They make 3 sizes in orange, red, white.

There is already ground and running light power to the front cab and door marker lights. I wired those to the low/running light wires on the LEDs. I ran an additional wire from the signal wire down in the bumper that is driving the orange halo rings, ran it along the wiring path inboard along the bumper and up into the cab thru the pass-thru points on the front sides of the engine tunnel. Continued this wire out past the front marker to the door marker. That wire gets connected to both the HI indicator wire on those markers. So the lights go high level when signal pulses are applied. Doesnt have to be a big wire as the LED doesn’t pull much current.

I will do the same thing in the rear, running power up thru the habitat walls to reach the rear upper markers and the 3rd eye brake lights I am planning.

IMG_3797.png
 

ramdough

Well-known member
1,554
1,729
113
Location
Austin, Texas
Well the leds I am putting on the cab rear bumper and habitat are two level, designed to be running and signal lights. They are surface mount aluminum base with plastic lenses. They make 3 sizes in orange, red, white.

There is already ground and running light power to the front cab and door marker lights. I wired those to the low/running light wires on the LEDs. I ran an additional wire from the signal wire down in the bumper that is driving the orange halo rings, ran it along the wiring path inboard along the bumper and up into the cab thru the pass-thru points on the front sides of the engine tunnel. Continued this wire out past the front marker to the door marker. That wire gets connected to both the HI indicator wire on those markers. So the lights go high level when signal pulses are applied. Doesnt have to be a big wire as the LED doesn’t pull much current.

I will do the same thing in the rear, running power up thru the habitat walls to reach the rear upper markers and the 3rd eye brake lights I am planning.

View attachment 911492
Do you mind posting links to the front and marker lights? Really that is a slick design.


Sent from my iPhone using Tapatalk
 

Ronmar

Well-known member
3,846
7,476
113
Location
Port angeles wa
Do you mind posting links to the front and marker lights? Really that is a slick design.


Sent from my iPhone using Tapatalk
here are the marker lights, as I changed my plan a little and just ordered some more.

https://www.amazon.com/Aluminum-AT-...8-1-spons&sp_csd=d2lkZ2V0TmFtZT1zcF9hdGY&th=1

They make several other types also, seems to be reasonably well made, time will tell of course. I am using the 5.5s for the lower cab markers and rear bumper (there are large holes in the doors, so the middle size lights are needed to cover that door hole). I am using those same 5.5” lights on the rear. Will use the 4.4” lights up high and the 7.5s for the 3rd eye brake lights.

The front bumper lights I ordered quite a while back, and don't seem to have links for them anymore. The headlights are 7” and there are tons of of 7” halo ring lights marketed for jeeps. The only things I had to do was replace the 3 screws that secure the ring on the headlight holder with slightly longer as the rim of these lights are slightly thicker. I also had to add a small hole in the back of the housing to addmit the wiring for the DRL and signal wires.

The driving/fog lights were aftermarket driving lights for a 2010ish Toyota Tacoma or Sequoia. I had to build brackets for these to adapt to the original signal light mounting plate in the back of the hole…
 

hike

—realizing each day
Steel Soldiers Supporter
531
838
93
Location
Texas Hill Country
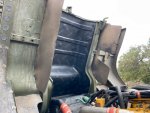
We added soundproofing over insulation under the doghouse in the engine compartment.

m1078.doghouse-insulation.jpg

m1078.doghouse-soundprofing.jpg
Cut down on the engine noise significantly.

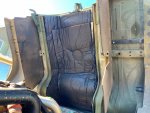
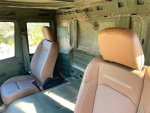
Then we mocked up and installed brackets for our new seats. Once we are sure we like their location and height we will clean them up and make them pretty.

m1078-rubicon-seats.jpg

Last we pulled the brackets for tying down a squatted cab, no more clanking from under our feet.

She is starting to get a little more comfortable. Just about ready to start insulating and sound proofing the interior–
 
Top
AdBlock Detected

We get it, advertisements are annoying!

Sure, ad-blocking software does a great job at blocking ads, but it also blocks useful features of our website like our supporting vendors. Their ads help keep Steel Soldiers going. Please consider disabling your ad blockers for the site. Thanks!

I've Disabled AdBlock
No Thanks