• Steel Soldiers now has a few new forums, read more about it at: New Munitions Forums!

  • Microsoft MSN, Live, Hotmail, Outlook email users may not be receiving emails. We are working to resolve this issue. Please add support@steelsoldiers.com to your trusted contacts.

What have you done to your HMMWV today/lately

Mario

Active member
315
87
28
Location
Rio Rancho, NM
If you guys have ever used a hydraulic one, you would not want anything else. They can be had cheap, and run off the steering pump. MileMarker makes them, and they can be had for peanuts, used. Mount it on a small hitch plate, and have a receiver in front and rear of the truck, with some Bobcat type quick connect fittings on the steering pump hose. Their ability to work under water and 100% duty cycle is fabulous, plus they are impervious to rain and weather exposure, unlike an electric one.
I agree with you that hydro winches are much better.
When you say that they can be had cheap... I'm hoping that you have a source that I'm not aware of because I've been looking at fleaBay and they're around a grand!
I would much rather do a hydraulic one if I can find it priced reasonably.
If you know of a place, please PM me if not allowed to just post it, openly here.
 

NormB

Well-known member
1,220
72
48
Location
Cloverly,MD
I agree with you that hydro winches are much better.
When you say that they can be had cheap... I'm hoping that you have a source that I'm not aware of because I've been looking at fleaBay and they're around a grand!
I would much rather do a hydraulic one if I can find it priced reasonably.
If you know of a place, please PM me if not allowed to just post it, openly here.


Hopefully I'm not breaking "da rules" here, but "can had cheap" like this one on fleabay:

152540186933

Now compare this with the price for a similar 24 volt winch with roughly the same capacity plus wiring; sure you might need to replace some of the hoses with the hydraulic model (I bought a set for about $60), but if you're patient, and wait for one of the "old-timers" who's in a good mood or just clearing out old stock or someone who just bought a pallet load of 'em at auction, you might get one for under a grand.

Norm
 

General Hood

Member
712
2
18
Location
Fort Towson, OK
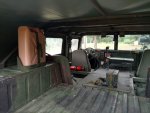
With a constant flow of money going into keeping one of my SEEs running, I haven't been able to buy the high dollar goodies I want for the HMMWVs. But the good news is, even the little things make me happy. I got in some jerry can holders and ammo can holders the other day. I have a start on the installation IMG_20170511_122242367_HDR.jpg
 

Mario

Active member
315
87
28
Location
Rio Rancho, NM
Hopefully I'm not breaking "da rules" here, but "can had cheap" like this one on fleabay:

152540186933

Now compare this with the price for a similar 24 volt winch with roughly the same capacity plus wiring; sure you might need to replace some of the hoses with the hydraulic model (I bought a set for about $60), but if you're patient, and wait for one of the "old-timers" who's in a good mood or just clearing out old stock or someone who just bought a pallet load of 'em at auction, you might get one for under a grand.

Norm
That's what I'm finding.
The one you posted would be 1,600 smackaroons by the time we figured shipping.
That's a lot of bread.
Hopefully someone will chime in with an option in the 600 bucks range

Sent from my SM-G955U using Tapatalk
 

Bravojmc

New member
512
5
0
Location
Palisade, Colorado
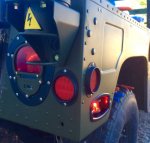
View attachment 666036 Ok so here's the deal. I've been paying big bucks for led marker lights..... So I will let all my brother and sister mv owners in on a deal I came across. You can buy new marker lights at napa part # 26313r1 is red and 26313y1 is amber. Made by trucklite at $ 9.78 each. Then I purchased led bulbs from superbrite led's for a $ 1.59 each. Led bulb # is wled-a4-90 for amber wide and wled-r4-90 for red wide. Each light takes 2 bulbs--- I only used 1 bulb in each and they are bright enough. The good thing is you can simply replace a bulb rather than having to buy a whole new light. The napa light housings are grey, but can be painted any color you like. Happy lighting!!!!!!
I just want everyone to know that (infidel got me) post is a very nice upgrade and very bright!
IMG_7555.jpg
At night these lights a nice and bright! So bright I may take one of the two lights out! I installed
packard fittings on them and they work nice! Thanks again (infidel got me!)
 

NormB

Well-known member
1,220
72
48
Location
Cloverly,MD
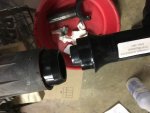
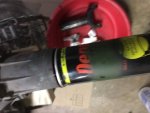
removed, installed rear transfer case seal. I bought a box of tools months ago and had the installation tool called for in the instructions.

It didn't work.

Unless I"m reading the manual wrong on this and it's for a 218 not a 242 TC (doubtful, the box o'tools were for later model HMMWVs, A2, I think, and this tool and replacement scheme is the only one I can find. The little extension up front bumps into the output shaft and you get about 2mm of engagement of the seal. I looked around the garage for a while and found an old tennis ball can (the steel ones you could put together with duct tape, punch holes in with a church key and with judicious use of lighter fluid and matches, make a tennis ball cannon. I'd been saving it just in case I could find two more at a flea market).

THAT worked just dandy with a little judicious use of a large rubber mallet around the perimeter.

Now on to dropping the fuel tank, replacing seals/sender/hoses/etc and then reinstall the TC, muffler, all the rest.

IMG_3418.jpgIMG_3419.jpg
 

Gear Report

Active member
265
45
28
Location
Nc
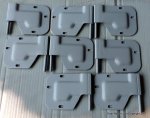
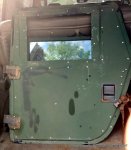
Took off the x-doors and installed 3 of 4 "new" Supplemental Armor Doors yesterday. Had to work on the 4th door this morning... will install it later today.
The doors arrived with uncoated hinges that appear to have been galvanized, but looked like crap. So, I took them off, primed and painted them.
Still have to work on the window that is missing all 4 rollers and one of the roller pins and replace the glass in 3 windows that have delaminated.
IMG_20170511_195856194.jpgIMG_20170511_091331721.jpgIMG_20170510_173105796_HDR.jpgIMG_20170510_173026845.jpg

Also updated our LizardSkin project article with a LOT of pictures and some feedback after a month of use.
http://gear-report.com/lizardskin-sound-control-ceramic-insulation-project-humvee-battlewagon
Lizard_Skin_HMMWV_Review (5).jpg
 

orgnal

Member
285
4
18
Location
Denver, CO
removed, installed rear transfer case seal. I bought a box of tools months ago and had the installation tool called for in the instructions.

It didn't work.

Unless I"m reading the manual wrong on this and it's for a 218 not a 242 TC (doubtful, the box o'tools were for later model HMMWVs, A2, I think, and this tool and replacement scheme is the only one I can find. The little extension up front bumps into the output shaft and you get about 2mm of engagement of the seal. I looked around the garage for a while and found an old tennis ball can (the steel ones you could put together with duct tape, punch holes in with a church key and with judicious use of lighter fluid and matches, make a tennis ball cannon. I'd been saving it just in case I could find two more at a flea market).

THAT worked just dandy with a little judicious use of a large rubber mallet around the perimeter.

Now on to dropping the fuel tank, replacing seals/sender/hoses/etc and then reinstall the TC, muffler, all the rest.

View attachment 680075View attachment 680076
Please grab pictures of your dropping the fuel tank and replacing seals process. I might have to take this task on at some point.

McReddy
 

Wire Fox

Well-known member
1,252
161
63
Location
Indianapolis, Indiana
Well, after having a blast yesterday with the Indiana MVPA and getting to ride around in a 1950s jeeps and an M35A1, I turned back to my own HMMWV to get started on the deconstruction before the transmission wiring can take place. My roommate was an excellent hand for helping get those troop seats off.

WP_20170513_18_59_43_Pro_LI.jpg
 

Lawdog734

Active member
268
101
43
Location
Colbert, GA
Refinished my drivers door armor panel on the GMV this weekend - I'm very pleased with the results.

Before:
20170514_124058_zpses7zxny8.jpg

After:
20170514_123807_zpsxufppsph.jpg

Bedliner stripped:
20170512_182303_zps7gwfwshq.jpg

X-Door Base:
20170512_175207_zpszoyl9sgp.jpg

Recoating w/ Bedliner:
20170513_204300_zpseet1tyyb.jpg
 

desmodromic

Member
235
22
18
Location
New York, New York
Great collection ! Would you have some pictures of the M996´s interior ? I recently aquired a TOW slantback kit with all the racks and holders, but am unsure about the placement of some.
Ha, the interior of my truck is completely gutted, save for 3/4s of a radio setup and a gunner's platform. Since you have all the parts, it sounds like you are a step ahead of me. ;)

Check out the photos of the M1025/26/45/46s that have recently sold on govplanet. They are largely intact and should give you a good idea on placement. Please post up pics when you complete the project!
 

AAVP7

Well-known member
217
263
63
Location
Dortmund, Germany
Wow, that was a great idea. I never bothered to check those, as the auctions are out of reach for us non-US-citizens. But to see how complete some of those trucks are, makes your eye water. An M1045A2, looking almost factory-fresh, with all the trimmings and supplemental armor, and and gone for $ 35,000. Overhere in Germany, you pay the same for an old, leaking and barely running A0 hulk. You guys are plain lucky to be so close to the honeypot... ;-)

P.S.: On second look, I take that "factory fresh" back, but still amazingly complete...
 
Last edited:

NormB

Well-known member
1,220
72
48
Location
Cloverly,MD
Puttered around with fuel tank, cleaned up fittings, painted brackets with rustoleum rust converter stuff, armor plate by tank too, knocked out the retaining plate from the tank to find no o-rings. Must've been put in on later models, or someone forgot this step at the factory. Parts from HPG tomorrow, putting bottom armor on it and Transfer case protective plate when I put this back together.

Then took a picture for fun.

IMG_0098.jpg

And Karl, on point.

IMG_0099.jpg

(thanks, Chik-Fil-A)
 
Top