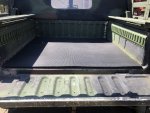
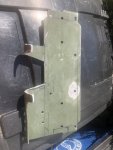
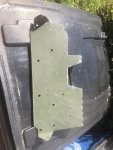
Got busy with the fuel system again. Finished up with replacing the gaskets and hoses and now have the tank ready to raise into place. I also cut the panel out of the floor for the fuel access and got it all setup. Then after my wife got back home, I enlisted her help to get my missing cargo hooks installed in the floor. (Most of them...)
Now what's got me perplexed is getting the cargo barrier support/cargo hook combo bracket setup correctly. It has a 1/2-13 x 1 3/4 bolt that drops through the bracket and into the floor...but the kicker is, the bolt drops into a C-channel that has a cover plate riveted on, making the only access possible by reaching through the rear seat footwell through a 1 1/2 inch opening. Is there any easy, reasonable way to get this in-place that I'm not seeing? Right now my best thought is to use my handiclamp to hold the nut, apply a tiny bit of grease to stick the washer to the nut, and have someone up top spin it to finger-tight, then get a thin wrench in its place to finish the job.
Sent from my Nokia 6.1 using Tapatalk

 .. took 30 mins
 Wire brushed those first two... don’t look bad at all.. new plugs in tomorrow