• Steel Soldiers now has a few new forums, read more about it at: New Munitions Forums!

  • Microsoft MSN, Live, Hotmail, Outlook email users may not be receiving emails. We are working to resolve this issue. Please add support@steelsoldiers.com to your trusted contacts.

What have you done to your HMMWV today/lately

fpchief

Well-known member
1,041
220
63
Location
South Alabama
We have a growing presence in FL Panhandle, about 5 owners just in Navarre, a potential former Marine in Pensacola wanting my 1994 M1097A1 then you boys in Alabama. Trying to get my OIF1 5SFG GMV roadworthy and safe for one of the meets at the USS Alabama in Mobile.
You have a Flyer?
 

papakb

Well-known member
2,285
1,185
113
Location
San Jose, Ca
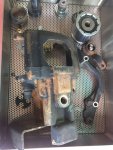
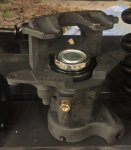
Lovely day today! Last week while I was working under my 996 ambulance I reached up and grabbed the right front brake caliper and it rocked all over the place. The bolts to the differential had come loose. To tighten them you need to remove the wheel and tire, the half shaft, and the caliper and rotor. When I got that all off I saw that the brake yoke had been rubbing on the differential output flange and had broken cleanly in half! It's not an expensive part but takes a while to replace. None of the others were loose but it never hurts to roll around on your creeper and look at everything while you're down there.
 

Mogman

Moderator
Staff member
Moderator
Steel Soldiers Supporter
6,938
9,600
113
Location
Papalote, TX
Indirectly connected to HMMWV, I picked up a HMMWV hauler today, very clean one owner 2008 GMC Sierra 3500HD SLT Duramax, I mean this thing has every option one could order, very nice leather even the dang pedals move! high millage but the guy had all the service records and he really took care of it, this thing is in MUCH better shape than my wife's 2013 F150 with only 90K on it!
It is also the same year as the Duramax donor I picked up for the M998 #2 project, if I ever get it...
Now to find that deckover bumper pull or now optional goosneck trailer, I may have to put my front porch back in service..
2008.jpg
Front Porch.JPG
Although I would have to convert it from vac/hyd to electric brakes, it's allot of work installing vac/hyd controls on a truck especially one that has no vacuum LOL
 

Inspector 1

Active member
105
73
28
Location
Spring Texas
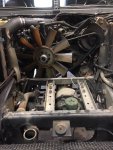
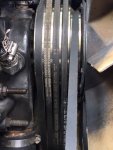
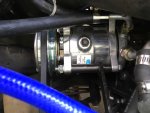
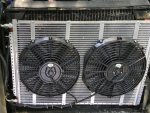
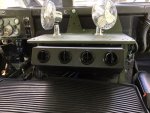
I had this Cold Master A/C system sitting in my garage for over 1 year. Finally installed it and not to soon with Texas temps pushing 100 degrees this week.
 

Attachments

92
88
18
Location
Perrysburg OH
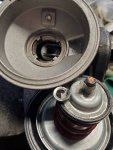
So everything was going great. The new engine was in, the trans was hooked up, and all harness ends and hoses were connected. Turned it over to see if I had the starter wired right and it started. I shut it off right away because I had to install the fuel lift pump. And as I was tightening the bolts I heard a “ping” like the sound of high strength steel breaking. So I removed the pump and plate and out fell a very short piece of the rod that actuated the pump. Since I installed it using some bearing grease to hold it in place, the remaining piece did not come out. Visions of a complete tear down danced through my head. I could just touch the piece still in the engine and could feel that it was an uneven broken end. So I went to the SS archives and read about several who have been in this predicament. In the end I had to go buy a small diameter magnet and after about fifteen attempts I got the broken end out. I put the two ends together and matched it up to a whole unbroken one and it showed me that there was no other shards in the engine. So after a good cleaning I was ready to try it again. This time I rotated the crank until the push rod was retracted it’s full amount. Then I very slowly reinstalled the pump. ALL IS WELL. So I’d like to give a big shout out to the SS community for sharing your stories, successes and failures, as they helped immensely.

Thank you!
 

Andyrv6av8r

Well-known member
Steel Soldiers Supporter
1,200
457
83
Location
Spartanburg,SC
Installed a new fuel lift pump. About 2 hours worth of work but she runs great now. Luckily the old one decided to die sitting in my drive. I cut the old one apart expecting to find a busted diaphragm. Problem was the small plastic washer the arm fork rides against busted. Instant death to the pump.
 

DREDnot

Well-known member
725
444
63
Location
Phoenix, AZ
Installed a new fuel lift pump. About 2 hours worth of work but she runs great now. Luckily the old one decided to die sitting in my drive. I cut the old one apart expecting to find a busted diaphragm. Problem was the small plastic washer the arm fork rides against busted. Instant death to the pump.
You dont say!
 

Attachments

MattNC

Well-known member
222
270
63
Location
Raleigh, NC
I had this Cold Master A/C system sitting in my garage for over 1 year. Finally installed it and not to soon with Texas temps pushing 100 degrees this week.
Inspector1, can you mention a little more about the kit? The model you ordered, any extra parts needed outside of the kit, how the install went and first impressions? Thanks!
 

Inspector 1

Active member
105
73
28
Location
Spring Texas
Inspector1, can you mention a little more about the kit? The model you ordered, any extra parts needed outside of the kit, how the install went and first impressions? Thanks!
The kit is a Cold Master 4500. The kit came uninstalled with my HMMWV purchase. I was told by the seller that the kit did not come with the 5 groove pully or, from what I understand, the compressor bracket. These items were also included by the seller with my purchase.
I had received two bids from two different automotive shops. First bid $4,000. Second bid for $3800. I chose to save the labor charge and take on the job myself. I took two weeks vacation . The 1st week dedicated to the HMMWV.
I know that some people can complete the job without having to remove the "Stack". ( Transmission Cooler/ Oil Cooler and Radiator ) My hands are the size of a football so I had to remove the "Stack", both left and right "Splash Guards", and disconnect the hood to raise it up vertically. (Did not have to remove the hood just disconnect the support arm ).
I observed a very minor oil leak at the water pump backing plate so I chose to replace both the water pump gasket as well as the backing plate gasket. I also replaced all the radiator hoses while I had everything apart.
There is a really good You tube video by "Dakota Woods" on the installation of the Cold Master System in the HMMWV. I had to figure some things out on my own but between Kit instructions and You Tube along with a very Informative HMMWV community, I was able to complete the job. No specialty tools needed. Air impact wrench will come in handy. A can of Blaster penetrating oil and a 2' cheater bar came in real handy on the 31 year old bolts. Start to finish was 5 days. I'm sure if you wanted to you could complete the job in 3 days. I enjoyed taking my time and learn about the different aspects of the engine.
It's been 100 degrees here in Texas all week. It is a very impressive unit in its ability to cool off the inside of the cab and keep it cool in regard to the searing heat.
Any other information that I can provide feel free to reach out.
 

MattNC

Well-known member
222
270
63
Location
Raleigh, NC
The kit is a Cold Master 4500. The kit came uninstalled with my HMMWV purchase. I was told by the seller that the kit did not come with the 5 groove pully or, from what I understand, the compressor bracket. These items were also included by the seller with my purchase.
I had received two bids from two different automotive shops. First bid $4,000. Second bid for $3800. I chose to save the labor charge and take on the job myself. I took two weeks vacation . The 1st week dedicated to the HMMWV.
I know that some people can complete the job without having to remove the "Stack". ( Transmission Cooler/ Oil Cooler and Radiator ) My hands are the size of a football so I had to remove the "Stack", both left and right "Splash Guards", and disconnect the hood to raise it up vertically. (Did not have to remove the hood just disconnect the support arm ).
I observed a very minor oil leak at the water pump backing plate so I chose to replace both the water pump gasket as well as the backing plate gasket. I also replaced all the radiator hoses while I had everything apart.
There is a really good You tube video by "Dakota Woods" on the installation of the Cold Master System in the HMMWV. I had to figure some things out on my own but between Kit instructions and You Tube along with a very Informative HMMWV community, I was able to complete the job. No specialty tools needed. Air impact wrench will come in handy. A can of Blaster penetrating oil and a 2' cheater bar came in real handy on the 31 year old bolts. Start to finish was 5 days. I'm sure if you wanted to you could complete the job in 3 days. I enjoyed taking my time and learn about the different aspects of the engine.
It's been 100 degrees here in Texas all week. It is a very impressive unit in its ability to cool off the inside of the cab and keep it cool in regard to the searing heat.
Any other information that I can provide feel free to reach out.
Thanks this is really helpful!
 

Mogman

Moderator
Staff member
Moderator
Steel Soldiers Supporter
6,938
9,600
113
Location
Papalote, TX
The wife and I went on a little trip through and around Corpus this weekend, after the third or forth flyover/cloverleaf she got on the com and asked "who the hell do you think you are, Carrol Shelby?"
I said I'm sorry (sarcastically) , M998 #1 has a low center of gravity and it over-steers a little bit, kinda reminds me of my old GT-6, of course I am sure just like the little GT-6 push it too far and she will get completely out from under you with no hope of recovery!!
 
Last edited:

Bulldogger

Well-known member
Steel Soldiers Supporter
1,330
586
113
Location
Quantico VA
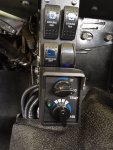
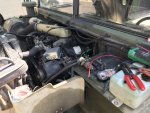
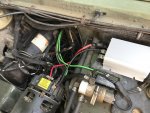
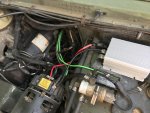
Installed a 60A 24VDC to 13VDC converter. This will help not only with future accessories but help my mechanic and I sort out wiring up a Hummer H1 turbo diesel and 4spd drivetrain later this coming week. While I may end up converting it all over to 24V, this allows us to get on the road faster, by not having to swap out injection pumps and the TCU. Can’t use the IP off my 6.2 cause it hasn’t seen service since 1987!
I am leaning toward a full 24V system in the end, but have been meaning to put a 24-12 converter in anyway.
Wired it to the alternator output and ground. That way it is already on a switched 24VDC source. No need for a separate solenoid or switch.
Bulldogger
 

Attachments

Top
AdBlock Detected

We get it, advertisements are annoying!

Sure, ad-blocking software does a great job at blocking ads, but it also blocks useful features of our website like our supporting vendors. Their ads help keep Steel Soldiers going. Please consider disabling your ad blockers for the site. Thanks!

I've Disabled AdBlock
No Thanks