• Steel Soldiers now has a few new forums, read more about it at: New Munitions Forums!

  • Microsoft MSN, Live, Hotmail, Outlook email users may not be receiving emails. We are working to resolve this issue. Please add support@steelsoldiers.com to your trusted contacts.

What have you done to your HMMWV today/lately

TNDRIVER

Well-known member
Steel Soldiers Supporter
333
508
93
Location
Cleveland,TN
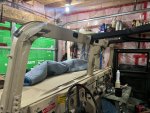
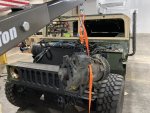
Rear toe alignment using string method. Really fun and effective for a low buck correction. Used greased fiber board for slip plates.

LR was almost 2” toe out, RR was 1”. Specs must have been a lot different on the 1151 with 1500+ lbs of armor pre demil.

Set total rear toe out about 1/8” as I will be running it unloaded most of the time.


Sent from my iPhone using Tapatalk
NOW.........................Please explain your method of setting the thrust angle......................Inquiring minds want to know??? Me, I'm just curious.
 

rcamacho

Well-known member
770
844
93
Location
Bainbridge Island Wa
Enhanced string method sets parallel from center of hubs. Essentially a square box
Thrust is controlled by even toe on each tire relative to square box.


Sent from my iPhone using Tapatalk
 

rcamacho

Well-known member
770
844
93
Location
Bainbridge Island Wa
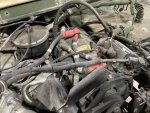
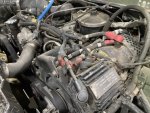
Replaced all LH bank injector return lines. Found the first hose from the return hard line to the #1 injector was loose. Whomever installed it missed getting the retaining clip over the injector return fitting.

Of note, on the ECV with 200A alternator access is a bear to #1. I came very close to pulling the alternator for better access. Creative automotive yoga prevailed though.

I used the braided kit from Badger Diesel. We’ll see how this line holds up sans clips.


Sent from my iPhone using Tapatalk
 

jake20

Well-known member
433
846
93
Location
Illinois
Replaced all LH bank injector return lines. Found the first hose from the return hard line to the #1 injector was loose. Whomever installed it missed getting the retaining clip over the injector return fitting.

Of note, on the ECV with 200A alternator access is a bear to #1. I came very close to pulling the alternator for better access. Creative automotive yoga prevailed though.

I used the braided kit from Badger Diesel. We’ll see how this line holds up sans clips.


Sent from my iPhone using Tapatalk
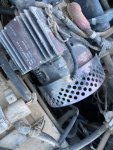
Oh man I can’t even complain about the 200s, the 400s really suck. You can’t get the fuel filter out, you can barely reach glow plugs and injectors, they start eating through the body harness after a while, and I personally don’t know anyone who needs an alternator that makes 10Kw lol.

Maybe I’d run one if I had a large pure sine wave inverter to hook into a house, but otherwise meh.


I recently swapped a 400 for a 200, man what a world of difference. My main reason for swapping it was the 400 screeching when spooling down after revving.
 

Attachments

Mainsail

Well-known member
Steel Soldiers Supporter
1,502
1,676
113
Location
Puget Sound, WA
My main reason for swapping it was the 400 screeching when spooling down after revving.
I hear something like that when it shifts from high RPM to low, and assumed it was the turbo overloading and opening the wastegate. I hear a similar sound when I shut the engine down.

EDIT to add: I didn't find the 400 amp alternator any bother when changing the glow plugs since they're so easily accessed from underneath.
 
Last edited:

jake20

Well-known member
433
846
93
Location
Illinois
I hear something like that when it shifts from high RPM to low, and assumed it was the turbo overloading and opening the wastegate. I hear a similar sound when I shut the engine down.
Yea it was very apparent on mine. Open the hood and rev the engine with your hand on the injection pump throttle lever, you’ll find out pretty quick if it’s the alt.
 

jake20

Well-known member
433
846
93
Location
Illinois
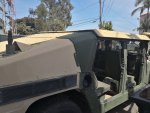
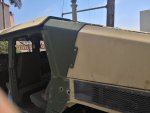
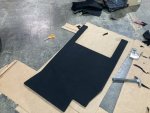
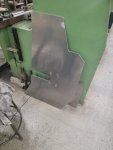
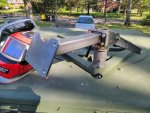
Made some progress on the chicken shield

View attachment 896550

View attachment 896551
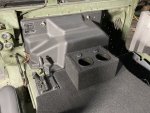
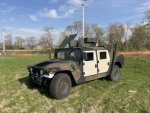
Awesome, what’d you use to replicate the measurements and how did you cut it out? Your setup looks slightly bulkier than mine, I had to keep weight in mind with my older style turret bearing.

Don’t think I ever posted pics of my finished one either.

I basically copied it off an existing steel one and cut it out of an aluminum sheet. Had a buddy bend the corner with a brake at a fabrication shop.
 

Attachments

Top
AdBlock Detected

We get it, advertisements are annoying!

Sure, ad-blocking software does a great job at blocking ads, but it also blocks useful features of our website like our supporting vendors. Their ads help keep Steel Soldiers going. Please consider disabling your ad blockers for the site. Thanks!

I've Disabled AdBlock
No Thanks