• Steel Soldiers now has a few new forums, read more about it at: New Munitions Forums!

  • Microsoft MSN, Live, Hotmail, Outlook email users may not be receiving emails. We are working to resolve this issue. Please add support@steelsoldiers.com to your trusted contacts.


wsucougarx's M923 acquisition

wsucougarx

Well-known member
6,951
65
48
Location
Washington State
Thanks for the comments guys. This is going to be a fun project. I plan on just adding to this thread for future projects etc.:driver:Just went outside to make sure she still starts...wow. She started within a second of hitting the starter switch. She's been sitting for 10 days....I'm impressed. I've heard these Cummins don't like the cold. She likes any type of weather I guess.
 
Last edited:

wsucougarx

Well-known member
6,951
65
48
Location
Washington State
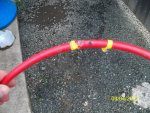
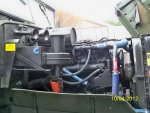
Got a couple things done today. I replaced a 3/8" OD airhose coming from the Spring Brake override on down next to the brake pedal. Not exactly sure what happened when the truck was in service. There was evidence of a shorted/melted wire behind the gauge cluster (black melted rubber drippings). The shorted wire must have been lying against one of the metal heater vent control lever cables. The control cable got hot enough to melt through the airline it was coming in contact with. It was an easy fix. Only costed about $6 in NAPA/ACE parts. She no longer leaks air:grin:
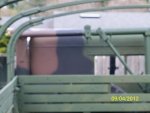
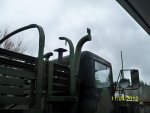
I also mounted some IR lights I have laying around. That's the problem with having extra parts. Can't help but put them somewhere;-)
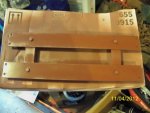
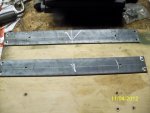
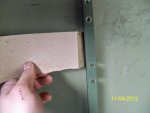
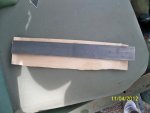
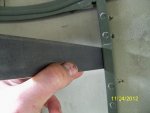
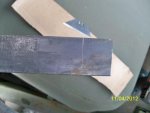
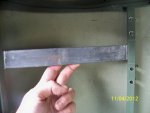
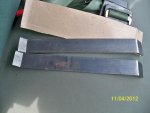
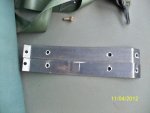
. I also found some NOS bridge plate numbers I had laying around and decided to make use of them as well.
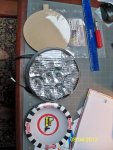
I also got my order of 3M Protective Film and got them placed on the LED's. I ordered the 7" headlight kit but found it was a bit too big. Hmm, I needed a jig to cut the film down to size. After a couple minutes in the kitchen, my son's tonka cereal bowl was a perfect match;-). Got to be resourceful...LOL. I don't plan on mounting the LED's until I get through with all my exterior projects. Hate to get overspray all over them.
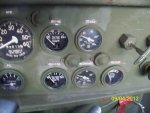
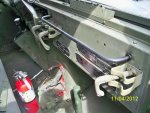
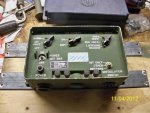
Today I also replaced the two temp gauges. There was nothing wrong with the ones on the truck other than they were getting hard to read due to age. Plus I also had them laying around;-)
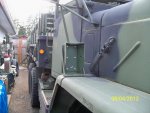
Also had some issues with the exterior passenger door knob not opening the door. So I pulled the entire mechanism and wacked on it a couple time with a hammer. A tab appears to have been worn down so bending it down for the catch lever to hit it worked!
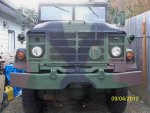
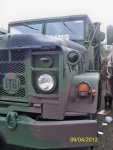
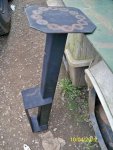
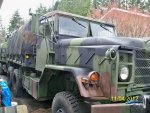
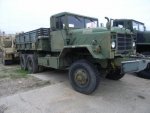
Since we had 72 degree weather, I busted out the Wagner power sprayer and my Behr paint. The davit on the spare tire rack was looking pretty sad. So I sanded her down, primed her with Rusty Primer, and shot some Behr on it. Looking at the pic you can see how similiar it looks to the CARC'd hardtop (sorry pic is so fuzzy). I also shot the front bumper with Behr paint to have it blend in with the rest of the truck.

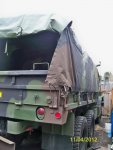
Next project is to mount the behind the cab platform, exhaust stack w/clapper, VIC-1 system, cargo cover, back up lights (armor lights), in cab weapon mounts, solargizers (2), and PMCS all the fluids.

Project Completed:
Replaced leaky Spring Brake Override 3/8" OD airhose
Replaced Transmission Temp Gauge
Replaed Engine Temp Gauge
Painted Spare Tire Davit
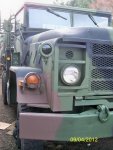
Painted Front Bumper
Mounted Infrared Lights
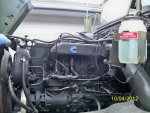
Applied the Cummins "C" to the intake manifold
Repaired the passenger door mechanism
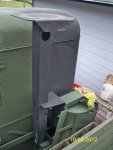
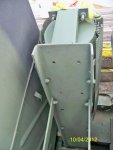
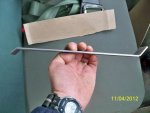
Mounted the Fender mounted antenna bracket
Applied 3M Protective Film to Trucklite LED's
Greased Zerks with GAA
 

Attachments

Last edited:

nf6x

Feral Engineer
1,630
49
48
Location
Riverside, CA, USA
Hmm, there was also black goo residue on the air fittings in my dash. I had a few loose fittings behind the dash and a cracked windshield wiper hose that I fixed a week ago.
 

wsucougarx

Well-known member
6,951
65
48
Location
Washington State
All my air fittings were loose as well. I pulled all the fittings and re-taped them. The defrost cable must have gotten real hot because it melted into the housing that the automatic transmission shifter is mounted to. I need to pull the cable because it's pretty much seized. It won't move. I'll take it out and flex it. If that doesn't work then I'll break out the PB Blaster.
 

wsucougarx

Well-known member
6,951
65
48
Location
Washington State
Yesterday I met up with Del (Beerslayer) and we exchanged parts over an outstanding breakfast burrito in Longview. My son is still talking about it;-). He keeps asking when we're headed back down to Don Pedro's for a bacon burrito...LOL. Had a great time chatting with you and getting ideas Del. Thanks!! I got home and got the behind the cab platform mounted. Thinking I'm going to use this platform to house a CB antenna and two solargizers. However, it's still in the planning phase.
I also decided to add three rifle mounts to the dash while I had the gauge cluster hanging. I also fixed the common bend dash handle. I took a couple more pics of the engine bay with it's Cummins "C" adorned! Now it looks more complete. The left over silicone adhesive in the form of a C just didn't cut it for me. Had to put what the military took off;-).
Looking at the engine rebuild dataplates. The NHC-250 was overhauled by General Support Center-Europe (now known as Theater Logistics Support Center-Europe) MAK-CRD (Maintenance Activity-Kasierslautem) in 27AUG07. I know this truck was in the European Theatre but not sure exactly where. This truck was sold with a bunch of other trucks from the same unit. The other trucks had a Kuwait shipping label on the door. My truck had a remnant of a shipping label on the outside of the driver door. But it was far too weathered to make anything out.

Projects Completed:
Mounted the Behind the Cab Platform
Mounted three dash rifle holders
Painted out the rear unit markings (going sterile)
 

Attachments

Last edited:

wsucougarx

Well-known member
6,951
65
48
Location
Washington State
Today I was finally able to fit my cargo cover on. I've had the cover but wanted to wait until I got things between the bed and cab completed. Working without the cover on was much easier;-). Fedex came by today and delivered my NOS Exhaust Stack. I mounted the flapper and I was good to go.
Since it was raining, I decided to turn my focus to the cab. I'm in the middle of fabricating some brackets for my VIC-1 set up. Today I was able to make the brackets to mount the AM-1780 and C-10456's to. I don't have a whole lot of tools or experience in metal work but my primitive methods worked;-) When I mean primitive I mean primitive. My outside work bench is a 1/8" piece of plywood sitting over two plastic do kennels...no joke. But hey it works.
Luckily I had the cargo oriented correctly in the bed...whew!! The funny thing is I've had this cargo cover for about a year now. When I bid/won on a lot of M105A2 covers, this NOS cover along with a NOS Intermediate tent was on the GL pallet. I got the pallet home and noticed I had more than five covers. Up until about 6 months ago, I thought I had a deuce cover. Had I known it was a M809/939 cover, I would have sold it when I got the covers home. I had no intention of buying a 5 ton. Well, not until the NOV 2001 lot of M923's came up anyways;-) This cover was definately a blessing to have around.

Tomorrow I plan on spraying some Behr paint on the brackets and getting them mounted. Then I need to troubleshoot my inop air horn. When I depress the horn button I hear an audbile click under the hood. So I know she's getting juice.

Pic's:
1- Newly arrived exhaust stack
2- Stack is mounted but the flapper isn't flush with stack end...project time
3,4- Cover shot (why doesn't the pattern ever match?)
5- Going sterile, no more unit numbers.
6- AM-1780 mounting brackets
7- AM-1780 test fit
8- Primed and ready to go
9- Test fit, now it's ready for paint. FYI, placing a towel at the base really helps in keeping all those metal shavings from going all over;-)
10- Gun mounts (work in progress)
Projects Completed:
Mounted Exhaust Stack w/flapper
Mounted Cargo Cover
Fabricated AM-1780 and C-10456 brackets
Freed up the seized rear cab window.
 

Attachments

Last edited:

wsucougarx

Well-known member
6,951
65
48
Location
Washington State
VIC-1 Brackets

Just in case if you're wondering how I went about making my VIC-1 brackets. Here you go. I just used some steel stock I got from my local Home Depot. I simply used a piece of cardboard for my preliminary fit. This helped me to brainstorm a nice clean fit. Also it helped me figuring how much stock length I needed and where to make my bends. I simply used a bench vise and hammer to make my angles. Once I got one bracket completed, then I used it as a jig for the second one. Can't get any simpler than this:) Tomorrow I'll shoot some paint on them and get them mounted.

Pics:
1- My crude cardboard bracket.
2- Figuring out the cleanest install method
3- My cut piece of steel stock over the template
4- Fitting the steel stock where I want it
5- Scoring with a razor blade to get my exact bend point
6- Test fit. Had to test fit it 10 times before I had the correct angle
7,8- Completed bends in the bracket
9- Got my C-10456 Control box mounting holes and hardtop mounting holes ready to go. Ready for primer!
 

Attachments

Last edited:

Beerslayer

Well-known member
Steel Soldiers Supporter
1,054
53
48
Location
Tualatin, Oregon
Was great meeting you and your son, Mike! Those Don Pedros breakfast burritos are addictive. Glad to see the Door Opener has a new and appreciative home.

So on the fender antenna mount, how are you going to tie the antenna down when under way? Seems like the mirror would get in the way of that. Is that location the standard for antenna mount on the m923?
 

wsucougarx

Well-known member
6,951
65
48
Location
Washington State

Attachments

Top
AdBlock Detected

We get it, advertisements are annoying!

Sure, ad-blocking software does a great job at blocking ads, but it also blocks useful features of our website like our supporting vendors. Their ads help keep Steel Soldiers going. Please consider disabling your ad blockers for the site. Thanks!

I've Disabled AdBlock
No Thanks