• Steel Soldiers now has a few new forums, read more about it at: New Munitions Forums!

  • Microsoft MSN, Live, Hotmail, Outlook email users may not be receiving emails. We are working to resolve this issue. Please add support@steelsoldiers.com to your trusted contacts.

WTK: Best way to line a V100 intergral fuel tank

Austringer

Active member
Steel Soldiers Supporter
410
34
28
Location
Atlanta, Ga
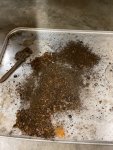
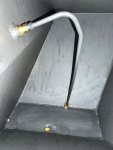
The original liner in the passenger side fuel tank is very badly deteriorated and starting to clog the fuel pick up from time to time. I've removed the filler neck assembly and have fairly good luck pressure washing out all the old led, scum and most the original liner down to bare metal. It flash rusts fairly quickly, but I'm not worried about that. what I am concerned about is the liner on the top of the tank and in the hard to get spots around the fueling point. i have a pressure washer whose nozzle can swivel up to 90 degrees, but there are some areas I still can not reach. I removed the fuel pick up line as well as it's rough and was curious about the screen filter that goes on the bottom of it. I think i have a solution for it, more than likely will just make another pick up line from the CU-NI easy flex line in the same size and then braze one of the aftermarket fuel strainers for an M38(A1) on the bottom with hte pick up almost at the bottom of it.

before I can do that, do i need to reline the tank (as I would like to do) or can I leave it metal like most gas tanks. I'd like to get everyone's opinion on what to do with this tank and what to use to liner it, as I will either have to use a small sprayer to get to some parts or a brush attached to a stick to get the far end. I was thinking of using Red Coat and a brush and just paint the inside of the tank with it, since turning the tank over and around to coat the inside would be a little difficult, at a minimum.


Let me know what you think and looking forward to everyone's thoughts or experiences in dealing with this. Again, I'm not worried about the flash rust as should not affect the ability of the Red-Coat to stick.

Last thing, should I just take the vehicle to a place that relines equipment intergral fuel tanks?

Thanks
Jason
 

jimk

In Memorial
In Memorial
1,046
45
48
Location
Syracuse, New York
Remove filler neck and pick up tube. Install drain plug. Remove sight gauge fittings and plug the holes. Vacuum out tank. Get 1 pint can POR-15. Mix well. Dump in hole thru paint strainer. Mop around with 3 or 4" horsehair brush. I could reach all spots and w/o a stick on handle. Pile it on heavy. Pull drain plug. Let drain into can for a 5 hours. Afterwards it leaves a thin film. It goes a long ways though the drain down process us slow. The bottom will puddle a bit. Mop what you can towards the hole and don't worry too much because more stuff will arrive. You can reuse what's left in other side. I thought 1 pint did both sides but might be wrong and it was a qt. Wash arm best you can.. Wear long sleeve shirts for next 10 days. Replace or inspect all brass fittings for buildup on threads and sealing cone. Hard to clean, easier to replace em. Verify the hull holes are not blocked. If your fuel caps have Micky Mouse ears install neck at the correct angle. Por15 is silver. The factory used red stuff.

http://www.ebay.com/itm/New-POR-15-...hash=item4d0e62c94a&item=330953836874&vxp=mtr

The pick up lines get rusty inside line and ouside around sock. One of mine was half gone. The other looked good but the sock was full of crap, the last inch of line gone. If in doubt make new p/u tubes out of 5/16 fuel line. These filters just press on by hand.

http://www.ebay.com/itm/Mopar-Fuel-...harger-Dart-/231174377404?hash=item35d3110fbc
 
Last edited:

Austringer

Active member
Steel Soldiers Supporter
410
34
28
Location
Atlanta, Ga
Here is what I've decided to do. Plugging off all holes from the inside with brass plugs, and using my 110 lb pressure pot I'm going to blast the inside with 2x used glass media. The pressure washer was able to get bast majority out but even with a 90 bend nozzle I could not get the old liner and rust around the roof near the filling hole. Once blasted, vacume out good, was down with some mek force dry then do as you said, pair the inside with Red Kote with a brush. Let semi cure, remove the brass plugs, let it finish curing then install new pickup line and site gauge lines. Regarding the pickup, going to use one of the m38a1 style stainless fuel filters they make now to replace the little baggy. That way I can remove and clean I'd needed. Also going to use the ezbend copper nickles tubing to avoid any future rust issues
Last thing, one tanks are clean, goinf to start running only 100LL (aviation fuel) offload fuel instead of regular gas.
 

Rickv100

New member
63
0
0
Location
NJ
The factory way was to fill the fuel tank with the sealer and then let it drain out. The remainder lined the tank.

Not sure you want to buy 55 gallons of sealer.

Rick
 

Buck Wampum

Active member
Steel Soldiers Supporter
64
132
33
Location
SE PA
The original liner in the passenger side fuel tank is very badly deteriorated and starting to clog the fuel pick up from time to time. I've removed the filler neck assembly and have fairly good luck pressure washing out all the old led, scum and most the original liner down to bare metal. It flash rusts fairly quickly, but I'm not worried about that. what I am concerned about is the liner on the top of the tank and in the hard to get spots around the fueling point. i have a pressure washer whose nozzle can swivel up to 90 degrees, but there are some areas I still can not reach. I removed the fuel pick up line as well as it's rough and was curious about the screen filter that goes on the bottom of it. I think i have a solution for it, more than likely will just make another pick up line from the CU-NI easy flex line in the same size and then braze one of the aftermarket fuel strainers for an M38(A1) on the bottom with hte pick up almost at the bottom of it.

before I can do that, do i need to reline the tank (as I would like to do) or can I leave it metal like most gas tanks. I'd like to get everyone's opinion on what to do with this tank and what to use to liner it, as I will either have to use a small sprayer to get to some parts or a brush attached to a stick to get the far end. I was thinking of using Red Coat and a brush and just paint the inside of the tank with it, since turning the tank over and around to coat the inside would be a little difficult, at a minimum.


Let me know what you think and looking forward to everyone's thoughts or experiences in dealing with this. Again, I'm not worried about the flash rust as should not affect the ability of the Red-Coat to stick.

Last thing, should I just take the vehicle to a place that relines equipment intergral fuel tanks?

Thanks
Jason
Old topic, but I was reading it yesterday before I sealed my fuel tank. Slightly less objectionable than cleaning it. Slightly.

You can get a 180-degree u attachment for a pressure washer. Stihl makes it, for cleaning gutters from the ground. I put that on my pressure washer and was able to clean the top inner surface of the tank with it. Worked very well around the fuel filler opening. Wear eye protection and a face shield because you are directing high-pressure water in the general direction of where your face is.

Cheers,
Scott
 

Buck Wampum

Active member
Steel Soldiers Supporter
64
132
33
Location
SE PA
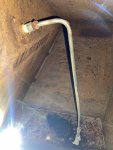
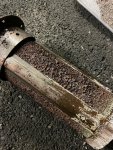
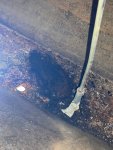
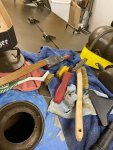
Cleaning out some old files and figured I'd add these photos of my tank restoration. One down, one to go. I used the JimK method as outlined above. You could not pay me to do this on someone else's vehicle. Ok you could, but I'd want $5,000. It was that nasty. Try to find a friend with long skinny arms, I had sexy bruises for a week. I recommend putting your phone in a sealed ziplock bag and inserting it into the tank while the POR15 is still wet, in video mode, to make sure you got the POR15 everywhere. Especially important to check up under the mounting area for the filler neck.

IMG_0428.jpgIMG_0412.jpgIMG_0429.jpgIMG_0452.jpg64913002716__83D3EB4C-FCC6-489E-BDE5-955EC5F765AB.jpgIMG_0450.jpgIMG_2606.jpg
 
Top