• Steel Soldiers now has a few new forums, read more about it at: New Munitions Forums!

  • Microsoft MSN, Live, Hotmail, Outlook email users may not be receiving emails. We are working to resolve this issue. Please add support@steelsoldiers.com to your trusted contacts.

"Rescued" M816 Wrecker

my blood flows OD

New member
340
3
0
Location
strafford new hampshire
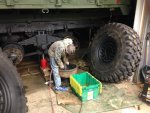
Lets just say that from the tire handling and wheel dismounting I'm back to wearing my wrist brace from a yard work-induced bad sprain last summer.

Red's tire work really wasn't bad, really, it wasn't, just "old" injuries acting up. Two people is the charm for working on MV stuff!

Just make sure you use some oil on the bead and let it sit for a few minutes. We actually used PB Blaster sprayed around the wheel lip and tire. Helps the tire slide off the wheel.
I just did all 7 of my by myself. It wasn't that bad. There was a few moment that I had to physic myself "com'on lets see what your made of dig deep you got this". My tires came with HET rims so I had to brake those down first.
i used Kroil on the bead and they fall off the rim and you can push them right back on
 

red

Active member
1,988
25
38
Location
Eagle Mountain/Utah
375.jpg

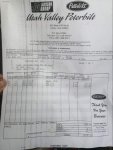
List of the part #'s for the extra long studs and the offset lug nuts. I'm using the stock studs on the rear axles with the offset lug nuts. Up front I'm using the stock lug nuts with the extra long wheel studs, studs on the receipt are 1/4" longer than the 'extra long studs' sold by the vendors. The aluminum rims I'm using are about 3/4" thicker than the stock 809 series steel wheels
 

red

Active member
1,988
25
38
Location
Eagle Mountain/Utah
Weather cooperated yesterday and got the replacement wheel studs so finished up the passenger side hub/wheel work. Next step is to install the new soft brake lines then turn the truck around so the driver side is accessible.


IMG_20160503_202845254_HDR.jpg


Also changed out the air intake for the Donaldson 5".

IMG_20160503_202859383_HDR.jpg
 

red

Active member
1,988
25
38
Location
Eagle Mountain/Utah
Couple things done to the truck last week. Installed new soft brake lines in the rear, tried to remove the front ones but the nuts were wanting to round off so I'll let them soak in PB blaster for awhile then try again. Bled the brakes, then drove the truck down to the street, flipped around, and came back up the driveway. With one side of the truck on 11"s and the other side on 395's I took it easy.

IMG_20160514_165414548_HDR.jpg

Finished the driver side front and middle axle hubs, only have the rear axle on the passenger side left to do. I believe the vent on the middle axle is plugged, seals on both sides of that axle were blown. Only 1 wheel cylinder so far that needed to be rebuilt.
 

red

Active member
1,988
25
38
Location
Eagle Mountain/Utah
Thanks, been working on the truck awhile and ready to actually drive it haha.

That's Valence's m105. I was going to hook it up to the wrecker as a prank, but he left the pintle locked :(

Sent from my XT1585 using Tapatalk
 

Another Ahab

Well-known member
17,999
4,556
113
Location
Alexandria, VA
It's actually my M105A2. I had it all covered for storage and tucked up by the house but had to move it due to a swarm of bees trying to colonize the eves...
Sweet!

You should keep that thing as a honeybee trap:
- Bess are getting scarce, and the cost of a "box" is going up! You can buy bees by the box; you knew that right!?:naner:
 
Last edited:

red

Active member
1,988
25
38
Location
Eagle Mountain/Utah
I prefer bee's anyday over a wasp or hornet. Usually not as hostile and at least they serve a purpose.


Well last friday finished up the hub flip and wheel end service and 395's swap finally. Went to the local hardware store to get a 1 gallon garden sprayer to build into a pressure bleeder and bled the brake system. While testing the brakes it was discovered that the brakes would not hold pressure anymore, step on the pedal and it would slowly go to the floor. With no visible leaks in the system and re-bleeding it determined that the master cylinder gave out so ordered a replacement unit.

Replaced the master cylinder today. Beauty of these trucks, really simple and pretty easy to work on. Pulled the transmission and transfercase tunnel covers out of the cab and accessed it that way. Went ahead and plumbed in the external brake fluid reservoir as well, mounted it to the cab behind the driver seat.

IMG_20160526_143401460.jpg

Someday I'd like to upgrade to a dual circuit brake system (or air brakes) for the safety factor. Looks like there is plenty of room for a dual circuit master cylinder.

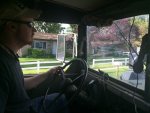
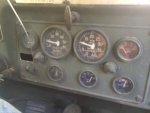
Bled the brakes and the pressure held great. Fired up the truck and tested a few more times in the driveway then took the truck for a short test drive through the neighborhood, first time this truck has been on the road under its' own power in over 2 years. Valence snapped a couple pics while I was driving. At one point he asked me to do a 'panic stop' at about 15mph, best way to put it seat belts hold and the brakes work very well. One of my poor jerry cans learned how to fly at that moment hahaha.
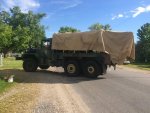
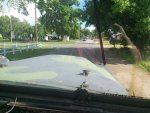
IMG_4269.jpg

IMG_4270.jpg

IMG_4271.jpg

IMG_4273.jpg


Will be making a roughly 60 mile trip this weekend with it, in the middle of moving to a different place and I need the crane to pick up a few items from the garage.

Couple quirks were discovered during the drive. There is an air leak around the transfercase. The sprag does engage how it's supposed to in fwd/rev so thinking it's just a loose/leaking fitting. Figure when it's addressed I'll install a air switch so the front axle can be disengaged. Exhaust had a significant amount of smoke when the drive first started, seemed to reduce the longer the drive went on so thinking it's just from the truck sitting for so long and only really being used at idle.

Last quirk noticed. It will rev while driving past 2300 rpm with relative ease.

After we got back from the test drive raised the tire pressure to 80psi (wheels and tires rated to 120) and fixed the driver side mirror bracket.

IMG_20160526_203732463_HDR.jpg


Also had a 'lightbulb' moment with the storage boxes in the rear. I don't like how they are a top open design, would be more useful to me if they opened from the side. Originally was planning to cut the feet off the front outriggers and have them modified to be removable, then make side doors for the storage boxes. Then it clicked, why bother going through all that extra labor to make the feet removable when they slide out easily enough?

IMG_20160526_203723210.jpg
 

wcuhillbilly

Member
421
5
18
Location
Devils Tower, WY
Sweeeeeet!!!!!,,,, Time for Jakes and a Turbo...... 10spd tranny, airbrakes,,, incab accesories, etc etc etc........ and most of all,,,, a longer boom for better reach...
Looking good guys, Hope to get back on mine soon.
 

red

Active member
1,988
25
38
Location
Eagle Mountain/Utah
Haha I've read that no matter how big a crane is you always need one longer.

Most of the missing wrecker BII will be here in about a month, would like to get the storage setup for all those parts and my hand tools this summer. Truck is serving as my mobile tool box until I have a shop of my own.

Next couple mods/repairs are:
Tool and equipment storage/access
Pinion brake (for backup and parking)
Front winch cable
Dual fuel line mod
Storage for the cutting torch equipment (little tanks, no need for me to have the stock large tanks)
Finish wiring in EGT gauge
Plumb in johnson bar
Overhaul front level wind
Overhaul vice
Change remaining fluids
 

Another Ahab

Well-known member
17,999
4,556
113
Location
Alexandria, VA
Most of the missing wrecker BII will be here in about a month, would like to get the storage setup for all those parts and my hand tools this summer. Truck is serving as my mobile tool box until I have a shop of my own.
Make that truck your shop, and then you're home free!

Wherever you go, your shop is always with you.

Just a thought. What do you think?
 
Last edited:

red

Active member
1,988
25
38
Location
Eagle Mountain/Utah
Make that truck your shop, and then you're home free!

Where every you go, your shop is always with you.

Just a thought. What do you think?
Will be that way for awhile, at least 2 years. You're right though the truck is a basic mobile shop by design haha. Crane, air power, torch, vise, tool storage. Main things it's missing are a welder, press, ac power, proper workbench, and protection from the elements.

Does give me an idea though with the cargo cover, speaking of that it needs to be cut down to size
 

BnaditCorps

Member
479
1
18
Location
Solano County, California
Will be that way for awhile, at least 2 years. You're right though the truck is a basic mobile shop by design haha. Crane, air power, torch, vise, tool storage. Main things it's missing are a welder, press, ac power, proper workbench, and protection from the elements.

Does give me an idea though with the cargo cover, speaking of that it needs to be cut down to size
I might get a wrecker, after getting a cargo, just so I have basic shop on wheels. 2 of my friends live on a ranch and it is always a pain to have to do field repairs, having a wrecker would make that easier and the crane would help when building structures.
 

Another Ahab

Well-known member
17,999
4,556
113
Location
Alexandria, VA
I might get a wrecker, after getting a cargo, just so I have basic shop on wheels. 2 of my friends live on a ranch and it is always a pain to have to do field repairs, having a wrecker would make that easier and the crane would help when building structures.
There's not much you CAN'T do if you have a wrecker!
 
Top