- 1,579
- 556
- 113
- Location
- Greenback, TN
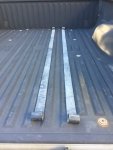
Do you ever stow the beds sideboards in their storage slots under the bed? If not, like me, you can cut a couple of pieces of plywood to insert into the lowest slots of those storage compartments (now bottomless) and slide stuff in there. For your pioneer tools, maybe mount the tool brackets to the plywood. Simply pull out and lower leading end of the board to ground when needing the tools.
I presently have a ladder, a fuel transfer pump, and odds and ends in that makeshift compartment. Easily converted back to normal if you ever want to stow the sideboards.
Bob
I presently have a ladder, a fuel transfer pump, and odds and ends in that makeshift compartment. Easily converted back to normal if you ever want to stow the sideboards.
Bob


")