• Steel Soldiers now has a few new forums, read more about it at: New Munitions Forums!

  • Microsoft MSN, Live, Hotmail, Outlook email users may not be receiving emails. We are working to resolve this issue. Please add support@steelsoldiers.com to your trusted contacts.

Working on the M1078 LMTV

tennmogger

Well-known member
Steel Soldiers Supporter
1,579
544
113
Location
Greenback, TN
Do you ever stow the beds sideboards in their storage slots under the bed? If not, like me, you can cut a couple of pieces of plywood to insert into the lowest slots of those storage compartments (now bottomless) and slide stuff in there. For your pioneer tools, maybe mount the tool brackets to the plywood. Simply pull out and lower leading end of the board to ground when needing the tools.

I presently have a ladder, a fuel transfer pump, and odds and ends in that makeshift compartment. Easily converted back to normal if you ever want to stow the sideboards.

Bob
 

mkcoen

Well-known member
Steel Soldiers Supporter
5,637
381
83
Location
Spring Branch, TX
Do you ever stow the beds sideboards in their storage slots under the bed? If not, like me, you can cut a couple of pieces of plywood to insert into the lowest slots of those storage compartments (now bottomless) and slide stuff in there. For your pioneer tools, maybe mount the tool brackets to the plywood. Simply pull out and lower leading end of the board to ground when needing the tools.

I presently have a ladder, a fuel transfer pump, and odds and ends in that makeshift compartment. Easily converted back to normal if you ever want to stow the sideboards.

Bob
Bob,

Thanks for the idea. It's just wasted space at the moment. I'm sure I could fill it with all sorts of stuff to get me out of (or into) trouble.
 

mkcoen

Well-known member
Steel Soldiers Supporter
5,637
381
83
Location
Spring Branch, TX
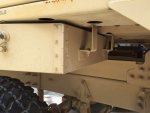
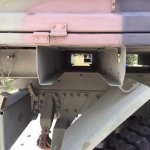
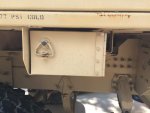
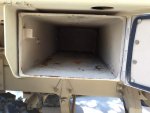
I've considered the same thing. Would want metal bottom, waterproof and a lock on the door... Would be a good place to store the 24v impact kit!
After looking at the tool box on my M1082 trailer I think I'm going to try and replicate that over the space above the rear mud flap. I could make a nice size tool box on both sides of the truck that would be lockable and waterproof. I even have a friend with a metal brake I could probably borrow to make the boxes with. Checking the trailer the box is 11" wide but there's 14.25" on the truck so I could make it wide enough to fill the whole space. Now I just need to find a couple of latches so it matches the truck's original tool box and would be lockable.

IMG_4699.jpgIMG_4700.jpgIMG_4697.jpgIMG_4698.jpg
 
Last edited:

tennmogger

Well-known member
Steel Soldiers Supporter
1,579
544
113
Location
Greenback, TN
I like my 'pathetic excuse for a horn'. The kids do the horn-blow pump-of-the-arm, I give them the pathetic beep beep, and they get a good laugh. :)
 

mkcoen

Well-known member
Steel Soldiers Supporter
5,637
381
83
Location
Spring Branch, TX
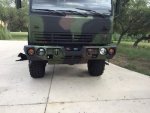
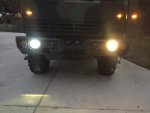
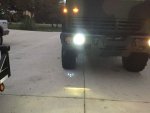
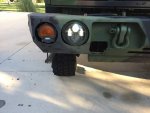
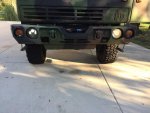
I got some new toys for the front of the truck. I only installed one as I wanted to see the difference side by side. The stock lights were fine on high beam but low beam was like having someone with a flashlight and weak batteries sitting on the bumper. Hopefully these will brighten things up a bit. Couldn't wait for full dark but I'll post another shot later.
 

Attachments

mkcoen

Well-known member
Steel Soldiers Supporter
5,637
381
83
Location
Spring Branch, TX
The new is LEDs, right?
Correct.

I had those new style speaker LEDs in my humvee. Best led headlight out there. Come stock on new hemtts. Kind of funny looking though.
With luck they'll last a while. I'll keep the old ones stashed in the truck in case I'm in the middle of no where and they go out. They are different looking but then I've always been a bit of an oddball so they fit right in.
 

mkcoen

Well-known member
Steel Soldiers Supporter
5,637
381
83
Location
Spring Branch, TX
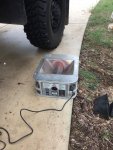
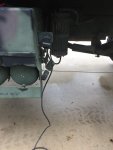
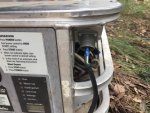
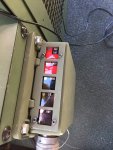
Getting ready for the trip to Big Bend next month so prepping my MBU for cooking. I'm pretty sure I saved a 2 burner branch cable from my MKT days but can't find it so it was time to improvise. I had a spare slave plug that just had a 3 prong plug end. I simply cut the end off and used a couple of butt end wire connecters. I crimped one side to the neg and pos wires and used the other side of the connecter to slide onto the posts of the MBU. Its not pretty but it works. I'll eventually get the proper cannon plug to put on there but won't get that done before the trip.

IMG_4726.jpgIMG_4727.jpgIMG_4728.jpg
 

mkcoen

Well-known member
Steel Soldiers Supporter
5,637
381
83
Location
Spring Branch, TX
I have the mbu slave cables but you still need a branch cable with it.
Exactly. I have the slave cable that hooks to the branch cable and I'm certain I saved a 2 branch cable as I was saving 2 MBUs but just can't locate it in my less than organized shop. Not really a problem this time as I'm only taking 1 MBU but it'll be an issue in the future if I'm cooking for more than a couple of people.
 

mkcoen

Well-known member
Steel Soldiers Supporter
5,637
381
83
Location
Spring Branch, TX
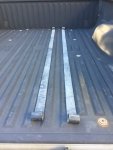
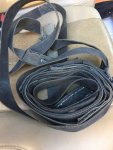
Got some more goodies for the truck today. Number 1 was a replacement CTIS controller. This immediatly fixed my problem of 5 solid CTIS lights. Everything is now cycling the way it's supposed to.

Next was a couple of items for the cargo cover. I have the new style bows and there is no real support or arch like a M35 bow set. What happens is water collects in the 4 rectangular spaces and sags significantly. We got about 4" of rain Monday and I had to try and get 100 gallon or more of water off the top as it was sagging between the supports. What I now have are a couple of bows and strap from an older style bow set. I'll have to partially disassymble things to get them in but thats easier then lifting all that water and I'd prefer not to stretch my new top out.
 

Attachments

Last edited:

mkcoen

Well-known member
Steel Soldiers Supporter
5,637
381
83
Location
Spring Branch, TX
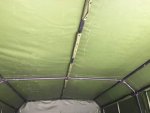
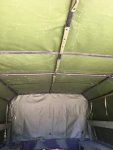
I added the new cross plates to the canopy frame this afternoon. It was a fairly easy job but required rolling the cargo cover all the way to the front (which meant loosening all the super rope and unsnapping all the interior hold downs). After that it was just a matter of unhooking each of the center most bars, two front and two rear. The cross plates have loops on each end that slide over the top rails but it goes over the top of the center rail thus giving you a bit of arch to an otherwise flat top. Unfortunately after getting it all assembled I think it just made the 4 large catch basins into 8 smaller ones. While this will be easier to clear after a rain I don't think it'll prevent pooling of water. The older style tops also had a couple of straps that ran the length of the top in between the side and center rails but I only have one of those. I suppose I could use a ratcheting tie down strap for the other side but still not certain that would alleviate the problem.

IMG_4736.jpgIMG_4737.jpgIMG_4738.jpg
 

Oxyacetylene

Active member
Steel Soldiers Supporter
518
179
43
Location
Stoneville, NC
I added the new cross plates to the canopy frame this afternoon. It was a fairly easy job but required rolling the cargo cover all the way to the front (which meant loosening all the super rope and unsnapping all the interior hold downs). After that it was just a matter of unhooking each of the center most bars, two front and two rear. The cross plates have loops on each end that slide over the top rails but it goes over the top of the center rail thus giving you a bit of arch to an otherwise flat top. Unfortunately after getting it all assembled I think it just made the 4 large catch basins into 8 smaller ones. While this will be easier to clear after a rain I don't think it'll prevent pooling of water. The older style tops also had a couple of straps that ran the length of the top in between the side and center rails but I only have one of those. I suppose I could use a ratcheting tie down strap for the other side but still not certain that would alleviate the problem.
My cover doesn't have those integrated pockets that look like they snap over the poles. Mine has straps that run along both sides (inside the cover) and nothing in the center of the top. I had the same water problem. For now I have taken a couple sheets of thin plywood and put them across the top center support, one at the front and one at the back. Turned sideways they fit perfectly and hold up the cover very well. No more water puddling up on it!
 
Top
AdBlock Detected

We get it, advertisements are annoying!

Sure, ad-blocking software does a great job at blocking ads, but it also blocks useful features of our website like our supporting vendors. Their ads help keep Steel Soldiers going. Please consider disabling your ad blockers for the site. Thanks!

I've Disabled AdBlock
No Thanks