• Steel Soldiers now has a few new forums, read more about it at: New Munitions Forums!

  • Microsoft MSN, Live, Hotmail, Outlook email users may not be receiving emails. We are working to resolve this issue. Please add support@steelsoldiers.com to your trusted contacts.

3D Printed Seal Driver

Awesomeness

Well-known member
Steel Soldiers Supporter
1,813
1,518
113
Location
Orlando, FL
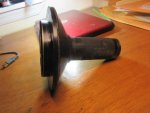
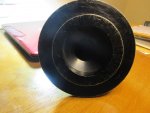
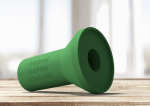
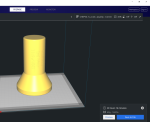
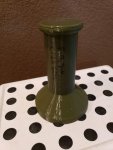
I figured I'd try 3D printing one of the seal drivers, since I'm about to take the front axle apart. It came out pretty good. It's within 0.005" on dimensions, and seems pretty tough (I printed it 90% infill... basically solid). This took me an hour or two to design up from the prints and tweak for printability, then about 17 hours and $15 in filament to print. It probably weighs about the same as a can of pop (12oz), or so (just a guess).

There's a little delamination around the top edge there, but it's not of concern. It's only one or two layers deep, because it was printed upside down and that was a steep undercut so those outer rings were not supported.

3DPrintedSealDriver-CTIS.jpg
 
Last edited:

Awesomeness

Well-known member
Steel Soldiers Supporter
1,813
1,518
113
Location
Orlando, FL
Thanks. Also, that 17 hour print number is on "draft mode", 0.3mm layer height. At more normal settings (0.15-0.2mm) it would take over 2x that long, maybe 36 hours, but I just wanted to see if it would be feasible.
 

Floridianson

Well-known member
Steel Soldiers Supporter
7,409
2,503
113
Location
Interlachen Fl.
Looks real good but the inner hub seal is a flat lip and just needs a hammer to install. I do have the correct one that I got off the bay along with the spindle nut socket.
 

Awesomeness

Well-known member
Steel Soldiers Supporter
1,813
1,518
113
Location
Orlando, FL
Looks real good but the inner hub seal is a flat lip and just needs a hammer to install. I do have the correct one that I got off the bay along with the spindle nut socket.
This is the design right out of the back of the manual (plus some changes to make it printable). While this is partly an experiment, I'd also rather have the tools before I take them apart then get it all disassembled and then find out I can finish the job easily until I do.

Very nice !
What kind of printer and filiment are you using ?
I'm planning on getting one for the Fam.
Thanks, Lionel
This was printed on my Prusa i3 MK3S. You shouldn't even look at any others, seriously. The kit is $750, and it's easily also the best hobbyist/prosumer printer on the market (and trust me, I'm on the Additive Manufacturing Working Group at work, and we have tried all of them , such as the Lulzbots/Ultimakers/Cubes/Dremels/etc., most of which are in the $2500-6000 range and still don't outperform these). The kit takes about 8 hours to build, or for $1000 you can get it pre-assembled. https://www.prusa3d.com/original-prusa-i3-mk3/

This was printed with Paramount PETG in OD green: https://smile.amazon.com/Paramount-3D-Military-Filament-OGRL60037764G/dp/B01M0IZYY0/
 
Last edited:

Floridianson

Well-known member
Steel Soldiers Supporter
7,409
2,503
113
Location
Interlachen Fl.
The inner part just holds the seal to the installing tool and the flat part does the pushing. As said if you have trouble just use a small hammer and install it straight in with it. Now if your doing the ctis seals then can't help you. I did away with the ctis seals when I switched to 5 ton combat wheels and new tires. Just had to block off the cits hub hole and now I have full floating rear axles. No more grease inside bearing and oil out side bearings.
 

Attachments

Last edited:

Smike740

Member
Steel Soldiers Supporter
199
15
18
Location
Columbus, Ohio
Looks great, when I did mine I turned a piece of aluminum down and added a handle. I may have to make a 3d printer one of my next major purchases. What CAD software are you using?
 

SandBar

Full Time Patriot
756
231
43
Location
GA/FL
Already tried it. It doesn't work very well. Even with "ABS-like" resins, they are too hard and brittle. It chipped around the edges.
I use Blu and Tenacious for lowers on many platforms and the hardness combined with elongation properties worked well.
 

Bulldogger

Well-known member
Steel Soldiers Supporter
1,330
586
113
Location
Quantico VA
Anyone tried nylon for these parts? I'm printing plenty of functional parts with nylon now. It can be tricky, but I figured out its quirks on my printer (CreatBot F430, out of reach for some I admit) and can print almost anything now.
Bulldogger
 

Awesomeness

Well-known member
Steel Soldiers Supporter
1,813
1,518
113
Location
Orlando, FL
Anyone tried nylon for these parts? I'm printing plenty of functional parts with nylon now. It can be tricky, but I figured out its quirks on my printer (CreatBot F430, out of reach for some I admit) and can print almost anything now.
Bulldogger
I haven't, no. The PETG does well, so there wasn't much need to look further. PETG has a density that's between HDPE and UHMW. The issues that required adjustment to the design were to minimize thin walls, where the print would separate between layers, and to increase printability so that it prints without supports leaving the driver face as dimensionally-accurate as possible (e.g. no supports touching that face).

My newest iterations are really good, and basically "done". However, they take so long to print, and at ~$2/hr (filament cost included) printer-time cost, it makes the drivers cost $40-80/each, plus tie up my printers for days on end. I wasn't sure if people wanted to pay that much, or if I wanted to spend that much time making them. I am planning to sell the files, for something trivial like $5/ea, just to recoup some of the effort/prototyping, but haven't got around to it yet.

Reposting pictures of some of my newer versions here, since I had only added them to the other thread.
20200812_203809.jpg
20200812_203852.jpg
20200812_203917.jpg
 

coachgeo

Well-known member
5,147
3,462
113
Location
North of Cincy OH
it was reported the the opposite end of the large military socket for the internal nut is the right size to drive the seals in. With that in mind would be lot less to 3d print a cap that fits the opposite end with a centralized head where one would tap to dive the seal in squarely
 

SandBar

Full Time Patriot
756
231
43
Location
GA/FL
I can print 1 inch vertical height per hour (14"x9" bed) on my SLA printer, so not a terrible time investment. If you decide to sell a copy soon please let me know, else I have to fire up Solid Works and get to work :D
 

Awesomeness

Well-known member
Steel Soldiers Supporter
1,813
1,518
113
Location
Orlando, FL
it was reported the the opposite end of the large military socket for the internal nut is the right size to drive the seals in. With that in mind would be lot less to 3d print a cap that fits the opposite end with a centralized head where one would tap to dive the seal in squarely
It's not a bad idea, but not really pragmatic either. Each of the seal drivers has different lengths, internal diameters, face recesses, etc. Then you would have to make it so it fit one specific "large military socket", that you hope everyone has (which will end up being a headache). It would make more sense to try to make one driver handle, that then all the different faces fit onto, but again the handle parts are all different shapes... there is one of them that has like a 10" internal depth, so the one universal handle would have to be at least that long.

And then at that point, all the time and effort to do the universal handle thing just drove up cost, part count, etc. Plus if they break or lose the one handle, the whole set is useless until it's replaced. See how this problem keeps cascading? Better just to make them stand-alone, in my opinion.
 

Awesomeness

Well-known member
Steel Soldiers Supporter
1,813
1,518
113
Location
Orlando, FL
I can print 1 inch vertical height per hour (14"x9" bed) on my SLA printer, so not a terrible time investment. If you decide to sell a copy soon please let me know, else I have to fire up Solid Works and get to work :D
Right, the time goes down, but the resin (especially the highly impact resistant resins) is significantly more expensive. So time lowered, but you're printing at up to $5-10/hr of resin consumption. So the drivers still come out $40-80 (to sell, since the hourly rate includes some handling time... it's a little cheaper DIY, which is why I was thinking of just selling the files, so people can feel like they saved money).

PM me, and I'll sell you one of the files for $5. I just hadn't gotten around to doing all the leg work of preparing to sell them (e.g. taking pictures, creating lists, making descriptions, creating posts / shopping cart inventories, etc.) . People don't realize how much work goes into getting all that done.
 

SandBar

Full Time Patriot
756
231
43
Location
GA/FL
Just saw you had replied, already finished one seal tool. Ran it through Ansys and webbing/relieved design was about 70% weaker in a failure analysis than simple flare. Having been deeply involved in CAD/CAM for some time now I can lend a hand in durable and cost effective FDM/SLA modeling.

I made a reinforced version (bolstered shaft diameter and longer taper from head end), printed in FDM at 45% infill (triangle pattern) it will survive quite a while. I always add more shell layers for parts that need to be durable as well as raising the temp some.

In SLA (resin) it will be equally as durable with a 50/50 blend of Siraya Blu and Siraya Tenacious, with the added benefit of printing faster and having much more precision. I started years ago in FDM and jumped into SLA as soon as it became available due to the consistent results and level of detail provided.

Printed in FDM (plastic): Approximately 23 hours, with a material usage of 341 grams (about $8.00 dollars in PLA+).
Printed in SLA (Premium durable resin): 9 hours, with a material usage of 540 grams (about $23.00 dollars in Siraya blend).
* Of note: If I select a normal resin, the price drops to approximately 10 dollars, however longevity will suffer.
 

Attachments

Awesomeness

Well-known member
Steel Soldiers Supporter
1,813
1,518
113
Location
Orlando, FL
Just saw you had replied, already finished one seal tool. Ran it through Ansys and webbing/relieved design was about 70% weaker in a failure analysis than simple flare. Having been deeply involved in CAD/CAM for some time now I can lend a hand in durable and cost effective FDM/SLA modeling.
Have to be careful with that thinking. There is always "better", but the real trick is knowing what is "good enough". The long taper on the flare is mostly for printability, it didn't need it for strength. So the cuts were to remove material that did not need to be there, and were just raising print time and material cost. So it's 70% weaker, in a place that was already 100%+ too strong to begin with, which actually means it can be cut away further! That flare cone is not where it fails - it fails around the thin driving lip, which really can't be changed because it has to fit the seal.

I made a reinforced version (bolstered shaft diameter and longer taper from head end), printed in FDM at 45% infill (triangle pattern) it will survive quite a while. I always add more shell layers for parts that need to be durable as well as raising the temp some.
This is a waste, with additive manufacted designs. There is no need for the volume, so increasing the volume just to shell it and hollow with infill, is typically counterproductive. (There are some cases where you need to create a thicker but hollower part, such as to spread layer adhesion, or a stressed-skin structure.) Thin it down, and just print it solid (90% infill). All that extra infill just results in longer cycle times on the toolpaths, where the simple perimeters would have been both faster and stronger. Also, for a seal driver, you want it to be as solid as possible, so that it is transmitting as much driving force to the part, instead of absorbing it internally with an infill grid.

In SLA (resin) it will be equally as durable with a 50/50 blend of Siraya Blu and Siraya Tenacious, with the added benefit of printing faster and having much more precision. I started years ago in FDM and jumped into SLA as soon as it became available due to the consistent results and level of detail provided.
I disagree with this. SLA printing is just the "wrong tool for the job", as it focuses more on precision with less impact resistant materials. FDM is able to adequately meet the precision needs, with materials that have better mechanical properties. I was curious, and printed two in SLA, with the mid-grade "ABS-like" resins (which is not an accurate description)... one chipped around the edges, making it poor for driving the seal nicely, and the other one I crushed in the press (not an ideal test, but I was mostly just double-dipping, screwing around with new resins, and new part designs).

Printed in FDM (plastic): Approximately 23 hours, with a material usage of 341 grams (about $8.00 dollars in PLA+).
Printed in SLA (Premium durable resin): 9 hours, with a material usage of 540 grams (about $23.00 dollars in Siraya blend).
* Of note: If I select a normal resin, the price drops to approximately 10 dollars, however longevity will suffer.
PLA isn't a good choice for functional parts, especially things like this that really need the impact resistance. ABS, ASA, or Nylon would be good, but add printing complications (e.g. heated build chamber, warping, weaker layer adhesion, etc.). PETG is a pretty good compromise.

My design for the same seal driver, printed solid (90%) is 360g. Print time 20h.

It's worth pointing out to others who might read this, he's just quoting material cost, not shop time (e.g. material cost + electricity + wear/repairs on the lifespan of the machine + labor +...).

I had considered a couple other options for the design, such as using a piece of metal pipe or conduit, with just 3D printed caps for the ends. I decided that I didn't want to mess with that, and that people probably wouldn't want to have to get a big piece of pipe just to cut out the 5" section they need, so it was better to print the whole thing. Gotta keep that part count down, anyway.
 
Last edited:

SandBar

Full Time Patriot
756
231
43
Location
GA/FL
Agree to disagree on several points, but that is just 20+ years in CAD/CAM and IT :D I will likely be making a lot more models for at least the CUCV and 5 Ton and some instructions for durable 3d printing.

Have many rounds through SLA AR15 lowers, VZ Skorpions, Glocks and much more. Durable printing is a very dear subject to me. SLA lags behind only because entry level FDM machines are flooding the marketplace while a good SLA machine costs more and takes more time to get up to speed.

Thanks for your contribution.
 
Top
AdBlock Detected

We get it, advertisements are annoying!

Sure, ad-blocking software does a great job at blocking ads, but it also blocks useful features of our website like our supporting vendors. Their ads help keep Steel Soldiers going. Please consider disabling your ad blockers for the site. Thanks!

I've Disabled AdBlock
No Thanks