• Steel Soldiers now has a few new forums, read more about it at: New Munitions Forums!

  • Microsoft MSN, Live, Hotmail, Outlook email users may not be receiving emails. We are working to resolve this issue. Please add support@steelsoldiers.com to your trusted contacts.

Was looking for a shop in or near Milwaukee to work on M1008; then did it all myself!

cucvrus

Well-known member
11,473
10,434
113
Location
Jonestown Pennsylvania
Really the spring wrap is NOT needed. That was added for protection and provide some crush resistance. Replacing the rear brake line is as simple as form to fit cut to length and re-flare. Don't forget the put the nut on the line before you flare it. And make sure it is the correct way. threads toward the flare. Customer ordered a stainless set for a Camaro and the 2 fittings at the rear had the threads facing inward. Now what? I tried flaring the Stainless and it cracked.
 

retro_life

Well-known member
243
629
93
Location
Los Angeles, California
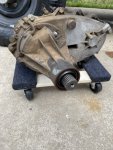
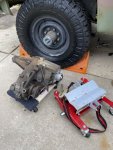
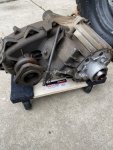
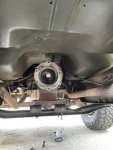
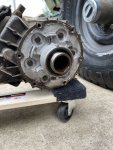
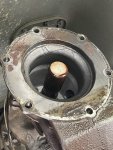
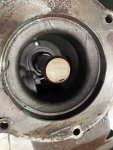
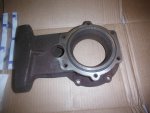
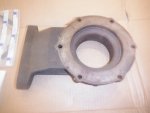
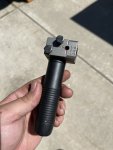
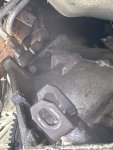
Well I finally dropped the transfer case. I went and picked up one of those low lift tranny jacks from harbor freight and that really saved the day especially the safety strap. The transfer case looks good but that adapter is cracked to all hell.

Once I have a replacement adapter I will support the rear of the tranny with the jack and remove the adapter and cross member and work on sliding it back to change out that flex plate.

Couldn’t have imagined me doing all this a few weeks ago.
 

Attachments

Last edited:

cucvrus

Well-known member
11,473
10,434
113
Location
Jonestown Pennsylvania
WOW. You have become a great mechanic is a few weeks. I think you had it in you all along and feared failure. Fear not you are well on your way to being able to repair almost every issue that comes your way on the CUCV. I can repair most CUCV issues but let component overhauls up to professionals that do it everyday. And besides I have worked with these people/friends all my life and know which area they specialize in. So basically I am a good parts replacer. I have not turned a wrench in a GM garage since 1987. Enough said? I am still happy to see how great the up side of your truck looks and the underside. I will send you a PM directly after this post. Keep up the good work. It looks great and you seem to have accumulated a few nice little toys during your CUCV experience. Good Luck. Keep on posting.
 

cucvrus

Well-known member
11,473
10,434
113
Location
Jonestown Pennsylvania
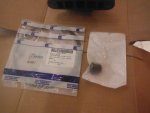
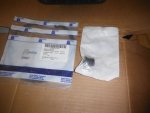
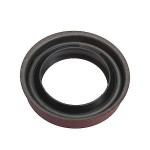
1625001797715.png You need to pick up a National 9449 output seal for the transfer case. Change it while you have it out. Standard ATF is all I ever buy. 1625001953095.png I would also pick up a 5 gallon pail of ATF. That is less expensive that way. You will need a good bit to refill the transmission and transfer case. Always nice to have around anyway. I do NOT use ATF in the power steering pump. I use power steering fluid. I once used Kubota UDT hydraulic oil and never had any problems. It was on a plow truck in the middle of the night and the power steering pump went out and i had no oil. I never changed it and it worked great. It is just hydraulic oil. The package is in the mail.
 

retro_life

Well-known member
243
629
93
Location
Los Angeles, California
Thanks so much @cucvrus. Do I need to change the seal on the transmission side too?

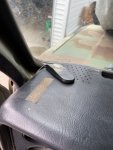
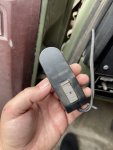
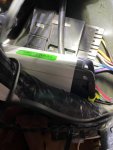
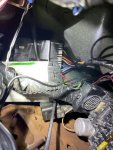
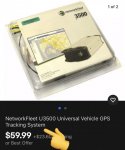
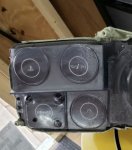
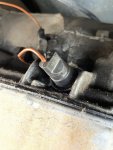
Today I was working on tidying up some wiring under the dash and adding a cigarette lighter power socket in the ash tray when I came across this module on the dash board. It looks like it’s possibly an antenna for some type of GPS module. There’s a box under the dash that says “Universal U3500” on the side of it. Have you ever seen one of these installed in these trucks? I’m planning to remove it because I think it may be causing a current draw when the truck is sitting and killing my batteries.

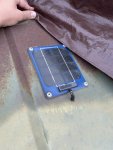
They also installed a solargizer on my truck, but the wires from the solar panel on the hood are ripped. I’ll repair it one day or just install a new one. But I know that’s disconnected and not bothering anything.

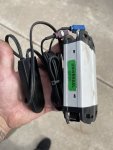
** looked it up and it’s a tracker. Def removing that ASAP.

Update** Removed!
Whoever installed it did a real nice job tapping the power harness into the main harness and electrical taped it nicely. I’ll just leave that alone and use that for any accessories I may want to add later. Hopefully this solves the current draw I was having while the truck was sitting.
 

Attachments

Last edited:

retro_life

Well-known member
243
629
93
Location
Los Angeles, California
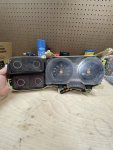
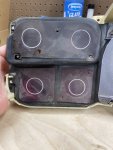
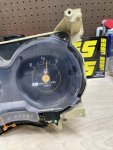
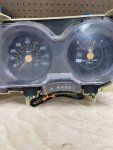
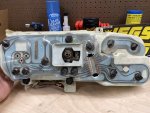
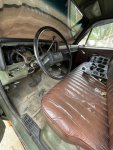
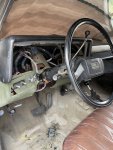
I ended up going down an interior rabbit hole and took the dash apart to rebuild the gauge cluster. There wasn’t many screws holding it in because a lot of the mounts have broken off. I think I’ll need a new cluster to mount everything back into. The gear indicator is also broken.

Im planning to clean it up and change all the lights to LED and install a new a gear indicator and put it all back together. May even throw in a new dash pad and seat cover… maybe even some vinyl flooring lol. We will see.

Please give me your advice and tips on the interior and dash.

Thanks!
 

Attachments

cucvrus

Well-known member
11,473
10,434
113
Location
Jonestown Pennsylvania
To me the cluster looks fine. It appears to have 1 broken tab on the left side. Common problem. Make a tab of light metal. I have used a flatted C clip or a conduit clamp flattened. The shift indicator is available from LMC. You can make a simple cable guide from a reversed T nut. Grease the T nut and run it in with a scew in the steel part of the dash. Last forever.
Metallic Conduit Clamp

Amazon.com: Parts Express #10-24 T-Nuts 50 Pcs.: Home Improvement
Tap the serrations down and use this as a cable guide. It is 10/24 size. It works. I have made many serviceable again with this method. Cleaning any polishing the clear plastic will be nice. I install the housing and reassemble the cluster from the drivers seat. Putting the speedometer and the fuel gauge in after I have all the lights working and the cluster bolted in place. Easier that way to me. Beats removing the cluster every time something is not working. Good Luck. Keep up the Great Work.
 

dougco1

Well-known member
Steel Soldiers Supporter
867
647
93
Location
Cooperstown NY
I ended up going down an interior rabbit hole and took the dash apart to rebuild the gauge cluster. There wasn’t many screws holding it in because a lot of the mounts have broken off. I think I’ll need a new cluster to mount everything back into. The gear indicator is also broken.

Im planning to clean it up and change all the lights to LED and install a new a gear indicator and put it all back together. May even throw in a new dash pad and seat cover… maybe even some vinyl flooring lol. We will see.

Please give me your advice and tips on the interior and dash.

Thanks!
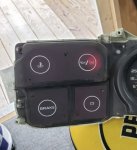
Be careful when cleaning the translucent basil that covers the idiot lights. The white in the white circles will actually dissolve and rub off when trying to clean them.
 

retro_life

Well-known member
243
629
93
Location
Los Angeles, California
I was looking at pics of clusters online and came across this dummy light cluster that has the one piece clear plastic over the top that would usually go onto trucks with gauges and a clock. I kinda like it because it would add some protection to those fragile film lenses for the 4x4/oil/generators. LMC sells it and I can just throw a new one on there. They also have a version without a clock so there’s no hole for the time setter. What do you guys think about that?
 

Attachments

cucvrus

Well-known member
11,473
10,434
113
Location
Jonestown Pennsylvania
I don't think the full cover fits. I salvaged a few from civilian clusters and cut that left half off for a reason. I believe the cluster POD holes will be recessed too deep to fit both glass and cluster. Good Luck. The real find is a civilian cluster with idiot lights. I still think one more hole in the lower part must be added but a few I found at the YOUPULLIT were pristine.
 

retro_life

Well-known member
243
629
93
Location
Los Angeles, California
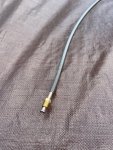
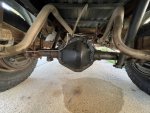
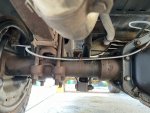
I got all the stuff to fix the brake line today so I went ahead and got that done. I’m really surprised with how nice it turned out.

My brake pedal is now nice and firm and no more leaks!
A030E2E7-D056-4192-ACDB-363DB3B3CA13.jpeg33CDC1D3-28C1-4D99-A56E-16760F88133E.jpeg775BE31F-DA38-4D79-86EE-5D5978D5AA07.jpeg75E7F60A-8914-49B8-9114-3F5260CC960D.jpeg

I almost want to do the other brake lines because they look so crappy compared to this one lol. But I have enough work on my plate for now.
 

cucvrus

Well-known member
11,473
10,434
113
Location
Jonestown Pennsylvania
Man I tell you that is one clean truck. The underside looks like a 5 year old truck in Pennsylvania. Winter and snow plowing take a huge toll on the CUCV's I have had and still maintain. I think the end is near for the CUCV plow truck. They served well. But all good things must come to an end. You can do it. Speaking of. Did you get that transmission slid back yet? Up dates are important. Keep you on track and having fun. Good Luck. Great hearing your success.
 

Curtisje

Well-known member
Steel Soldiers Supporter
596
693
93
Location
Okinawa, Japan
I got all the stuff to fix the brake line today so I went ahead and got that done. I’m really surprised with how nice it turned out.

My brake pedal is now nice and firm and no more leaks!
View attachment 838462View attachment 838463View attachment 838464View attachment 838465

I almost want to do the other brake lines because they look so crappy compared to this one lol. But I have enough work on my plate for now.
Where did you pick up that brake line at?

Great job with everything you're doing.
 

retro_life

Well-known member
243
629
93
Location
Los Angeles, California
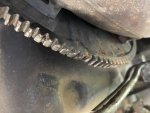
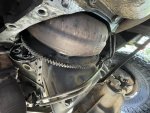
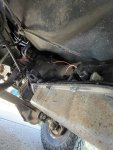
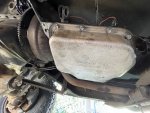
I started getting ready to swap the flywheel today. So far I’ve removed the inspection cover, trans cooler lines and the shift linkage. Also the oil filter because it seemed to be in the way and I’m going to do an oil change after this anyway.

I just want to clarify a few things before I go any further.
Does it matter than the trans is in park? I can hook up the linkage again and shift it if does.

I must remove the starter correct?

How does the transmission kick down come out? I tried pulling on it but I couldn’t get it to come out. I thought there may be some retainer and I didn’t wanna break it, so I thought I’d ask.

Are those two bolts on each side the only ones holding the trans mission on? I know those are the ones I gotta swap to the longer bolts, but I was wondering if there are any other bolts holding it on.

How should I turn the flywheel once I’m in to get to all the bolts?

What should I torque everything to? Blue loctite?

Sorry if any questions are dumb or redundant I just wanna go in there prepared and get this done right.

Anything else I’m missing or need to know please let me know!

CA855BE7-625B-4866-B5C4-4EF4E3803CF0.jpeg66348887-A354-4647-8139-8F6A109A4D3B.jpegBCF8EBC3-45C5-456D-828B-D7C9D343E2D5.jpeg775E3106-5FD7-4989-A1C1-6B801631510B.jpegCA070FED-046B-41B8-80E0-8D5C63917698.jpeg07433884-283E-4EC6-9E79-41A6E7098C5E.jpeg
 

cucvrus

Well-known member
11,473
10,434
113
Location
Jonestown Pennsylvania
Does it matter than the trans is in park? I can hook up the linkage again and shift it if does.
It does not matter. You can manually shift the selector on the transmission. Leaving it in PARK is great.


I must remove the starter correct?
Yes. You must remove the starter and the starter heat shield. Thus the starter support bracket must be loosened at the block. The heat shield is slotted so removal of the support bracket is not required.

How does the transmission kick down come out? I tried pulling on it but I couldn’t get it to come out. I thought there may be some retainer and I didn’t wanna break it, so I thought I’d ask.
No there is nothing holding it. Firmly grasp it and give it a tug from the capped part. Use a 8mm socket and unscrew the bolt retaining the wire to the case. Same as the 9/16" hex bolt on the bell housing. Remove that wire and clamp. Tie back the cooler lines and the kick down wire.

Are those two bolts on each side the only ones holding the trans mission on? I know those are the ones I gotta swap to the longer bolts, but I was wondering if there are any other bolts holding it on.

Yes you have 3 bolts to access on each side of the transmission bell. I have attached a picture of a TH400 bell. The picture is of an Olds or Pontiac bell as the Chevrolet has the rounded top of the bell. Bolts are the same. All 3/8" x 16 TPI. Use a 9/16" swivel socket and a long extension. Place the 4" bolts at 3, 9, 11, & 1 o'clock into the block to slide the transmission.

How should I turn the flywheel once I’m in to get to all the bolts?
You can use a screwdriver or opt to purchase a flywheel turning tool. When I first started out I removed the glow plugs and free wheeled the ring gear. I used a prybar to hold the ring gear while I loosened and tightened the bolts. they are 15MM hex head M10 X 1.5 bolts. 6 of them. After you remove all 6 just gently push the converter back a bit into the transmission.


What should I torque everything to? Blue Loctite?
60 ft lbs comes to mind. I would use a bit of the blue lock tite.


Sorry if any questions are dumb or redundant I just wanna go in there prepared and get this done right.

No dumb questions. Many people won't even try what you are doing. So I hope I am helping you along with anyone else that cares to tackle this job. I think you are doing a fantastic job and you are lucky that you can stay focused on the one job. My life is like a shot gun blast. I am happy with it but I must hit targets all over the place and keep things going. Not always ideal but it keeps me happy and busy. Never a dull moment.

Anything else I’m missing or need to know please let me know!
The flex plate/ flywheel / ring gear will fit 2 ways. Only 1 way is correct. The crank has a dowel pin in it to align the bolt holes correctly. By the way the bolts are 11/16" hex head. Shallow socket works. But be sure the counter weight on the flex plate is facing the engine and not facing backwards. The tightening of the flex plate to the crank is simple. The dowel pin is very tight on the flex plate engagement so don't be alarmed if it requires a bit of prying and coaxing to remove it after removing all 6 bolts. Same as installation. Get the bolts started and equally tighten the bolts. It is tight up there but you can do it. Use thread locker on the crank bolts. Torque 7/16 bolts in an even tightening sequence to 70 ft/lbs. I think you have tis covered. We are all here for you. Report back with any questions or issues. And of course the progress. Thank You. Happy July 4.
 

cucvrus

Well-known member
11,473
10,434
113
Location
Jonestown Pennsylvania
775E3106-5FD7-4989-A1C1-6B801631510B.jpeg
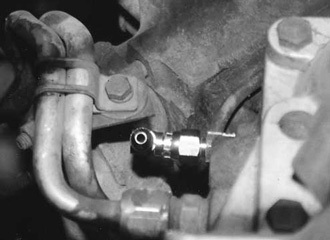
You are missing a 1/4 x 20 bolt and clamp on the oil cooler lines. They secure the lines to a bracket that should be on the left exhaust manifold rear. If you encounter alignment difficulty thread a bolt into the bracket and get the lines over the bolt and add a nut. Sometimes getting the bolt thru from the backside is near impossible. You may need to loosen the lines to get them aligned properly. In this case maybe a short piece of perorated pipe strapping would work great or a large P Clamp hammered flat.
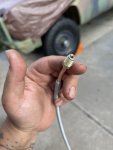
Get them secure while you are there. Heavy wire ties in an X as a last resort but secured.
 
Top
AdBlock Detected

We get it, advertisements are annoying!

Sure, ad-blocking software does a great job at blocking ads, but it also blocks useful features of our website like our supporting vendors. Their ads help keep Steel Soldiers going. Please consider disabling your ad blockers for the site. Thanks!

I've Disabled AdBlock
No Thanks