• Steel Soldiers now has a few new forums, read more about it at: New Munitions Forums!

  • Microsoft MSN, Live, Hotmail, Outlook email users may not be receiving emails. We are working to resolve this issue. Please add support@steelsoldiers.com to your trusted contacts.

Dark Seas M1008 Project

cucvrus

Well-known member
11,473
10,432
113
Location
Jonestown Pennsylvania
So I walked down the other side of my building and knocked on their door, this really ghetto looking dude came to the door and I asked him about it and at first he looked at me like I was nuts, but when I explained I was supposed to receive a few bolts for a truck project I'm working on, that's when he realized what I was talking about. He must've opened the package deemed it not valuable enough for his gain and tossed it. He told me they did get a package for the wrong person. Instead of taking it to the office like a good human to see if anyone with my name lived here and they just had the wrong address, he said they just threw it out weeks ago.

Really had to bite my tongue on that one, had a few things I wanted to say to him but didn't. Just disappointed in people.
OK. I will reship. No worries. It is an easy come easy go part. Besides I will get it shipped out next week. I received a fuel pump for a John Deere tractor. Not in my name but my address. I looked on Facebook and found a few people within the local area with that name. No report back. A few days later a man showed up at the door and ask if I received the package. I said I did. It was the weekend, and I was in the house. Everyone lived happily ever after. He lived in Harrisburg 523 same address. Different town.
 

DarkSeas

Well-known member
201
310
63
Location
Leland, N.C.
OK. I will reship. No worries. It is an easy come easy go part. Besides I will get it shipped out next week. I received a fuel pump for a John Deere tractor. Not in my name but my address. I looked on Facebook and found a few people within the local area with that name. No report back. A few days later a man showed up at the door and ask if I received the package. I said I did. It was the weekend, and I was in the house. Everyone lived happily ever after. He lived in Harrisburg 523 same address. Different town.
Sounds good cucvrus, thank you so much again man. Yeah I hold onto neighbors packages and knock on their door when I see them home or turn them into the main office to notify the correct recipient all the time. Don't know why that's not common sense. Especially for a package... like, come on man. Bolts in a package? That's likely important...
 

cucvrus

Well-known member
11,473
10,432
113
Location
Jonestown Pennsylvania
Sounds good cucvrus, thank you so much again man. Yeah I hold onto neighbors packages and knock on their door when I see them home or turn them into the main office to notify the correct recipient all the time. Don't know why that's not common sense. Especially for a package... like, come on man. Bolts in a package? That's likely important...
I am currently on a task. I will look for 3 more of the stud bolts. I didn't come across any during my body bolt search. but they are here.
 

DarkSeas

Well-known member
201
310
63
Location
Leland, N.C.
With cucvrus help, I should now have everything I need (including the time, sheesh, I think that was the hardest thing to find recently) to get the ball rolling on my project again. She's just been sitting patiently in the yard waiting for me. Time to rewire, bolt down, and get the motor to crank and run for me again.

I got tired of waiting for my self-proclaimed wiring guru buddy to come and help put the wiring back together, so I sat down the past week and really studied the wiring diagrams to make sure I understood how everything goes together and why. I've taught myself organic chemistry in the same manner, I don't know why I didn't take it upon myself to learn it on my own and just do it myself like I've always done. I guess I felt like it would feel like I'm insulting Tom a little that we don't need him or something, but it's been waiting for wiring for months now, so I'm doing it myself. I'm going to order a few replacement cables on the 24V side, because I don't like the stereo wire BS hackjob currently under the hood.

I'm engaged and planning a wedding is up to my fiance - my part is largely over, so I'm finally freed up to get back to it. (It's a big plus to have the CUCV as an excuse to get out of the house). I also got my daily driver fixed under warranty, so no more lost sleep and stress there.

Other buddy of mine is moved in and settled into his new house about 5 minutes down the road from me, way closer than he was before (by about 30-40 minutes) so I've got my mechanical wisdom and guidance available to me again as well.

Updates to come more frequently now.
 

DarkSeas

Well-known member
201
310
63
Location
Leland, N.C.
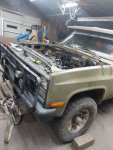
Yesterday was the first time I got to put a wrench to the CUCV in a long time. Got the guys together, we pulled the truck back inside the garage, got the hood off, and got to work. I hope all of you are doing well in your own lives, projects, and families!
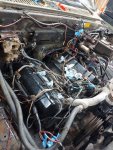
20220921_203632.jpg


Using my handy dandy sticky note sketch I was able to easily swap the incorrect valve cover bolts for studs (Thank you again, cucvrus. I got something in the mail for you should be coming any day now. They told me Wednesday at the earliest). I tightened them down. That checks the boxes for the valve covers: cleaned, painted, correct studs, new gaskets.


Screenshot_20220921-173622_Gallery.jpg

Tom and I ran the wiring harness looms down the sides of the valve covers and started putting our heads together on the little scribbled tape notes I put on every connector. Apparently he thinks my "to" and "from" labels are backwards. They make sense to me, at least, and being in an in tact harness, there's only so many places they could reach anyway.

Jr got the new power steering pump on after about 20 minutes of sweet talking it and telling me he didn't need my help holding the one side of the bracket on the bolt. That was a big step in my eyes, just gotta reattach the lines and clamps and refill the fluid now.
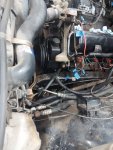
20220921_203643.jpg


Tom took the fuel lines to his shop today to make sure they're cleaned out.

I'm scratching my head about which alternator is which, they look mostly identical. I also need to get some battery cables (or get the materials to make my own). I'll probably get to that this weekend while everyone else is busy. Recommendations on source would be awesome, still trying to see if I can get a few cables professionally built or where to buy good wiring and connectors to do it myself. I'm thinking marine wire for their tin coating and corrosive resistance? I want to replace the lines between the batteries, between the batteries and bus bar, between the bus bar and starter, and maybe the wiring to the glow plugs between the 24V bus bar/resistor/GP relay.
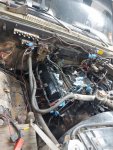
20220921_203655.jpg

Starter, intake, vacuum, and fuel lines still need to go on. I'm thinking it wouldn't be too far fetched to get the vacuum lines and starter on tonight. New temp sensor needs to go in and connector for it needs to be spliced to the harness. Gotta do all that before the intake goes back on anyway. We started pulling the old sensor out last night to replace it but it started flooding coolant out and we had no way to contain it quick, so we tightened it back up till we have something to catch all that coolant.

I'm just praying the starter relay just works like it did before when we turn the key, and that rewiring the glow plugs back correctly they'll start working as they should (not controlled by some button on the dash). Maybe even a wait light will come on the dash, that'd be nice. I do fear that the previous 12V hackjob changed something else I might be missing, but we removed about 90% of the wiring in the engine bay and replaced it (leaving things like the headlights), so I can't imagine I haven't found and removed all his mistakes by now. 24V starter 12V glow plugs at the turn of the key is all I'm really worried about. Not 100% sure where that relay even sits, under the dash?

There's a lot to do still. I know I keep saying that, but we put about 4 hours to it last night and we are meeting back there tonight to keep going at it. I'm a lot deeper into a motor than I've ever been or even seen before, but the boys are confident we're gonna get it running again. It's good to have good friends. And good friends that know old Chevies.
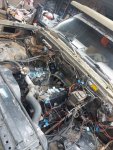
20220921_203638.jpg
 

DarkSeas

Well-known member
201
310
63
Location
Leland, N.C.
Hope a double post makes up for some lack of content. We got the temp sensor in the back of the motor swapped with a new one (I plugged the flood of coolant with my thumb for a couple minutes while the boys used a vise to separate the old sensor from the adapter.

We also got the fuel lines put back on. Ready for the intake and all to go back on once I figure out which bolts put the transmission sensor brackets back on haha.

I'll be sourcing some battery wiring over the weekend and figuring out which alternator is which over the weekend. Good progress so far though, I'm happy and we're all in good spirits over here.

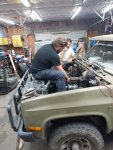
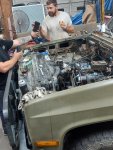
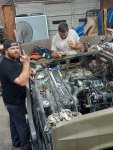
Some pics from tonight (was hard to get some, my phone was playing music wired to the stereo). That's Jr. in the black and Tom in the white.

20220922_184456.jpg20220922_191449.jpg20220922_191509.jpg

He realized I was taking their picture and gave me a little hell for it. The guy's like a big brother to me so it's all love. When we left we took Tom home then took our trucks out mudding, tearing things up with his little girls. Great end to the day and the week.

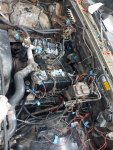
Probably should've painted those fuel lines... oh well.

20220922_204022.jpg20220922_204032.jpg
 

87cr250r

Well-known member
1,267
1,988
113
Location
Rodeo, Ca
Please tell us you didn't put gaskets under the valve covers. It sounds like you did.

For primary wiring it should comply with SAE J1128. Automotive wiring has a flexibility requirement, especially at low temperatures that other wiring doesn't need to comply with. Otherwise, there really isn't such a thing as marine primary wire. We mostly use MTW for hookup (wiring inside enclosures) in the marine industry.

There is wire sold as marine wire by brands such as Anchor. It's good stuff but it costs a premium, too.
 
Last edited:

cucvrus

Well-known member
11,473
10,432
113
Location
Jonestown Pennsylvania
Please tell us you didn't put gaskets under the valve covers.
I always use valve cover gaskets on every 6.2 diesel I work on and have to remove the valve covers. Part Details (drivparts.com)
I put a light coating of Permatex® The Right Stuff® Black 1 Minute Gasket Maker, 5 OZ – Permatex on each side and assure the valve cover is straight and not compressed and bent. Also make sure all the sealing surfaces are clean and thoroughly wiped clean of any oil and debris that could interfere with the sealing. Don't go ape on the M8 studs and bolts and all will be well.
Please order the correct intake gasket set for the J code 6.2 Part Details (drivparts.com)
Good Luck. It looks like you have made great headway. There is NO difference between Gen 1 and Gen 2. Gen 1 is on drivers side and has a push on tach sensor wire and the ground going to the engine intake stud. So if you want to know which generator came from Gen 1 position it should be the one missing the rubber cap on the RPM pick up stud. Once again my terminology may not be correct. I am a simple man and get by just fine. I think you have this in the bag. Let me know if you need any more smalls and large parts. I see the resistors are disconnected. IMHO I ran my CUCV's for over 28 years with a stock AC Delco 13G glow plug on a stock system and have lived happily ever after. Take Care.
 

DarkSeas

Well-known member
201
310
63
Location
Leland, N.C.
There is NO difference between Gen 1 and Gen 2. Gen 1 is on drivers side and has a push on tach sensor wire and the ground going to the engine intake stud. So if you want to know which generator came from Gen 1 position it should be the one missing the rubber cap on the RPM pick up stud. Once again my terminology may not be correct. I am a simple man and get by just fine. I think you have this in the bag. Let me know if you need any more smalls and large parts. I see the resistors are disconnected. IMHO I ran my CUCV's for over 28 years with a stock AC Delco 13G glow plug on a stock system and have lived happily ever after. Take Care.
I got my alternators checked and cleaned up and they gave them back to me looking pretty much identical. I know one is internally grounded and the driver side is grounded by wire to the motor... but the backsides look identical to me now.

I may try and swing by after work today to get a picture of the backs of each see if y'all can make sense of which is which. I may end up needing to take it back to the alternator shop and have them tell me which is the internally grounded one.
 

cucvrus

Well-known member
11,473
10,432
113
Location
Jonestown Pennsylvania
They are both the same. they should both have an isolated ground stud on them. there is no difference. The Gen 1 has a separate ground wire from the 1/4" case mounted stud on the alternator to the M10 stud on the coolant cross over manifold. The other Gen 2 on passengers is just wired into the stock wiring harness. The connection is 1/4" hole and the other has a an M8, 5/16 eyelet. I hope that helps. Terminology may differ. I am sure someone has a picture. It's a Simple Task. Good Luck.
 

DarkSeas

Well-known member
201
310
63
Location
Leland, N.C.
They are both the same. they should both have an isolated ground stud on them. there is no difference. The Gen 1 has a separate ground wire from the 1/4" case mounted stud on the alternator to the M10 stud on the coolant cross over manifold.
This sounds like what I'm seeing on one of the back of the generators. There is a small (thin, didn't check the size yet, but it looked about quarter inch to me) stud that sticks out about an inch off the back of one of the cases and the other one doesn't have this stud coming out at all. This is intriguing me. I'll go back after work and get some pictures.

To haunt all of you, I might take a picture of what's lurking underneath my dash while I'm there. Will likely have to keep the GP on a manual button for now, at least get the motor to crank first for some motivation before I dive into the mess of wiring underneath the dash to set the GP circuits straight. While we were putting the new GP circuit temp sensor in last night, I started to trace the old sensor wires down the GP harness into the firewall and under the dash to see what it looked like (and to replace it, I have a new GP harness already). I didn't find the other end to it, where the card would be. I found a rats nest of cut wires and frayed wires, different colored wires connected by wire nuts and a mess of electrical tape stringing things up and together.

Previously I noticed that all the GP harness wires in the engine bay are frayed to the point where I couldn't understand how they even worked... well, I got my answer last night. They didn't work, they weren't hooked up to anything. He was just running 12V directly to the glow plugs through a button on the dash, and, for now at least until we get the motor to crank, I'm going to leave it that way.

The current GP setup is as follows:
He had 12V running from the batteries to the bus bar, cut the resistor block wires (which you can see in the pictures from the past couple days) and ran a wire directly from the 12V bus bar to the engine wiring harness block. From the block, 12V goes to the dash button which pushes 12V to the GP relay and the GP. Not 100% sure how he got 12V through the relay from the button, I wonder if he just put the 12V input on the bottom where the GP from the wiring harness connect to throw 12V directly to them, just using the relay as a mounting point?

Tom was telling me, typically that solenoid (GP relay) would get 12V in at the top, and then a switch/sensor (the two wires on the sides of the GP relay) would work the solenoid to put 12V through to the bottom where the wiring harness GP connection was. I think I took pictures before we started, might have to look closely at them to see if I can figure out what he was doing, because those sensors and switch wires definitely were not in service. I'm think I'm pretty sure that he must've just used the relay as a mounting point and connected the harness GP connector to the 12V wire coming off the manual button.

Since we're putting her back to 24V, I'll be employing the resistor block again to cut 24V to 12V to the engine wiring harness block (instead of the GP relay as it shows on the diagrams). It'll be temporary though, don't worry. Right now the priority is getting the motor to start again. Then I will set the GP circuit back up the correct way and likely replace all the dash wiring when it's nice and cold outside and I can't feel my fingers.
 

87cr250r

Well-known member
1,267
1,988
113
Location
Rodeo, Ca
I did. The valve covers were leaking oil, I replaced the bad gaskets with new.

Don't use gaskets. Use the ultra black silicone. If you use the cork valve cover gaskets you'll need to retorque them periodically and you can't do this because the fuel line clamps are in the way. To add insult to injury, when you try to take the nut off the stud is loose so you won't be able to break the nut free. This will cause you to bend your fuel line clamps.

A little medium strength Loctite on the studs is a good idea as well. You don't want them coming loose when when you try to remove the nut.

There are quite a few gaskets in the kit that should go straight to the garbage. The valve cover gaskets, the oil pan gaskets and the water pump mounting plate gasket, and the exhaust manifold gaskets.

These engines were ahead of their time using a mixture of silicone and anaerobic gasket makers. In fact, you only really need 4 gaskets for the engine. That's the head gaskets, intake manifold, water pump (gasket sets impeller clearance), and vacuum pump. Otherwise, if it's sheet metal use silicone. If it's cast or plate use anaerobic.
 
Last edited:

DarkSeas

Well-known member
201
310
63
Location
Leland, N.C.
Don't use gaskets. Use the ultra black silicone. If you use the cork valve cover gaskets you'll need to retorque them periodically and you can't do this because the fuel line clamps are in the way. To add insult to injury, when you try to take the nut off the stud is loose so you won't be able to break the nut free. This will cause you to bend your fuel line clamps.

A little medium strength Loctite on the studs is a good idea as well. You don't want them coming loose when when you try to remove the nut.

There are quite a few gaskets in the kit that should go straight to the garbage. The valve cover gaskets, the oil pan gaskets and the water pump mounting plate gasket, and the exhaust manifold gaskets.

These engines were ahead of their time using a mixture of silicone and anaerobic gasket makers. In fact, you only really need 4 gaskets for the engine. That's the head gaskets, intake manifold, water pump (gasket sets impeller clearance), and vacuum pump. Otherwise, if it's sheet metal use silicone. If it's cast or plate use anaerobic.
I guess I'll cross that bridge when I get to it. I already have new gaskets on the valve covers. My biggest issue has been the wiring though, if the gaskets right now are temporary and start leaking again, I'll need to go back into it later. That's totally fine with me. The black silicone stuff is what I found under the valve covers. It was tattered/split/crumbling apart in spots and oil was leaking down the entire passenger side of the motor. Not sure how old it was or anything, or if it was done correctly, but I know the stuff you're talking about.
 

DarkSeas

Well-known member
201
310
63
Location
Leland, N.C.
I was daily driving my truck. I had to pull the valve covers and remove the gaskets within 6 months.
Oh yeah no no, this won't be my daily. I'm keeping my daily (I drive a 2013 GMC, it's unreliable but more reliable than my CUCV currently). I'll likely be taking this truck out on weekend cruises down backroads. Mess around with the 4wd till I break something, drag it home and call it my next project. Maybe I'll get more luck and life out of the gaskets I've got on now. I guess we'll see lol, you can be the first to tell me "I told you so"
 

cucvrus

Well-known member
11,473
10,432
113
Location
Jonestown Pennsylvania
That is why every good mechanic has a set of thin tappet wrenches. May i recommend that if you work on your CUCV you have at least a thin 13MM and a thin 15MM wrench. I had a friend mill down a set of inexpensive Craftsman wrenches in metric and standard. Just the open end side. Saved a lot of cussing and twisted/broken wire and clamp connections. All vehicles use that bolt to stud application and it is made easy with an inexpensive set of wrenches. Just saying. I never had to retighten the valve cover gaskets after I installed them. Glued on both side with The Right Stuff. And I probably have an under dash wiring harness and a parts one if you need one. Let me know. I can cut connections out of one or sell you the entire harness. Good Luck. Steady as she goes.
 
Top
AdBlock Detected

We get it, advertisements are annoying!

Sure, ad-blocking software does a great job at blocking ads, but it also blocks useful features of our website like our supporting vendors. Their ads help keep Steel Soldiers going. Please consider disabling your ad blockers for the site. Thanks!

I've Disabled AdBlock
No Thanks