• Steel Soldiers now has a few new forums, read more about it at: New Munitions Forums!

  • Microsoft MSN, Live, Hotmail, Outlook email users may not be receiving emails. We are working to resolve this issue. Please add support@steelsoldiers.com to your trusted contacts.

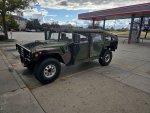
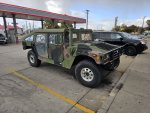
2000 HMMWV M1123 Project

mow***com

Active member
72
205
33
Location
Salt Lake, Utah
If soon the engine side it is # 3C
To replace it all you would need to do is run a wire from the ground lug on the alt or any other major ground to the firewall.
Most likely something heavy shorted +24V to the body and that fried the wire, the problem now is how many other wires in the harness were affected by the red hot wire :eek:
It is from the harness that comes from the engine side and bolts to the body, just behind the fuel filter.
I have already bypassed it then, by grounding the alternator ground lug to the rear of the engine block, then again, to the body ground lug behind the fuel filter.

I haven't seen any other evidence of harm to any other wires in the harness, but I will keep any eye on things as I continue testing.
Truck just rolled over the 44k mile mark. Yay, small achievements.
 

Mogman

Moderator
Staff member
Moderator
Steel Soldiers Supporter
7,017
9,694
113
Location
Papalote, TX
This is exactly the type of ground loop issue I fear with the "supplemental" harness, they grounded the entire body through a 12ga wire
It is from the harness that comes from the engine side and bolts to the body, just behind the fuel filter.
I have already bypassed it then, by grounding the alternator ground lug to the rear of the engine block, then again, to the body ground lug behind the fuel filter.

I haven't seen any other evidence of harm to any other wires in the harness, but I will keep any eye on things as I continue testing.
Truck just rolled over the 44k mile mark. Yay, small achievements.
BTW there are two ground wires on the other side of that bolt/firewall behind the inst. panel that should be looked at
 

mow***com

Active member
72
205
33
Location
Salt Lake, Utah
This is one reason that I don't really like the grounding kits and prefer to now leave the system alone. Unless of course, something might need attention.
I am using 6 gauge wiring and individual wiring straps for my ground connections.

So far, I've just done the body ground behind the fuel filter and the ground to the alternator.
Part of me wants to ground the glow plug box again. But, part of me wants to leave well enough alone.

I was wondering about the engine fan in this truck too.
I swear that I can unplug the TDS, and the fan clutch engages and runs. Then, plug it back in and hear the clutch disengage.
However, when pushing the truck harder, the temps kind of just get up to 220° and just does it's own thing.
It doesn't cycle down to 200° and disengage like the M998 did.
It mostly just engages the fan, the fan runs and the truck very very slowly cools down. It usually only cools down to like 210-215° and relaxes there.
This makes me wonder if my radiator might be internally clogged, because I can't imagine the system runs this warm nearly all the time running.

I'll report more later. Thanks, everyone.
 

mow***com

Active member
72
205
33
Location
Salt Lake, Utah
This is exactly the type of ground loop issue I fear with the "supplemental" harness, they grounded the entire body through a 12ga wire

BTW there are two ground wires on the other side of that bolt/firewall behind the inst. panel that should be looked at
Okay... Mogman. You posted this picture a while back. It shows the ground wire from the alternator lug, and the various places it ties into the harness, plus the grounds it supplies to each component.

Is it possible you have a greater expanded view of this diagram? It would very much help me individually bypass each ground from the broken harness ground wire.
Much appreciated, if you get a moment.
 

Attachments

mow***com

Active member
72
205
33
Location
Salt Lake, Utah
So, in going through the M1123 diagram.... Am I correct in seeing that the body lug behind the filter supplies ground to the engine harness and not the other way around?
I was assuming the ground link was coming from the engine harness side, primarily from the PCB.
However, it looks like the link is being made from the body lug, behind the fuel filter?
If so, deleting the harness ground should bypass ground to the engine harness?
The ground that I am seeing that meets the body lug is 57B, from the body connector and I don't see a ground wire coming from the PCB, to engine connector.

If I am wrong, please correct me. I enjoy looking at the schematic, but I am not perfect at following them. Thanks again.
(Edit): The other ground wire that I see, coming from the engine harness, to the TDS and Cadillac valve is 93B. This is where I think to myself. Why not just cut the 93B wire that was supposed to supply ground to the TDS/Cadillac valve and ground the 93B wire to the PCB mounting bolt?
I can't even understand where the ground is supplied to 93B, at the TDS right now, since it is cut from the body lug.)
 
Last edited:

Mogman

Moderator
Staff member
Moderator
Steel Soldiers Supporter
7,017
9,694
113
Location
Papalote, TX
The engine and drivetrain is grounded through a 1/0 ga cable to the battery box, the body harness ground is provided by wire #3A that is bolted to the engine block.
EDIT, the EESS is getting its ground through wire #57B which is part of the body harness.
What is labeled as a "body ground" is actually acting as a passthrough for the ground to the inside of the cab for the body harness ground, why it is SO important to maintain that connection, there are no devices that depend on the body for ground, I assume the connection to the actual body was included for static voltage and radio noise purposes it was very short sided of them to use such a small wire as if say the 24V pos. terminal was to come into contact with the battery box that 12ga wire would get all that current.
 
Last edited:

Mogman

Moderator
Staff member
Moderator
Steel Soldiers Supporter
7,017
9,694
113
Location
Papalote, TX
I would certainly pull the inst. panel and look to see if it was a short inside that caused the ground wire #3C to fry which is pretty likely unless you had/have a 400A alt in which case it could be the harness that passes behind the alt.
EDIT::: it would be more correct to call the ground connection on the inside of the firewall a body harness ground, all the lights, horn, inst even the blower motor grounds through the "body ground" passthrough and that 12ga #3C wire, man that is asking allot for one #12 wire.
So if 3C was fried then you likely had issues with all the body devices like lights etc, there are probably some places that are providing unintentional grounds though, like the throttle cable etc.
 
Last edited:

Mogman

Moderator
Staff member
Moderator
Steel Soldiers Supporter
7,017
9,694
113
Location
Papalote, TX
ALSO the frame has no ground, the engine is isolated by its mounts and so is the body, this is why if the starter drops off its mounts (yes it happens) and the pos. terminal on the starter contacts the frame all that current goes through things that are providing unintentional grounds to the frame like the parking brake cables, brake fluid lines, shifter linkage and also the u joints can get fried.
When I built the DuraVee I grounded the frame on both sides of the engine with 1/0 cable to the engine and the body got 4, #2 grounds, two to the engine and two to the frame, I still ran grounds to all the devices and nothing depends on the body for ground.
Now if the 12V or the 24V system gets grounded to the frame or the body all sorts of bad things are still going to happen but it should not fry any wires in the hand made wire harnesses.
 
Last edited:

mow***com

Active member
72
205
33
Location
Salt Lake, Utah
ALSO the frame has no ground, the engine is isolated by its mounts and so is the body, this is why if the starter drops off its mounts (yes it happens) and the pos. terminal on the starter contacts the frame all that current goes through things that are providing unintentional grounds to the frame like the parking brake cables, brake fluid lines, shifter linkage and also the u joints can get fried.
When I built the DuraVee I grounded the frame on both sides of the engine with 1/0 cable to the engine and the body got 4, #2 grounds, two to the engine and two to the frame.
Now if the 12V or the 24V system gets grounded to the frame or the body all sorts of bad things are still going to happen but it should not fry any wires in the hand made wire harnesses.
I appreciate the replies. This is what I have done, to keep connections between certain components.
The alternator in my diagram has a grounding strap that goes to the front of the engine and has no other grounds to the harness.
That being said, I have made my own 6 gauge ground from the alternator negative lug to the rear of the block.

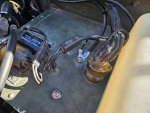
I have also take 93B from the engine harness side of the TDS and grounded it to the PCB mounting bolt, which has also now been grounded to the rear of the engine blockas well. This is how things look.

Edit: Since, I am away from the shop, these are temporary fixes. I will use correct sized connectors when I get the truck back to the building.
 

Attachments

Mogman

Moderator
Staff member
Moderator
Steel Soldiers Supporter
7,017
9,694
113
Location
Papalote, TX
Just make sure you have a good ground to the bolt going through the firewall and inspect the wiring behind the inst panel, I think you said you ran a #6 to that stud which is good..
 

mow***com

Active member
72
205
33
Location
Salt Lake, Utah
Just make sure you have a good ground to the bolt going through the firewall and inspect the wiring behind the inst panel, I think you said you ran a #6 to that stud which is good..
Life is pretty funny sometimes... Path of least resistance kind of thing.
Tomorrow, I will pull the instrument panel and inspection the firewall bolt.
I remember building the instrument panel and don't remember any funny business behind there. But, it always pays to be thorough.

Lastly, the truck seems to be clearing up in the tailpipe area. But, it feels like slow progress. There are times in traffic, where sitting in drive puts a load on the system and it wants to cut out.
Only raising the idle keeps it from stalling out. Part of me wants to just remove the IP cover, clean the inside of the IP and be done with that.
I just have a feeling that it is gummed up.

EDIT: I may have been too quick to condemn the transmission pan gasket. While starting the truck on an incline, I again noticed ATF in my driveway.
This time, I was able to get a better look, with a flashlight and the transmission hose above the pan wasn't fully tightened and it was leaking down onto the front of the transmission pan/exhaust area.
Having tightened it, I don't see any more leaks. But, I will keep an eye on it.
 
Last edited:

mow***com

Active member
72
205
33
Location
Salt Lake, Utah
Grrrr!!!! Just when I am working on one step forward.... Bam! Two steps back.

Fortunately, for me. It looks to be something that emerged from a bad manufactured part.
As I was driving to work today, I noticed the smell of coolant. I went over my hoses recently, so I was a tiny bit concerned.

When I made it to work, I popped open the hood to see coolant steaming all over the engine bay.
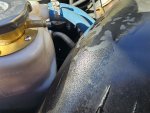
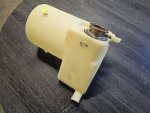
The pressure was too great, so I had to wait a few minutes. But, quickly realized that a pin sized hole had pierced through the seam of the new coolant tank that I bought a few months back.
WTF.... Thankfully, it didn't do any damage. But, I am beyond upset that something so odd, could have nearly taken out my engine.

I've ordered a new one and should probably ordered two, with my luck.
The truck is parked, until I get the cooling sorted. This at least gives me time to get it ready for winter.
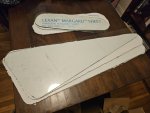
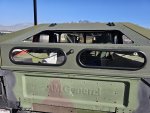
Since, I don't have machinery and don't have cool saws... I free cut my polycarbonate with a budget hand router and will clean up the final edges, with that same router. Hopefully, they get the job done.

I was able to get the slantback bolted all the way down, to accept some windows. I'm pretty sure I would have already broken glass, driving around like I do.
Lastly, the engine feels like it is slightly getting better. It is holding load better near idle and I have a small amount of faith that a month or so, might bring something called trust.
 

Attachments

Milcommoguy

Well-known member
Supporting Vendor
1,713
2,279
113
Location
Rosamond, CA
Grrrr!!!! Just when I am working on one step forward.... Bam! Two steps back.

Fortunately, for me. It looks to be something that emerged from a bad manufactured part.
As I was driving to work today, I noticed the smell of coolant. I went over my hoses recently, so I was a tiny bit concerned.

When I made it to work, I popped open the hood to see coolant steaming all over the engine bay.
The pressure was too great, so I had to wait a few minutes. But, quickly realized that a pin sized hole had pierced through the seam of the new coolant tank that I bought a few months back.
WTF.... Thankfully, it didn't do any damage. But, I am beyond upset that something so odd, could have nearly taken out my engine.

I've ordered a new one and should probably ordered two, with my luck.
The truck is parked, until I get the cooling sorted. This at least gives me time to get it ready for winter.
Since, I don't have machinery and don't have cool saws... I free cut my polycarbonate with a budget hand router and will clean up the final edges, with that same router. Hopefully, they get the job done.

I was able to get the slantback bolted all the way down, to accept some windows. I'm pretty sure I would have already broken glass, driving around like I do.
Lastly, the engine feels like it is slightly getting better. It is holding load better near idle and I have a small amount of faith that a month or so, might bring something called trust.
Recycled plastic milk bottle.
Here's the test for the imported tank from a far far away land of fire crackers. The magnet test to the filler neck. If it sticks... It sucks - blows - cracks - leaks. or will soon. If it is really white plastic... A fake. Somewhere I posted a write up to the same problem here years back and can't find it.

AMG tanks are a dull dingy yellow white. The real deal are brass and soldered at the relief coupling. Filler neck is brass.

Leave in on the front porch for pick up, CAMO

Found IT>
 
Last edited:

Coug

Well-known member
Steel Soldiers Supporter
3,003
4,420
113
Location
Olympia/WA
Or just do away with the plastic tank entirely and buy one of the aftermarket aluminum ones. They used to be about the same price as the real coolant tanks, but I think someone got rid of all the competition building them somehow and upped the price.

As was just pointed out, too bright of a white and too shiny of a neck, and at a price that seems too good to be true is pretty much guaranteed to be a fake.
I believe one company selling the import chinese coolant tanks finally went and pressure tested their inventory after a few failed for customers, and pretty much every single tank they had failed.
 

mow***com

Active member
72
205
33
Location
Salt Lake, Utah
I will just find an aluminum one. Still can't believe the price on them though.
I bought the cheapest one I could find, to keep costs down.
An easy regret, after the fact. Live and learn.

At least the leak is small and I can still run the truck for a short time period each day.
The truck is puffing less and less black smoke as I drive around now. Letting the truck sit at the moment sounds terrible.
 

mow***com

Active member
72
205
33
Location
Salt Lake, Utah
Yesterday was a little bit of a pain... With the combination of cutting windows and trimming them for fitting, I am also drilling a custom winch plate for my 20ft trailer.
Having done a winch plate a few times, I swear this will be my last time, probably. Hand drilling all the holes and I've been up all night.

So, a small update. Got the little rear round windows in. Still have to trim and fit the side pieces.
I may try to fit the glass in the slantback portion, due to the flex on the 1/4 polycarbonate. Either that, or I may have to add some slight reinforcement.
We'll see. I'll be crossing that bridge soon enough.
 

Attachments

mow***com

Active member
72
205
33
Location
Salt Lake, Utah
Time for another update... A big thanks to Camo, for helping me with the AM General coolant surge tank.
I was going to buy an aluminum tank and be done with it. But, the AM General surge tank allowed me to save a little money right now and it certainly helps.

So, the truck is back on the road. In fact, it just crossed over the 500 mile mark, since I started my testing.
In that time, I've met a few surprises and have had to overcome some fueling issues.
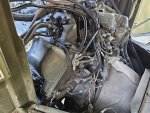
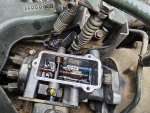
That being said, I finally got to removing the top cover of the IP. Since, I had already drained the tank multiple times, have all new injectors, and soft fuel lines. I wish I would have done this earlier. Because, it has some growth build up that is less than pleasant.

So, I spent nearly the entire day, cleaning it out and extracting the fluids.
Then, filled it up with clean diesel and went along my way.
Now, I am running biocide, alongside injector cleaner in my fuel tank.
This is due to the engine bogging down under load from putting the transmission in gear.
I've been able to mostly overcome it, by raising the idle up.
But, it hasn't really gotten any better. Nearly everything seems to point towards the fuel metering valve, inside the IP.
I took a before picture. But, of course forgot to take an after picture.
Next week, I will remove the IP cover and show what it looks like after a week of driving it again.

Got most of the windows in. The final rear window arrives any day and I plan to cut it as fast as possible, to get it in the truck. It is starting to get cold out and I want to be warm in the truck.
Time for a new dog house seal and whatever I can do to seal the cab away from the engine.
I have an exhaust leak on the passenger side and it is time to investigate that also.
Lastly, the little clip that holds the rod on my brake switch, to the brake pedal has come off.
So, it looks like I am without brake lights, until I get another clip, or find a different solution.
One side of the rod has a hole drilled, with a clip through it. I thought to myself, why not just do that and be done with it. We will see....

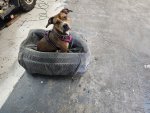
Bonus: I have been trying to adopt a pup. So, wish me luck that I get a Humvee navigator to ride along with me.
 

Attachments

Mullaney

Well-known member
Steel Soldiers Supporter
Supporting Vendor
7,769
19,877
113
Location
Charlotte NC
Time for another update... A big thanks to Camo, for helping me with the AM General coolant surge tank.
I was going to buy an aluminum tank and be done with it. But, the AM General surge tank allowed me to save a little money right now and it certainly helps.

So, the truck is back on the road. In fact, it just crossed over the 500 mile mark, since I started my testing.
In that time, I've met a few surprises and have had to overcome some fueling issues.
That being said, I finally got to removing the top cover of the IP. Since, I had already drained the tank multiple times, have all new injectors, and soft fuel lines. I wish I would have done this earlier. Because, it has some growth build up that is less than pleasant.

So, I spent nearly the entire day, cleaning it out and extracting the fluids.
Then, filled it up with clean diesel and went along my way.
Now, I am running biocide, alongside injector cleaner in my fuel tank.
This is due to the engine bogging down under load from putting the transmission in gear.
I've been able to mostly overcome it, by raising the idle up.
But, it hasn't really gotten any better. Nearly everything seems to point towards the fuel metering valve, inside the IP.
I took a before picture. But, of course forgot to take an after picture.
Next week, I will remove the IP cover and show what it looks like after a week of driving it again.

Got most of the windows in. The final rear window arrives any day and I plan to cut it as fast as possible, to get it in the truck. It is starting to get cold out and I want to be warm in the truck.
Time for a new dog house seal and whatever I can do to seal the cab away from the engine.
I have an exhaust leak on the passenger side and it is time to investigate that also.
Lastly, the little clip that holds the rod on my brake switch, to the brake pedal has come off.
So, it looks like I am without brake lights, until I get another clip, or find a different solution.
One side of the rod has a hole drilled, with a clip through it. I thought to myself, why not just do that and be done with it. We will see....

Bonus: I have been trying to adopt a pup. So, wish me luck that I get a Humvee navigator to ride along with me.
.
Cute Puppy!
Dang right... You NEED a co-pilot for sure.
 
Top
AdBlock Detected

We get it, advertisements are annoying!

Sure, ad-blocking software does a great job at blocking ads, but it also blocks useful features of our website like our supporting vendors. Their ads help keep Steel Soldiers going. Please consider disabling your ad blockers for the site. Thanks!

I've Disabled AdBlock
No Thanks