• Steel Soldiers now has a few new forums, read more about it at: New Munitions Forums!

  • Microsoft MSN, Live, Hotmail, Outlook email users may not be receiving emails. We are working to resolve this issue. Please add support@steelsoldiers.com to your trusted contacts.


84 m1009 cucv chevy blazer build-up

chevymike

Well-known member
581
451
63
Location
San Diego, CA
Agree, uploaded to the site pics means they will still be around in years to come. Linked pics are always at the risk of an account loss, change in hosting service, etc.
 

2INSANE

Well-known member
722
819
93
Location
Belgrade, Montana
Today I decided to not use the rebuilt badger diesel fuel pump for this build. I had to advance it about 1/2 inch to get the motor running right. I figure it was a crap rebuild.

Apon further inspection, the badger diesel advance piston was sticking causing havoc on the fuel timing. In the pictures you can see the huge gap between the piston and the rocker arm adjustment screw.

Unfortunately, Badger Diesels 1 year warranty is up so I decided to use the low mile J code injection pump that originally came with this surplus motor. Here is picture of the advance piston rod in its correct position not sticking.

Since I have the stock J code Injection pump out of the spare parts box, I turned up the fuel screw from the side access plate 1/4 turn clockwise as required for the banks sidewinder turbo.

I was going to replace the throttle rubber O-Rings but the Allen wrench bolt head broke from too much corrosion. I’ll attempt to fix it tomorrow and replace the bolt with the badger diesel IP good one.

That is 2 bad rebuilt IPs from 2 different companies. My best of luck with IPs is just using the stock low mile ones and replacing the throttle O-rings and they are as good as new.
 

Attachments

Last edited:

Sharecropper

Well-known member
Steel Soldiers Supporter
1,817
948
113
Location
Paris KY
I have had excellent service from Huckstorf Diesel in Wisconsin. John Huckstorf is, in my opinion, extremely knowledgable on these pumps and can set the fuel at whatever flow rate you want. He can also furnish you any part you need, such as hybrid lines to marry a mechanical punp to newer 6.5 injectors. Hope this helps. https://www.hdiesel.com/
 

2INSANE

Well-known member
722
819
93
Location
Belgrade, Montana
Using no gaskets, I installed the freshly refurbished Banks fuel pump plate with bung and the almost new mechanical fuel pump with push rod.

I will only be doing one side of the motor at a time to reduce dust, bugs and whatever.

Removed the passenger valve cover. The seal looked great with no leaks or blow outs.

I removed the pressed rocker arms and push rods placing them on paper towels on my work bench in order of how I removed them. Marked the top of the paper towel as passenger rear for reference.

Then I removed my labeled sensor and glow plugs placing them on the paper towel in order. Looks like the sensor was leaking oil threw the threads. Will have to use thread tape when I put it back on.
 

Attachments

2INSANE

Well-known member
722
819
93
Location
Belgrade, Montana
Next I unbolted the Arp head stud nuts and took out the washers placing them on my work bench. Every Arp stud rocked in place after removing the nuts and washers.

I identified 5 coolant leaks coming from 5 Arp studs. 3 under valve cover and 2 on outside of valve cover. It is my right to say the Arp thread sealer sucks azz! I will use Optimum Black next time I install the studs.
 

Attachments

Last edited:

2INSANE

Well-known member
722
819
93
Location
Belgrade, Montana
With the head still on, I removed the Arp studs. I did not have to double nut them because after I made them hand tight, I turned them 1/4 turn clockwise.

Inspecting every stud, I can see the Arp thread sealer failure. It looks as if it chemically disintegrated from the coolant. Also was still gooey like straight from the tube. I then placed all the studs on my work bench for future cleaning and use. Some of the studs threads didn’t even have the sealer on them anymore.


I don’t like pry heads off if I can. So I used a rubber mallet and gently hit the sides of the heads to help loosen them.
 

Attachments

2INSANE

Well-known member
722
819
93
Location
Belgrade, Montana
The rubber mallet method did not work this time to take the head off. I believe the copper spray acted like a glue. I could not even pry them off. I had to use a chisel and gently hammer it between the block and head to break the seal. She is off with no damage from the chisel. I put the head outside on my other toolbox.

Cleaning up gaskets can be nasty work. I like to use proper Ppe when working with any harmful substances.

I stuffed paper towels in the 3 cylinders and lifter compartment so gasket and angle grinder material getting in the motor is minimal.

Using a razor blade and my shop vac, I carefully removed as much gasket I could get from the block.
 

Attachments

2INSANE

Well-known member
722
819
93
Location
Belgrade, Montana
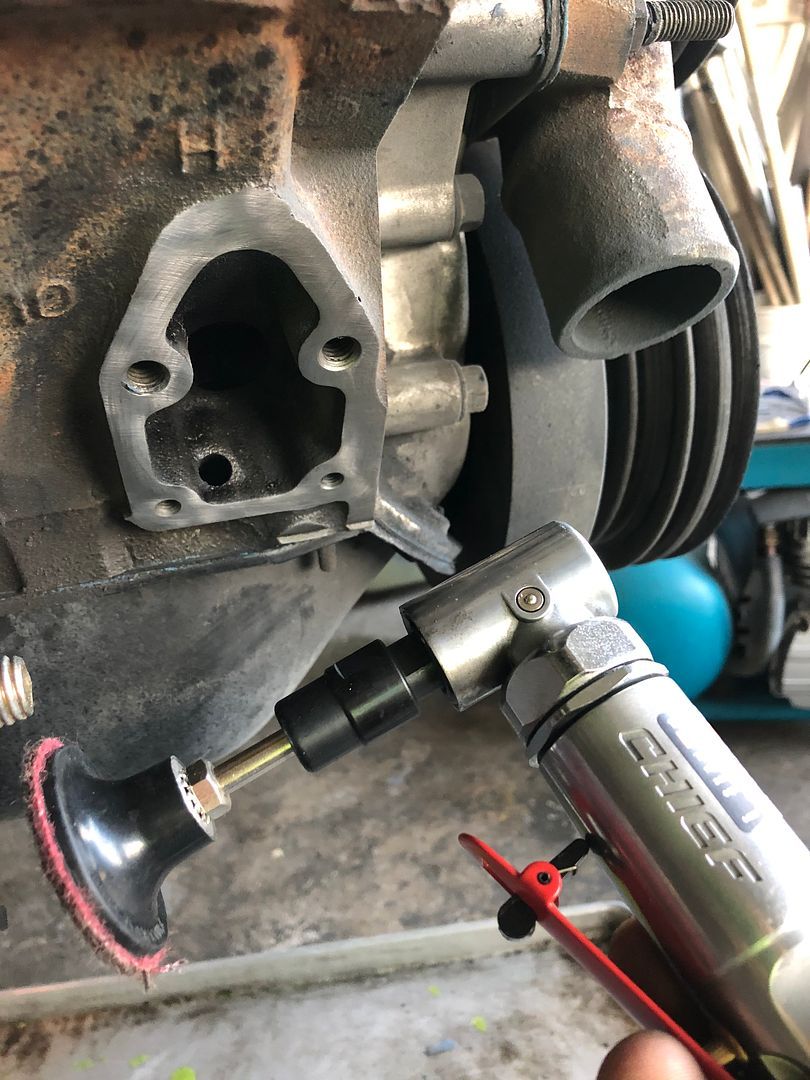
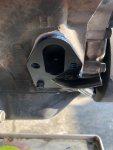
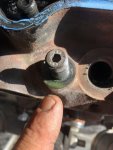
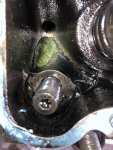
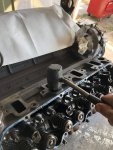
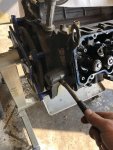
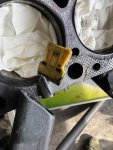
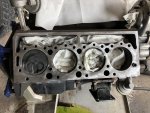
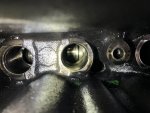
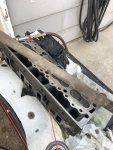
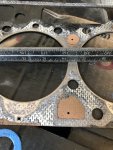
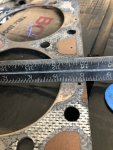
Once all the gasket material was removed with the razor blade, I used paper towels and brake cleaner to remove oil and coolant from the block.


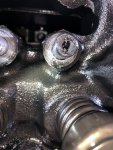
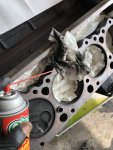
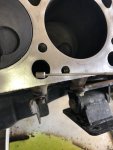
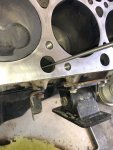
Then using my shop vac and angle grinder, with a Scott’s pad on it, I super cleaned the block where the head gets bolted.


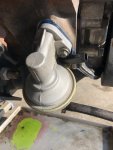
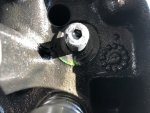
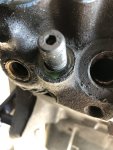
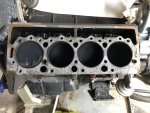
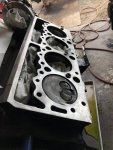
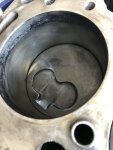
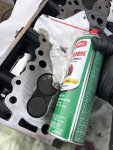
I sucked up any material with the shop vac, took out the paper towels and wiped the area and cylinders with some oil to prevent rust while I wait for the new lifters to arrive. Don’t worry I’ll clean the oil off when it’s time to install the head gaskets.


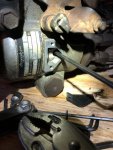
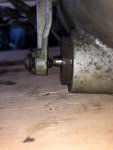
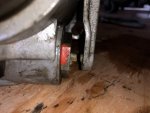
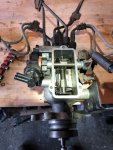
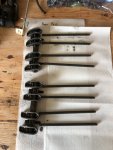
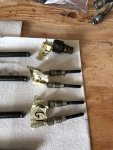
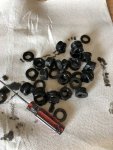
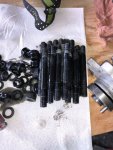
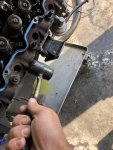
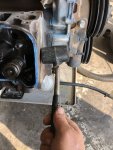
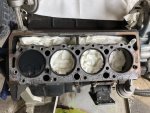
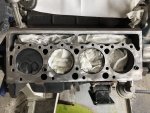
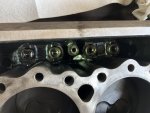
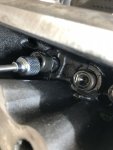
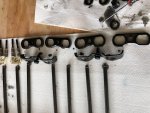
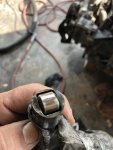
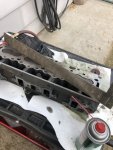
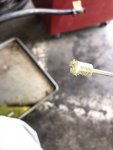
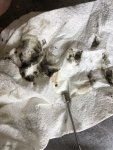
I then removed the lifters mounting plates, put the plates and bolts in order of how I removed them on my work bench. Removed each lifter with a magnet. Inspected each lifter roller and the cam where each lifter was. The rollers and cam looked almost new with minimal wear. Tossed the lifters in the garbage.
 

Attachments

2INSANE

Well-known member
722
819
93
Location
Belgrade, Montana
For the passenger head I used the same method to clean it as I did the block. Razor blade all gasket material off while using shop vac to get material. Cleaned with paper towel and brake cleaner. Used the angle grinder Scott’s medium grit pad as much as I could without jeopardizing losing Metal. I cleaned again with brake cleaner and paper towel. Used compressed air, brake clean and blew out all holes. Then cleaned the head surface again with paper towel and brake clean.

Precups look great with no cracks.

No cracks between valves... Yet...

Checked to see if it was warped. Looked good to me.
 

Attachments

2INSANE

Well-known member
722
819
93
Location
Belgrade, Montana
To clean the head bolt holes I used a 12x1.75 tap that fits perfect! After each hole I cleaned the tap and hole with brake clean. Thank the Lord I have a full respirator that blocks all fumes, gas and vapors.

I did 5 passes with the tap and cleaner with each hole.

Each time I inspected the tap and looked for metal. None!

Last time I used a thread chaser that did not seem to work very well and took many hours to get the holes clean.
 

Attachments

2INSANE

Well-known member
722
819
93
Location
Belgrade, Montana
There are a lot of rumors about 6.2 and 6.5 head gaskets. I had to see for myself which one I thought would be the best option for a turbo application.

I went into O’Reilly auto parts and compared both head gaskets.

The top gasket is for a 84 6.2.

The bottom is for a 93 6.5.

The cylinder holes on the 6.2 look uneven and not a perfect circle.

The cylinder holes on the 6.5 look like a perfect circle.

The 6.5 fire rings look stronger and a tad thicker.

The 6.5 seems to have more material between cylinders then the 6.2.

When flipped over, the 6.5 has more metal protection material then the 6.2.

When putting them together to compare, all holes are exactly the same except the 6.5 has this small hole on the end where the 6.2 does not.


Back at home I measured the cylinder holes of the old 6.2 head gasket and the new 6.5 head gasket. They both measured the same except the uneven part on the 6.2 cylinder ring was 1mm wider and the rest of the ring was the same.

My choice in head gaskets for the 6.2 is plain as day. IMO the 6.5 head gasket is more superior.
I would even say that the 6.5 head gaskets would be best even for N/A non turboed 6.2 diesels

If the banks turbo ever fails, you can not just call banks and get a replacement. They don’t make the turbos anymore, I have 2 other turbos I can replace it with if it fails. (GM5/Hx35w) So I am thinking of the future, potentially more boost with a bigger turbo if it comes to that.
 

Attachments

2INSANE

Well-known member
722
819
93
Location
Belgrade, Montana
Another rumor in regards to head gaskets I would like to put to rest once and for all.

The claim I have read dozens of times to use a .10 thickness head gasket to lower compression for more boost is IMO not a good idea and is false.

I base my judgement on the many build repairs I have read and personal experience.

The .10 thicker gasket has more material, which means that is more prone to blowing out from the added boost. Also I believe there is less surface pressure when torquing the .10 head gasket down.

That is why I choose to use a standard thickness head gasket.
 

cruzer747

Active member
218
145
43
Location
California
after having done a backyard rebuild recently... one thing that helped me a ton was head and deck honing with a piece of plate glass I have (3.4"x12"x36") spray adhesive and sandpaper. It will also allow you to true your framing square up if honed with a guide to help keep it 90' (not falling over so you cut the face square). I was surprised how out of flat things were. Not sure about the 6.2 but the 6.5 replace spec for the head is ~.006" warpage lengthwise and ~.003 widthwise on the head and block. Doesnt take much so having a perfectly true straightedge is a good thing.

I decided to flatten things and bolt em up as they were not that bad but I am glad I took the time at this point to measure twice.
 

2INSANE

Well-known member
722
819
93
Location
Belgrade, Montana
after having done a backyard rebuild recently... one thing that helped me a ton was head and deck honing with a piece of plate glass I have (3.4"x12"x36") spray adhesive and sandpaper. It will also allow you to true your framing square up if honed with a guide to help keep it 90' (not falling over so you cut the face square). I was surprised how out of flat things were. Not sure about the 6.2 but the 6.5 replace spec for the head is ~.006" warpage lengthwise and ~.003 widthwise on the head and block. Doesnt take much so having a perfectly true straightedge is a good thing.

I decided to flatten things and bolt em up as they were not that bad but I am glad I took the time at this point to measure twice.
Cool! Got any pictures?
 

2INSANE

Well-known member
722
819
93
Location
Belgrade, Montana
Going above and beyond most, I probed the inside of the block with a magnet and picked up quite a bit of metal material. Mostly rust chunks.
 

Attachments

Top
AdBlock Detected

We get it, advertisements are annoying!

Sure, ad-blocking software does a great job at blocking ads, but it also blocks useful features of our website like our supporting vendors. Their ads help keep Steel Soldiers going. Please consider disabling your ad blockers for the site. Thanks!

I've Disabled AdBlock
No Thanks