• Steel Soldiers now has a few new forums, read more about it at: New Munitions Forums!

  • Microsoft MSN, Live, Hotmail, Outlook email users may not be receiving emails. We are working to resolve this issue. Please add support@steelsoldiers.com to your trusted contacts.


84 m1009 cucv chevy blazer build-up

Cucvnut

Well-known member
3,802
51
48
Location
Carver, Oregon
Here's the front flex test. You will see better drop and articulation on the front due to no over load and the leafs are closer together. I am very pleased with everything so far. More progress coming soon:)
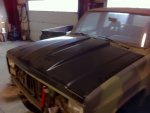
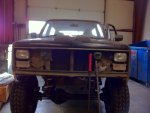
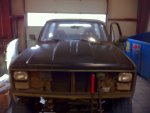
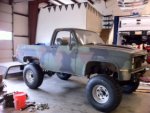
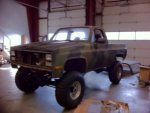
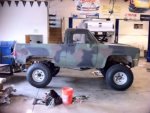
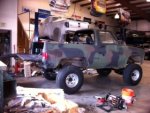
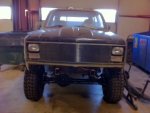
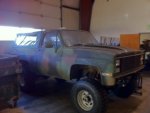
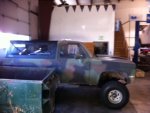
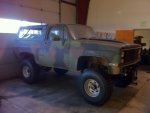
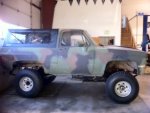
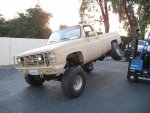
oh yea i canalso flex out my truck also with a forklift!
:beer::mrgreen:
 

Attachments

Last edited:

epartsman

New member
264
0
0
Location
Jacksonville/Florida
Save the flexing for the trail. I forsee body mounts and other repairs in the future for you guys. There will be stress cracks and other things to deal with. Remember these are 27 yr old trucks.
Looks AWESOME!
 

tequilaiam

Member
157
0
16
Location
Brazil, IN
Did you use the stock mounting brackets for that rear bumper or did they have tube steel welded on the back side for mounting?

I'm interested in something like that to mount a rear tire carrier but don't know if the factory brackets would hold it...especially when swinging it out.
 

2INSANE

Well-known member
722
819
93
Location
Belgrade, Montana
Did you use the stock mounting brackets for that rear bumper or did they have tube steel welded on the back side for mounting?

I'm interested in something like that to mount a rear tire carrier but don't know if the factory brackets would hold it...especially when swinging it out.
No. The shop cut the frame in the rear so it's flush. Then drilled new holes in the frame to mount the bumper. Right now the bumper is off until I get the wiring and fuel cell figured out. I don't know of any website or shop that makes the tire carrier bumper for the blazer. They are all out of business, to my understanding. Best to buy a Diy4x.com or offroaddesign.com bumper and have a local shop add a tire carrier for you.
 

tequilaiam

Member
157
0
16
Location
Brazil, IN
One of those 4x4 sites had spindles to build your own. I was going to start with a 2x4 piece of steel tube and get some mileage out of my torch. I'm running through my head what other "stuff" needs addressed.

I'll likely wait until spring to drop the tank, patch holes in the bed and do some custom bumper/tire carrier thing while I'm at it.
 

2INSANE

Well-known member
722
819
93
Location
Belgrade, Montana
One of those 4x4 sites had spindles to build your own. I was going to start with a 2x4 piece of steel tube and get some mileage out of my torch. I'm running through my head what other "stuff" needs addressed.

I'll likely wait until spring to drop the tank, patch holes in the bed and do some custom bumper/tire carrier thing while I'm at it.
It shouldn't be too hard for ya. Dropping the tank is easy! Took me only 10 mins to drop the tank. A good sharp knife will help you make it faster. Don't worry about taking the rubber hoses off the hard way. Remember your rig is old and it's smart to get new rubber fuel lines for the tank so don't worry about cutting the old ones for a quick drop. My old 83 gmc truck had old fuel lines and air was getting in them making the truck sputter sometimes...
 

2INSANE

Well-known member
722
819
93
Location
Belgrade, Montana
So a few issues... That super cool rear bumper from blazinoffroad fits great but... It's about 1/2 inch on both sides too inward from letting the tailgate go down. It will have to be modified...
I'm still contemplating on how I'm going to modify the fuel tank/tool box...
Also thinking what would work best for a good strong e brake... Either a valve system locking pressure on all 4 brakes or a drive shaft e brake. I'm leaning toward the valve system because it's a lot cheaper and it locks all 4 tires.
The only issue with the valve system e brake set up is that over about 5-9 hours it looses pressure. But it's more effective then the drive shaft e brake. Just means I can't park it on a hill for hours at a time with the valves set.
 
Last edited:

2INSANE

Well-known member
722
819
93
Location
Belgrade, Montana
I got home and installed a few things. This hood I ordered from LMCtruck.com. I wanted it for better ventilation to keep the motor cooler during hot summer desert trips. The install was simple. Simply swapped over hardware from old hood to new hood. I'll paint it later.
 

Attachments

2INSANE

Well-known member
722
819
93
Location
Belgrade, Montana
At the end of the day I had the shop guys help me with the soft top. It was a good quick install after I had to run to Ace hardware and get some better mounting bolts. 12x grade 8. She looking good! The light from the windows kinda messed up the pic quality. Ill get some better pics later.
 

Attachments

2INSANE

Well-known member
722
819
93
Location
Belgrade, Montana
So far she is sitting high in the front. But I figure adjustments will be made after the front bumper, winch and rear bumper is installed with fuel in the tank.
 

2INSANE

Well-known member
722
819
93
Location
Belgrade, Montana
nice job! I am doing soft top this summer for sure!
Thanks man! Just a FYI. After installing the soft top I noticed that a lot of air, water, etc will be coming inside the cab threw the top portion of the roof rear edge. It's the design and seems to me to be used only during the summer months. It would be smart to keep your hard top and stock tailgate on standby for winter.
 
Top
AdBlock Detected

We get it, advertisements are annoying!

Sure, ad-blocking software does a great job at blocking ads, but it also blocks useful features of our website like our supporting vendors. Their ads help keep Steel Soldiers going. Please consider disabling your ad blockers for the site. Thanks!

I've Disabled AdBlock
No Thanks