• Steel Soldiers now has a few new forums, read more about it at: New Munitions Forums!

  • Microsoft MSN, Live, Hotmail, Outlook email users may not be receiving emails. We are working to resolve this issue. Please add support@steelsoldiers.com to your trusted contacts.

Behr Paint Jobs- Show me your MV's

Tow4

Well-known member
Steel Soldiers Supporter
2,096
646
113
Location
Orlando, FL
Waiting a couple days and then force dry kinda defeats the purpose of force drying :razz:
I was thinking of those who don't have enclosure to keep the rain and dew off of uncured paint,super curing using heat would sure be convenient.
I worked for a boat builder and we would wrap the finished product with shrinkwrap and use a lp flamethrower to shrink the wrap without burning it,I've seen these flamethrowers in the roofing dept at lowes, i think I'll try this if someone don't beat me to it!
I don't know, 3 week drying time cut to 2 days sounds like an improvement. Maybe it's just me....:beer:

Option 1: Paint a piece of scrap, heat it up, and report back. Make sure you use the same materials and process as you would use on the truck.

Option 2: Just go for it and paint the truck, heat it up, and report back.
 

Coondawg

New member
36
1
0
Location
Florida Panhandle
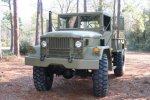
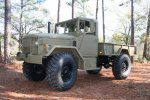
I just painted mine with BEHR using the formula below from a thread over in the paint and bodywork section. I sprayed it with an airless sprayer and added a little Flotrol, but the tip on my gun ended up putting a faint line in the pattern. I ended up back rolling it with a fine nap roller. It gave it a real similar texture to the original CARC paint in the cab. I'm real happy with the results. It's been a wet week here in the south this week, so curing time was slowed. I've had it out in the sun and dry air the last two days and it's hardened up nicely.

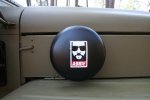
I'm a Big Lebowski fan, so I couldn't resist giving the air intake cap the Lebowski treatment.

Coon


Here is Eric/CBVET formula for Olive Drab - 987A - Federal Std# 34087


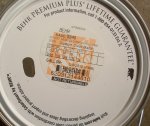
Home Depot - Base = BEHR Premium Plus EXT Flat(PPESF) Deep Base (4300)

Colorant........... OZ... 48... 96
B-Lamp Black..... 3...... 9.... 0
C-Yellow Oxide... 6.... 30... 1
KX-White............ 1.... 16....1
V -Magenta......... 0.... 40... 0
 

Attachments

Coondawg

New member
36
1
0
Location
Florida Panhandle
It took 3 gallons to paint what you see, plus inside the doors, and jambs. It would take another gallon to paint inside the bed. I haven't done that yet because I haven't decided how I want to do it. I put two medium coats on. I put one on first thing in the morning, and the second one on late in the afternoon. With Acrylic Latex, you want the first coat good and dry before you attempt a second coat, especially on smooth or fairly smooth surfaces. If you don't, the second coat can soften and peel the first coat. I would avoid one heavy coat. It's real easy to get sags because the curing process is so long.
 

indy4x4fab

Banned
1,711
41
0
Location
indy, indiana
We will be painting the wife's Ramcharger with it here in the next couple weeks desert tan. It will be a cucv look alike, with black chevron and all.
 

seabeeut

Member
154
1
18
Location
Conn
Ok here is my take. I brought some 24087 spray cans from army jeep parts then painted some samples .I then took a sample to home depot to match.
The test on the truck was right over the old paint no real prep except cleaning I wanted to see how it went I used a brush to see if the paint leveled like I have heard .
24 hours later I put the piece back on the truck I like the color and brought the HD HVLP wagner gun this morning when the weather warms a little Iam going to paint the troop seats and bed and bows for another test.
 

Attachments

MWMULES

Well-known member
Steel Soldiers Supporter
In Memorial
5,580
349
83
Location
DESOTO, KANSAS
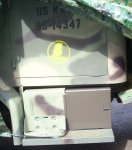
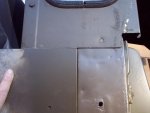
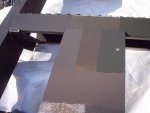
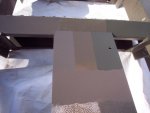
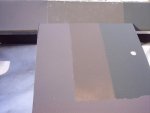
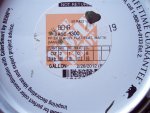
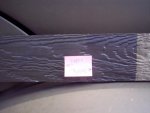
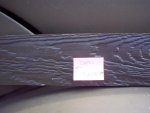
Hunt for 24087 continues. Ok I am getting ready to repaint a XM818 and M146 trailer back to 60's color for a Nam tribute truck. I had some Gillespie rattle cans I pick up last year from Rapco, sprayed some for a sample went to HD got some made, came home and it was off, too brown. So looked around found Gunfreak25 post on his mixture (Aervoe copy flat)contacted him to make sure it was correct. Was getting ready for a trip back to HD when I saw seabeeut post on his mix(gillespie copy semi gloss), his #'s were closer to the ones I had so got both of their colors in Behr 5340 semi gloss made for a paint off. It has only been on 10 hours so will check tomorrow to see if there are any change. 1st picture is what I had made next to Gillespe plate. The rest of photos show the test plate with from L to R seabeeut, Gill, Gunfreak25 and with mine on the bottom and the rung of a ladder same order,but middle is original 24087. So far I would say seabeeut is the closest.
 

Attachments

Last edited:

MWMULES

Well-known member
Steel Soldiers Supporter
In Memorial
5,580
349
83
Location
DESOTO, KANSAS
new Behr #'s for 383 green

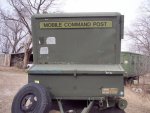
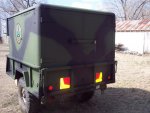
I decided to keep this former USAF M101A2 to keep my temper tent in. First added a jack landing leg, flipped rear lights and added a tailgate off another trailer that had delcinlator decals. It need paint so down to HD for some Behr carc 383. No power at the barn so ran a Wagner airless with a deep cycle battery and 200 watt inverter. First pic are the before. Just noticed I left a Pringles lid in the reflector.
Also Behr changed the names of their clrnt!!! If your HD has a old good paint guy he will know what to change them to, if not here is my new mix for 383 green carc. RAYZER's is the 2nd one
 

Attachments

Last edited:

MWMULES

Well-known member
Steel Soldiers Supporter
In Memorial
5,580
349
83
Location
DESOTO, KANSAS
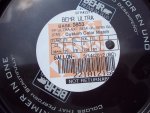
24087 code for Behr Got it right after too many trips back and forth to HD I think I finally got the Behr 24087. The left half was sprayed with Rapco/Gillespie 24087 3 days ago, Right was rolled on with Behr Ultra exterior semigloss about 2 hours ago.[FONT=arial, helvetica]
[/FONT]
 

Attachments

tennmogger

Well-known member
Steel Soldiers Supporter
1,579
543
113
Location
Greenback, TN
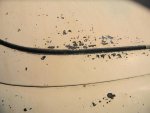
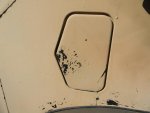
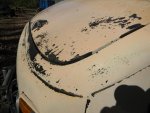
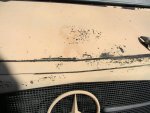
This paint job is 12 years old. Used Desert Sand color from Home Depot. It weathered sort of pink and didn't hold up well. But, that was 12 years ago, and someone asked about long term testing.

Surface was sand blasted, primed with POR-15, cured, sanded, washed with degreaser, topcoated with Home Depot paint (probably Behr back then too??) using standard gun.

Note that POR-15 can be difficult to paint over. However, another truck painted over POR-15 at about the same time and using a two part automotive paint, still looks new.

YMMV.
 

Attachments

plym49

Well-known member
1,164
171
63
Location
TX USA
This paint job is 12 years old. Used Desert Sand color from Home Depot. It weathered sort of pink and didn't hold up well. But, that was 12 years ago, and someone asked about long term testing.

Surface was sand blasted, primed with POR-15, cured, sanded, washed with degreaser, topcoated with Home Depot paint (probably Behr back then too??) using standard gun.

Note that POR-15 can be difficult to paint over. However, another truck painted over POR-15 at about the same time and using a two part automotive paint, still looks new.

YMMV.
Perhaps the problem was the type of vehicle. You might not be able to keep the pink from breaking through.
 

diverman555

In Memorial
In Memorial
463
9
0
Location
Detroit, michigan
I have read all of this and never even holding a paint sprayer before, I'm overwhelmed. Some questions please. I have a M923A1 I would like to paint it with a Marine paint scheme. Where do I find patterns to go by. I see everyone keeps talking about 24087 is that a single color and then how do I find the other colors and codes. I want to paint the bottom of the bed and wheel wells with herculiner, then the rest of the truck in full Marine design.
I also have a friend from racing who is around the Charlotte area and does sand blasting. I had my chassis blasted and he does a great job. If interested let me know. All help on the paint will be helpful. Just explain like I know nothing, because I don't. Thank you Mark
 

diverman555

In Memorial
In Memorial
463
9
0
Location
Detroit, michigan
need info bad

I have read all of this and never even holding a paint sprayer before, I'm overwhelmed. Some questions please. I have a M923A1 I would like to paint it with a Marine paint scheme. Where do I find patterns to go by. I see everyone keeps talking about 24087 is that a single color and then how do I find the other colors and codes. I want to paint the bottom of the bed and wheel wells with herculiner, then the rest of the truck in full Marine design.
I also have a friend from racing who is around the Charlotte area and does sand blasting. I had my chassis blasted and he does a great job. If interested let me know. All help on the paint will be helpful. Just explain like I know nothing, because I don't. Thank you Mark
 

Scrounge41

Member
167
1
16
Location
St. Augustine, Fl
For Diverman-The 24087 is a single color. It is the Korean War/Vietnam era semi-gloss olive drab and was used as a solid color vs. a camo pattern. The colors used on the MV's differ depending on what era you want to depict on your truck. Since you said you wanted a "pattern" I assume you want a camo pattern. You should be able to find your truck in the TM-

http://www.steelsoldiers.com/upload/M35/TB43-0209.pdf

This manual has all the trucks and equipment colors in Paint-by-number line drawings. I just painted my M109A3 and it was pretty simple. I used phosphoric acid to neutralize the rusted areas on the truck, scraped/sanded and then painted the rusted areas and all the seams with Rusteoleum rusty metal primer. I let the primer cure for 2 weeks and then painted it green. I made copies of the drawings in the manual and shaded them in to represent the actual colors rather than looking for all the #3's etc. Looking at the copies I used a sharpie to draw the camo pattern for the black and brown, on the truck and used the paint sprayer to paint just over the sharpie lines with the black paint. I did the brown last because it is a minor component of the scheme. The camo pattern is like the easiest paint job you will ever do, because if you mess up, you can come back from the other direction with the other color, instead of having to shoot a whole panel and get it to blend. As far as using a paint gun, there are typically 2 adjustments to make on a conventional gun-air and material. The air you use to adjust the "fan" or spray pattern (by regulating the air pressure) and the material you use to adjust the amount of material in the mix. If you are using a conventional gun, you need to make sure that the air compressor you are using will supply enough air so that you don't have to wait for the compressor to build up pressure while you are spraying (that would give you an inconsistent spray pattern). Something else you will have to play with is the paint viscosity. Typically you will have to thin paint to use in a conventional gun. Try not to exceed the paint mfg. recommendations. If you are getting big splatters, you probably need to up the air pressure or thin the paint. If you are getting runs, you are either moving too slow (putting it on too thick) or you have thinned your paint too much. Once you have your gun loaded with paint, look down at the spray pattern from above and from the side while you give the trigger a short burst to get an idea of the fan your gun is creating. You'll want to overlap your passes probably by 1/3 to get and even layer. Practice on some scrap material. several thin layers are better than thick ones. There is more, but those are the basics. Good luck.
 

yolner

Active member
393
68
28
Location
Rockville, MD
This paint job is 12 years old. Used Desert Sand color from Home Depot. It weathered sort of pink and didn't hold up well. But, that was 12 years ago, and someone asked about long term testing.

Surface was sand blasted, primed with POR-15, cured, sanded, washed with degreaser, topcoated with Home Depot paint (probably Behr back then too??) using standard gun.

Note that POR-15 can be difficult to paint over. However, another truck painted over POR-15 at about the same time and using a two part automotive paint, still looks new.

YMMV.
I believe POR-15 requires that you topcoat while the POR is still tacky. Maybe that's your problem.
 

tennmogger

Well-known member
Steel Soldiers Supporter
1,579
543
113
Location
Greenback, TN
I believe POR-15 requires that you topcoat while the POR is still tacky. Maybe that's your problem.
Probably would have worked better. The other method to paint POR-15 is to sand it after it is cured, then paint over it, which is the way I did it. Ditto on the other truck (another Unimog, a 406) and that paint over POR-15 worked great.

Thanks,
 
Top